Creating Manual BOLA Attack Scenarios
Navigate to URL
Open your browser and visit: https://<your-tenant>.apisecapps.com
Visit the application.
-
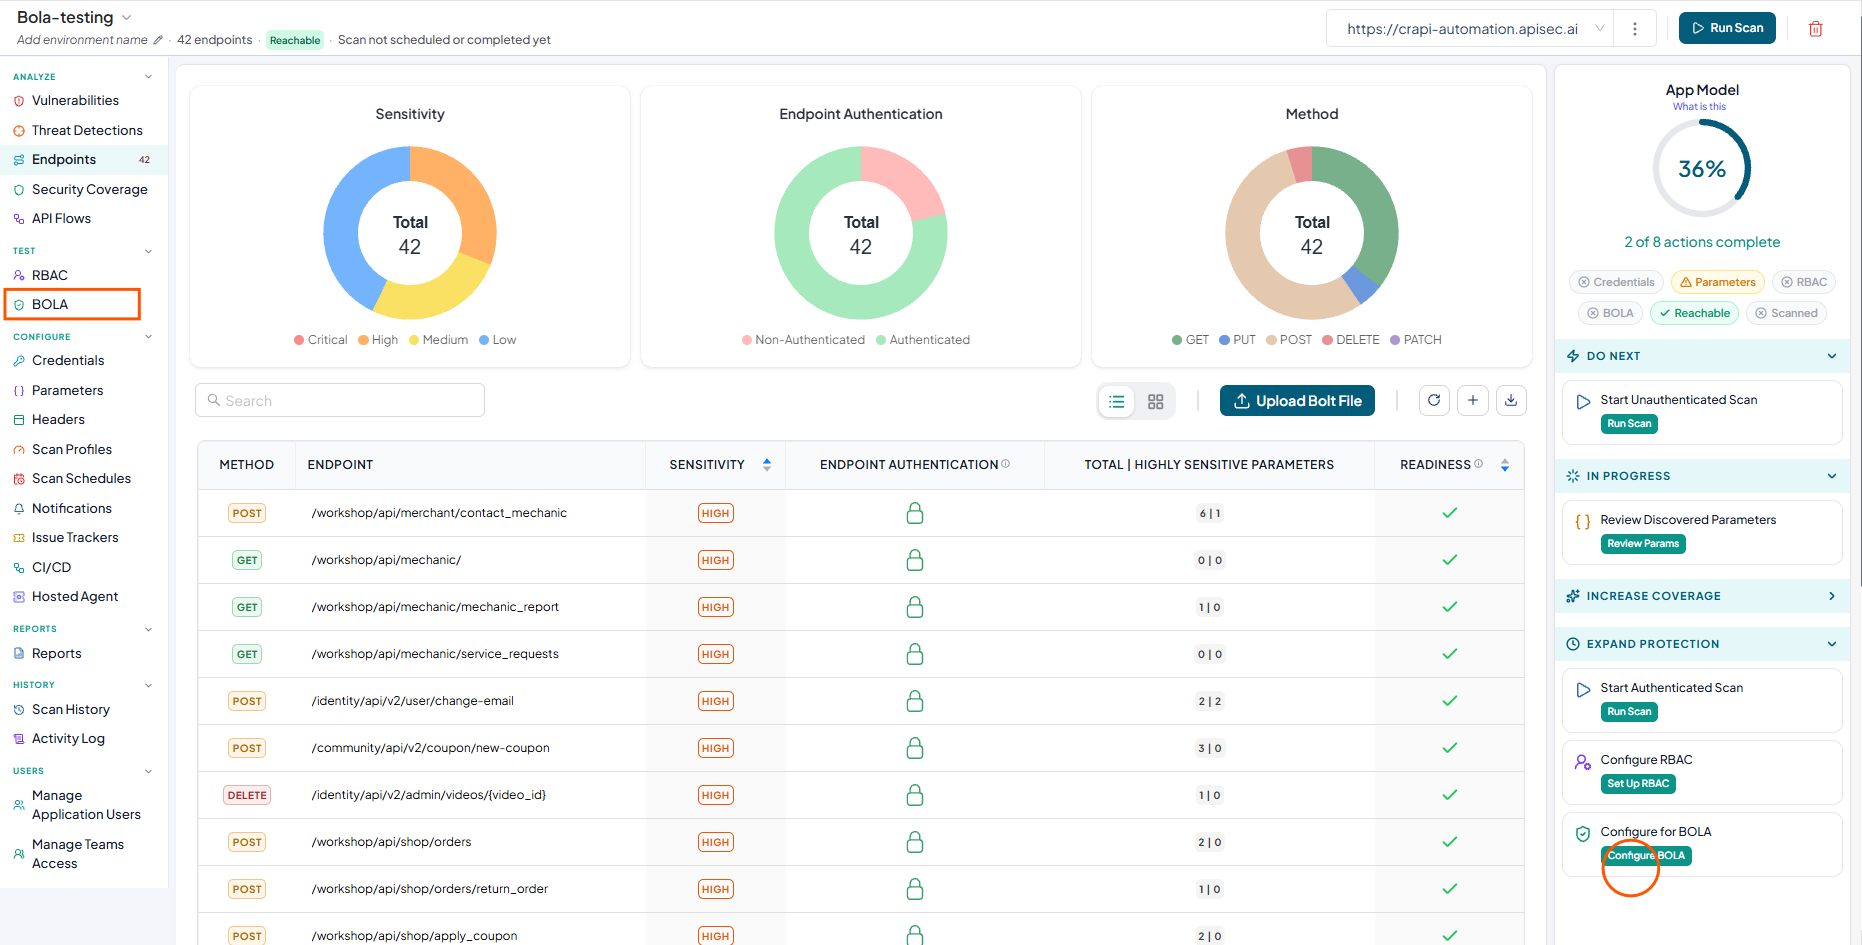
Create a new application or open an existing application
-
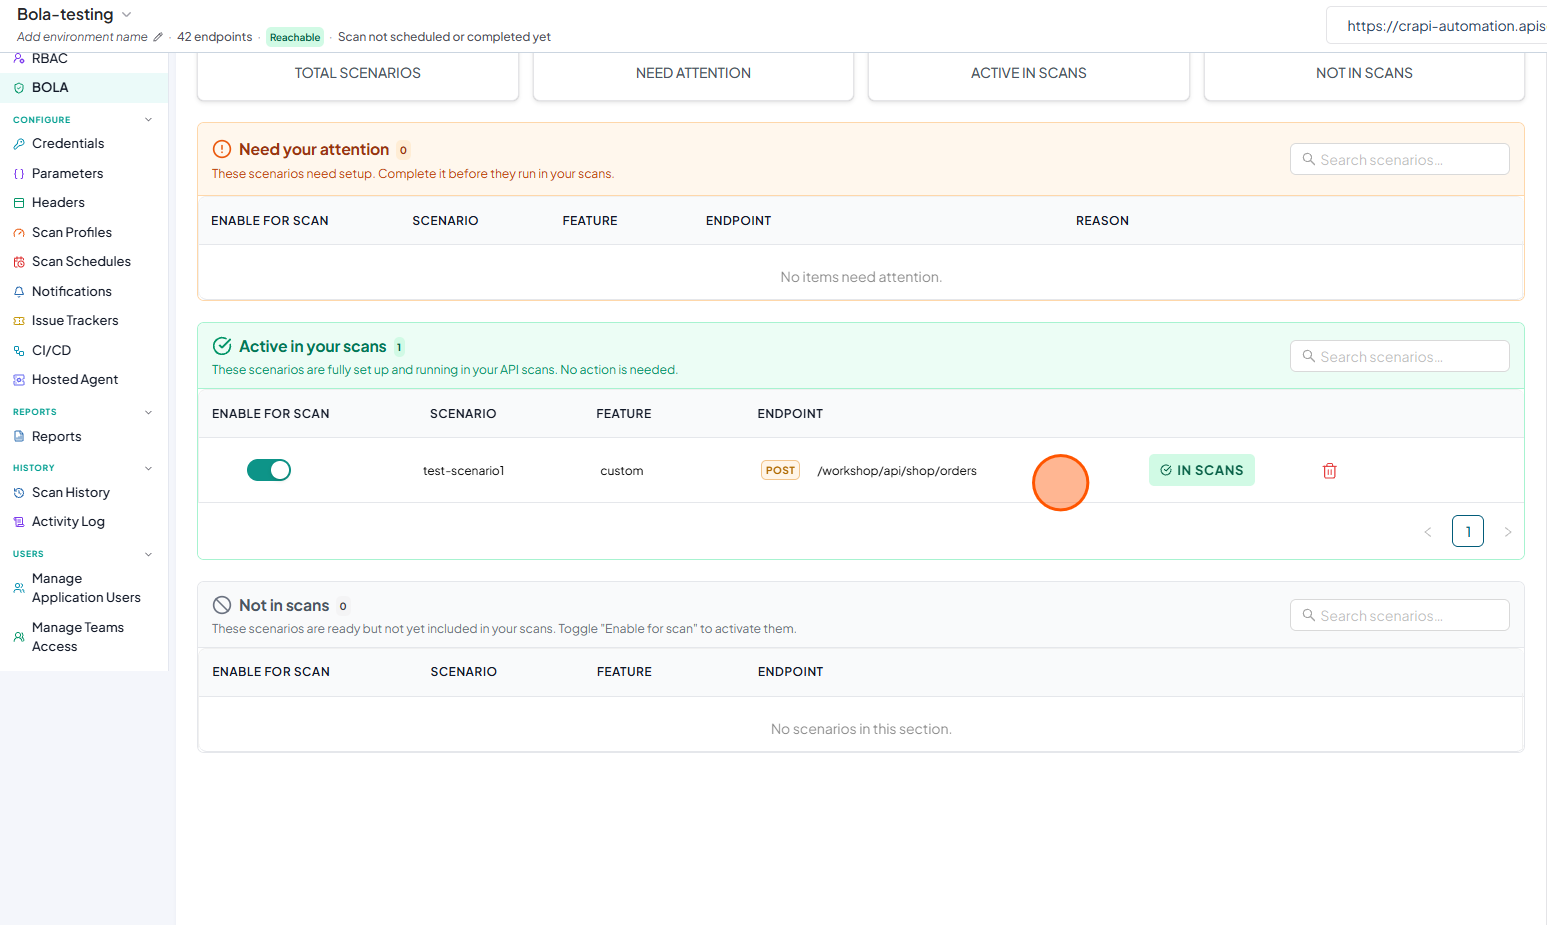
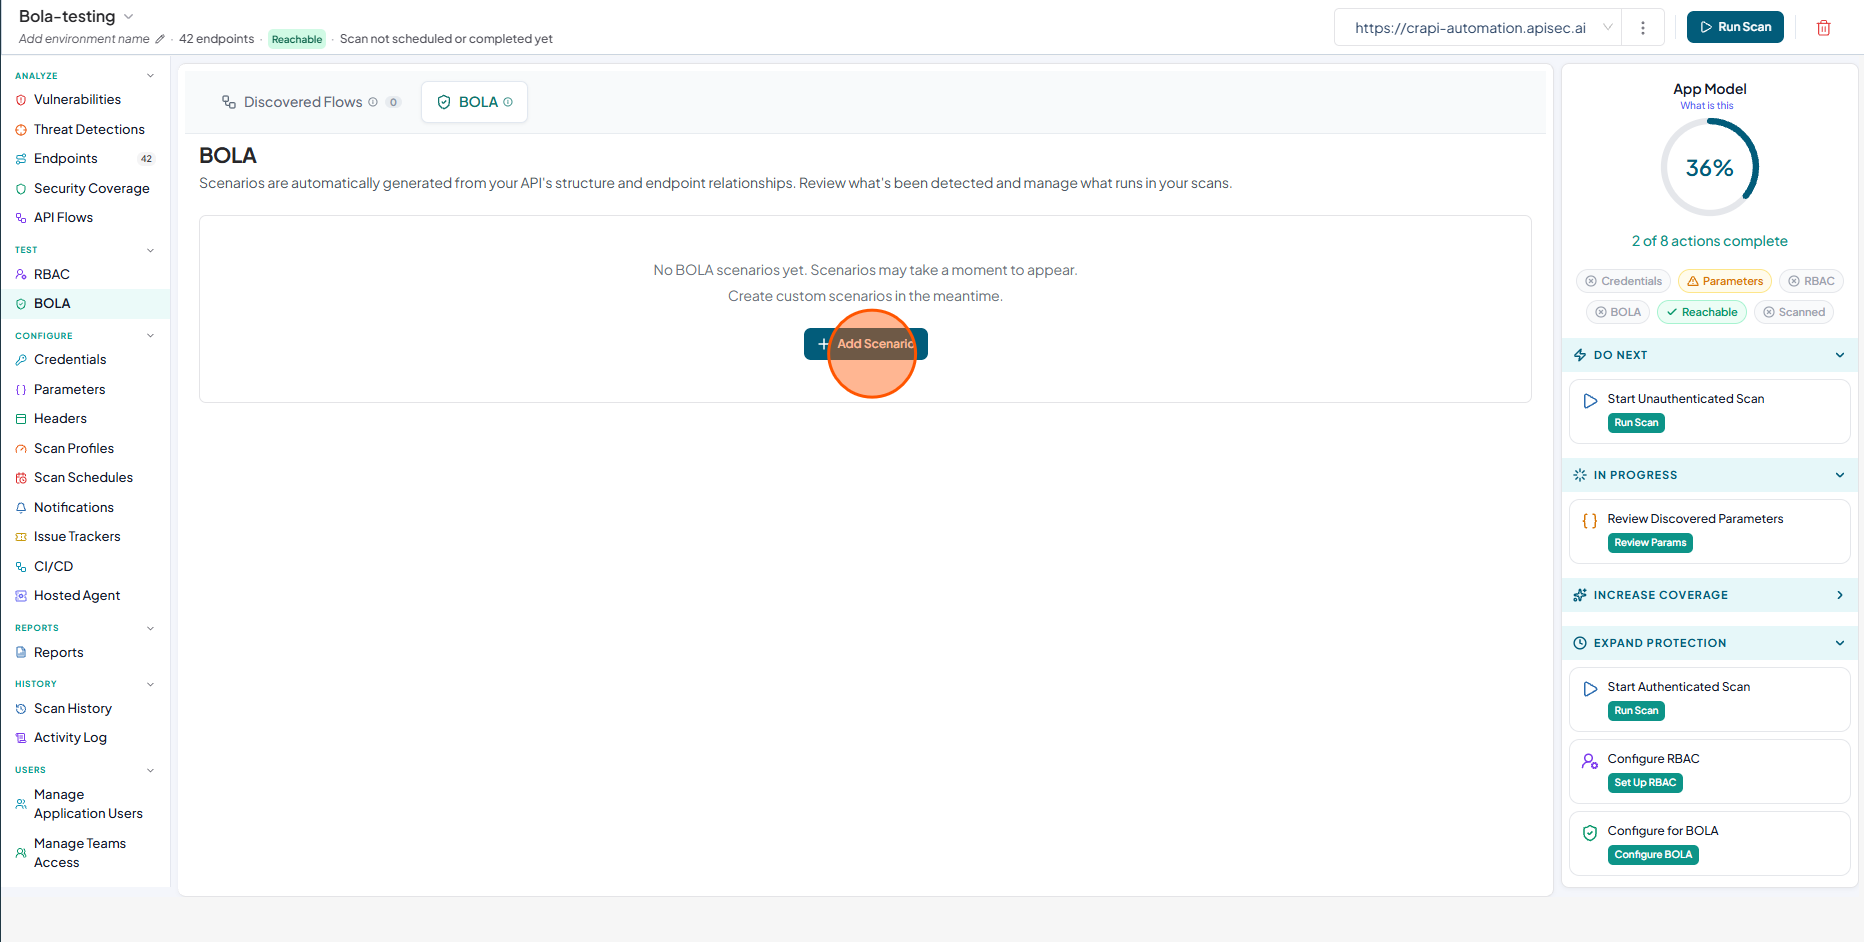
click Configure BOLA in the App Model or select BOLA from the sidebar.
-
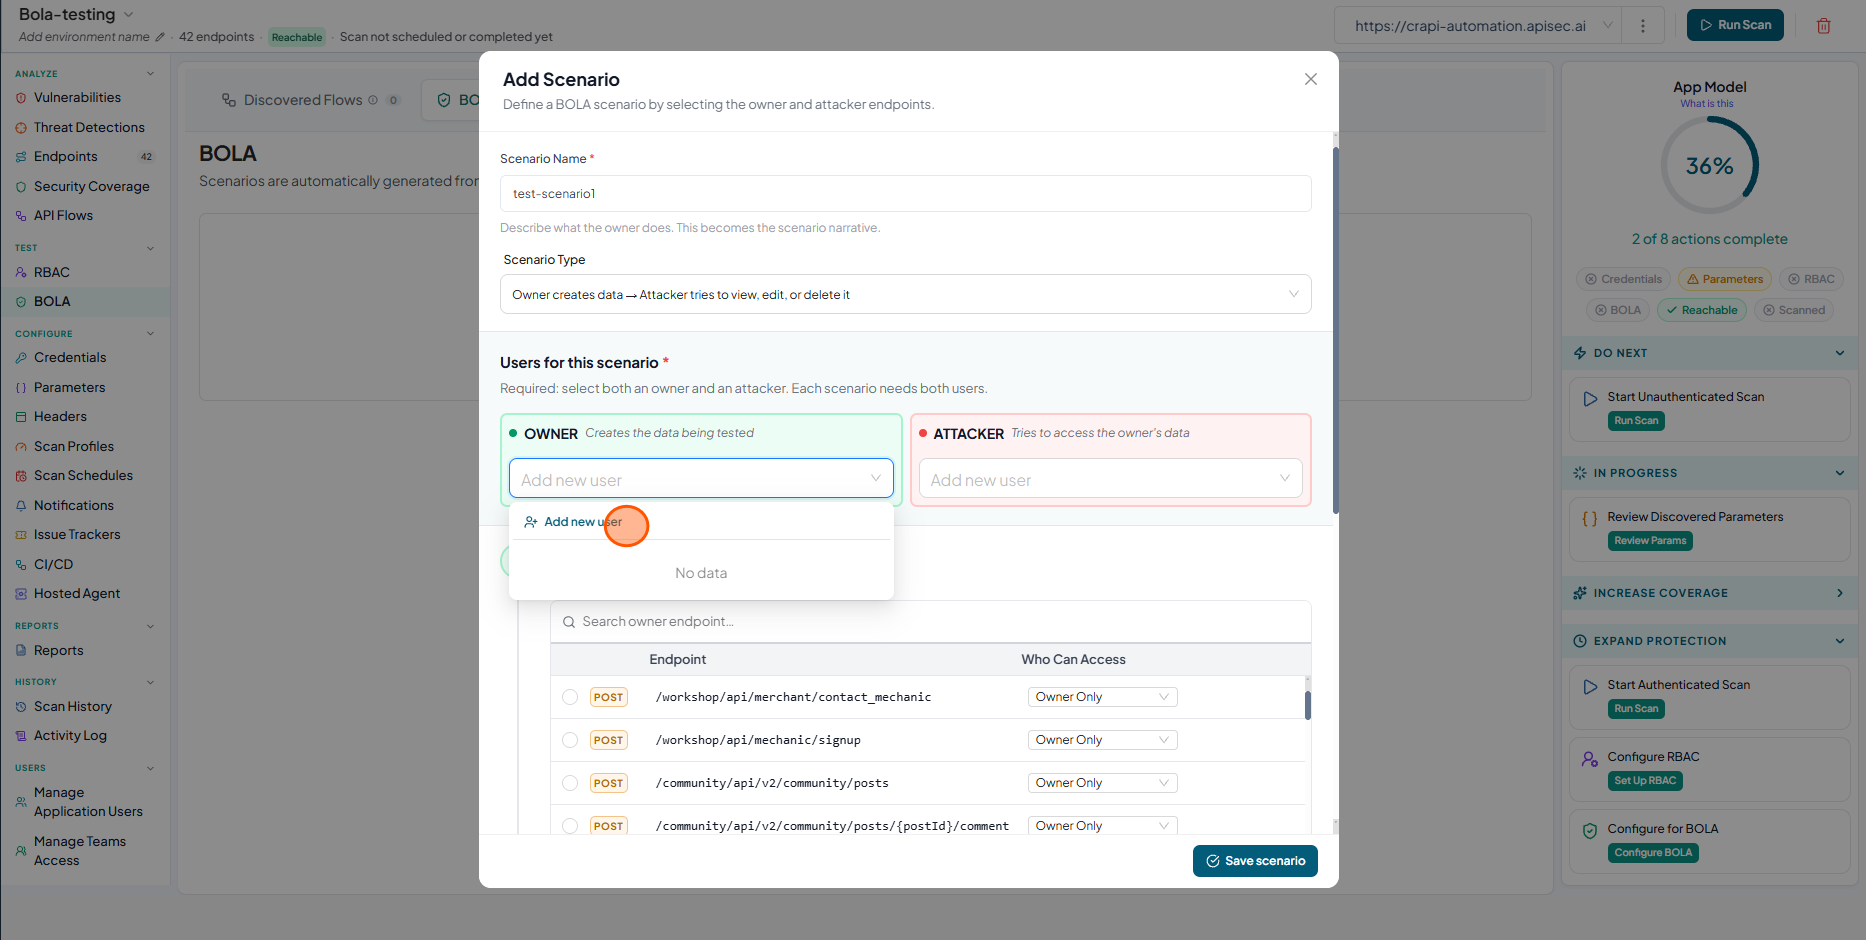
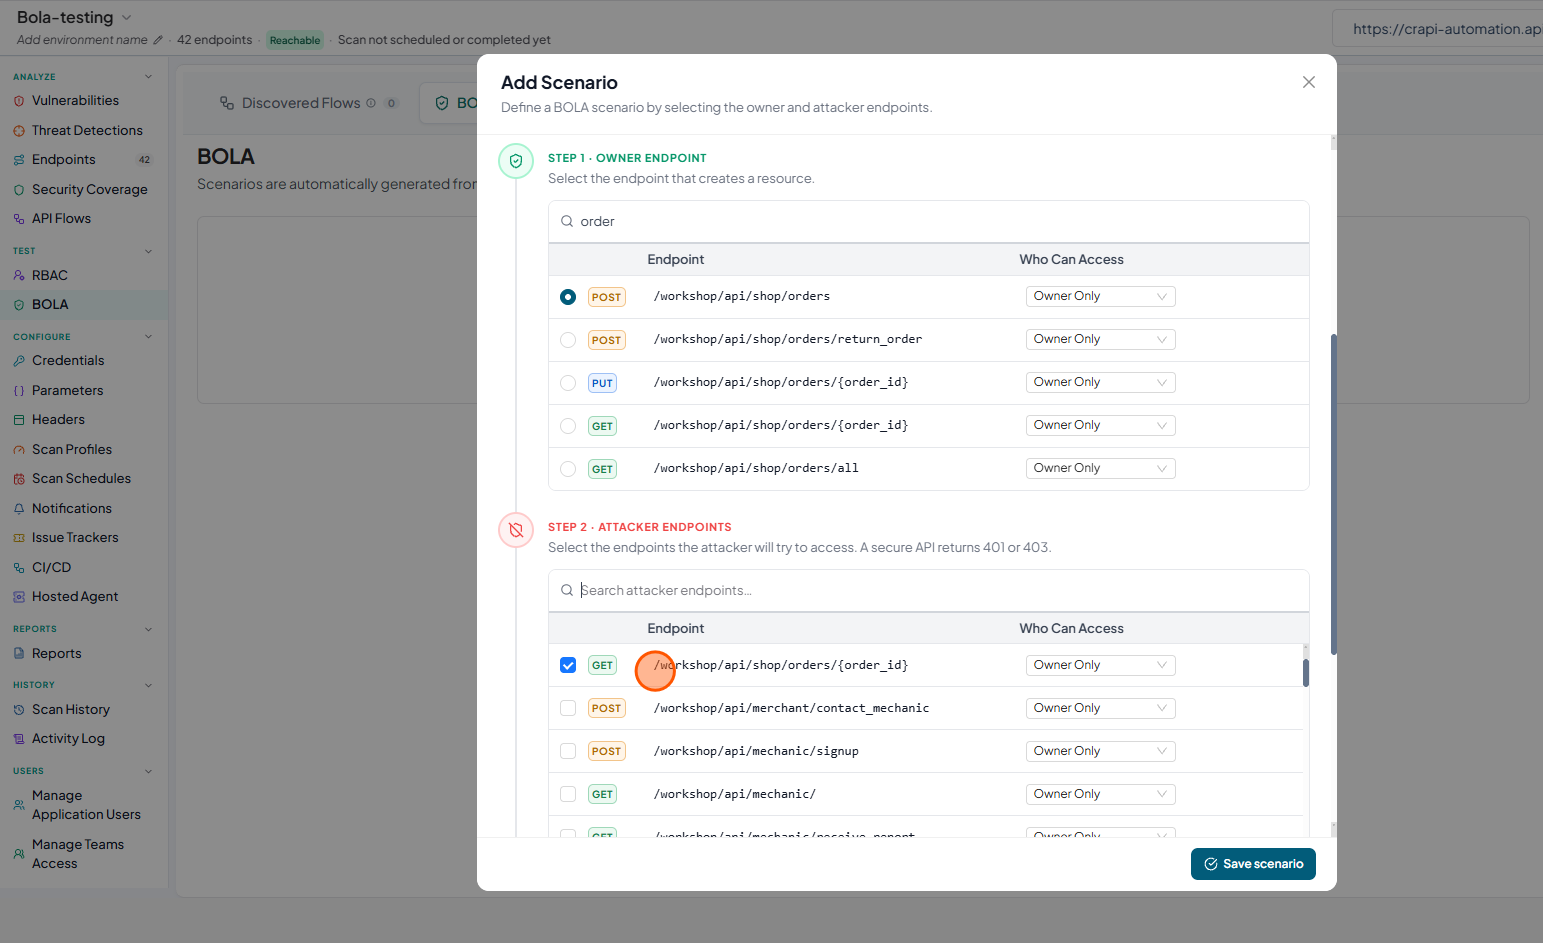
Click Add Scenario
-
In the BOLA configuration window, define a scenario by selecting or adding the Owner and Attacker users, then choosing the corresponding Owner and Attacker endpoints.
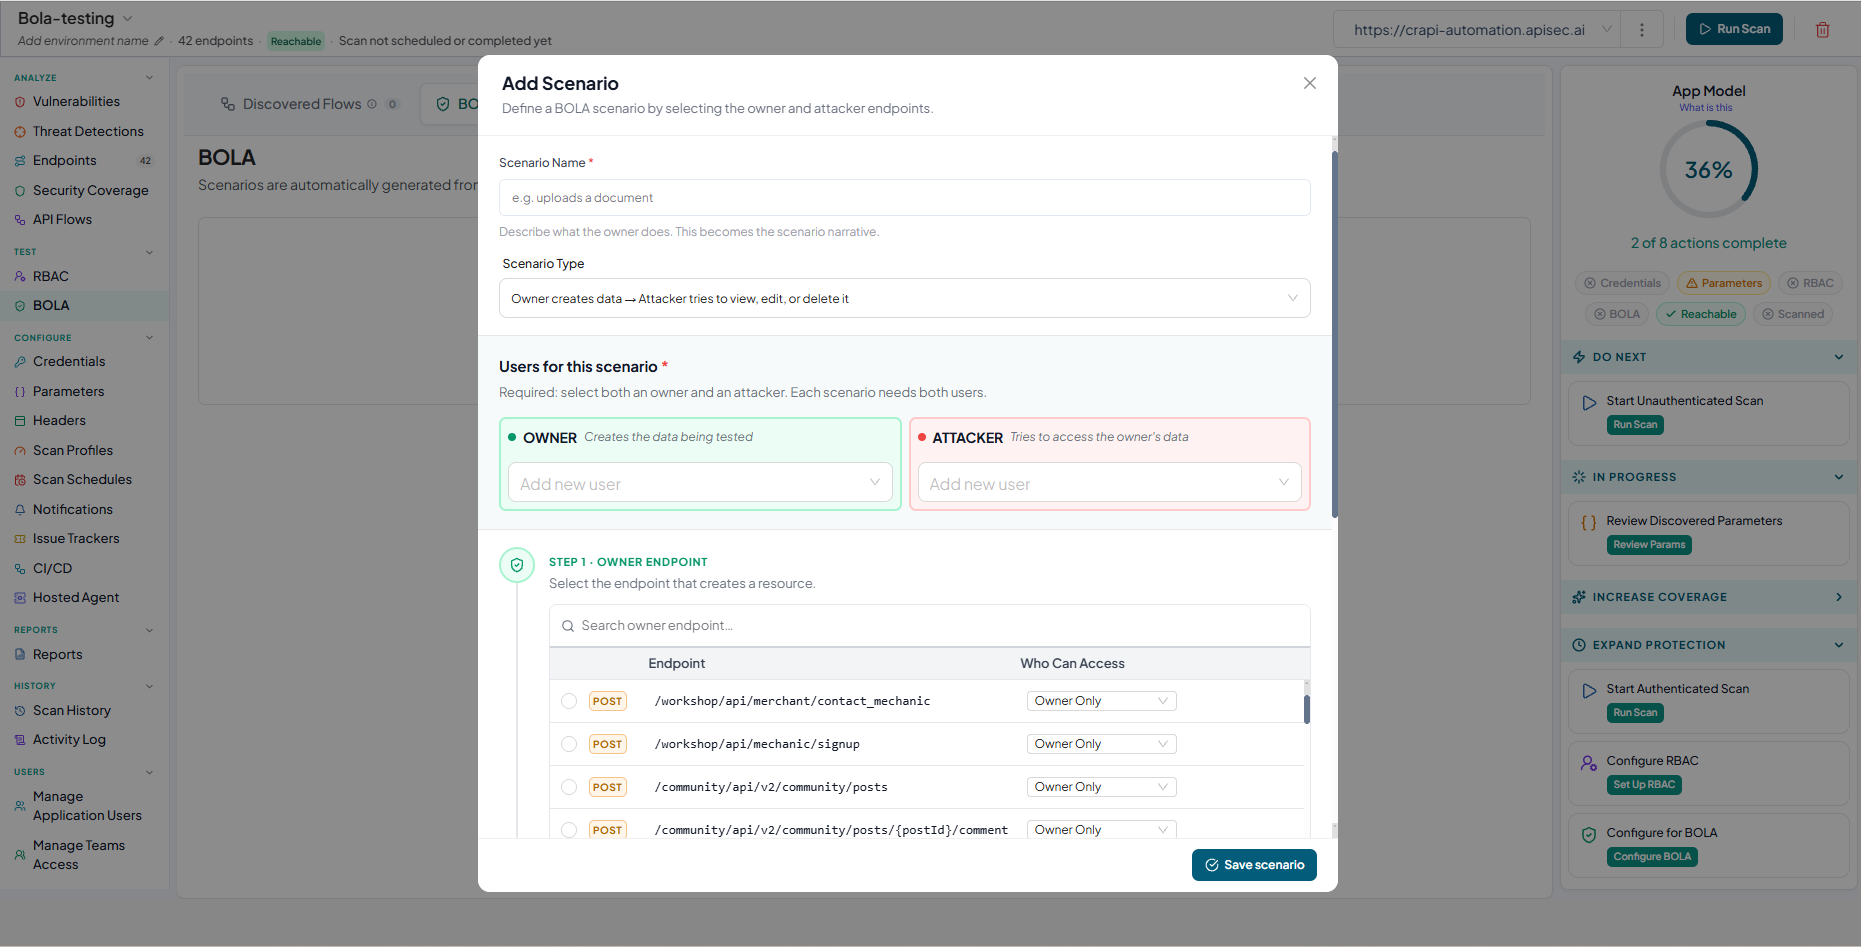
- Enter a Scenario Name
- Select a Scenario Type to define the interaction between the Owner and Attacker, such as:
- Owner creates data → Attacker tries to access it
- Data restricted to owner → Attacker tries to access it
- Select/add both Owner and Attacker users
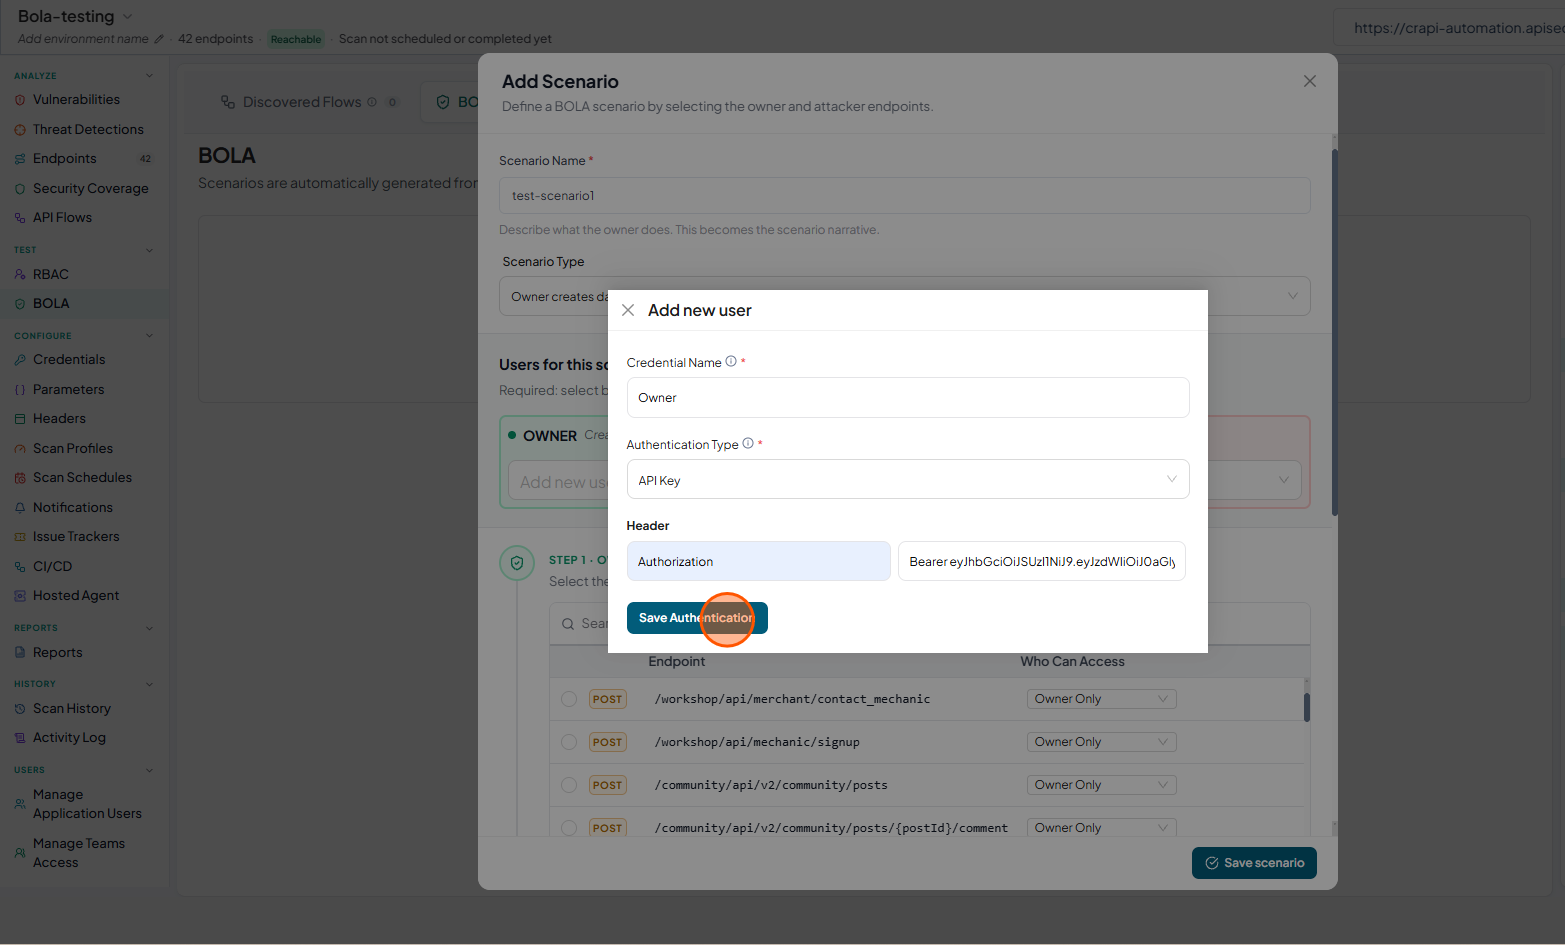
- Adding Owner:
- In the Owner section, click the Add new user dropdown and select Add new user
- Fill the details and Click "Save Authentication"
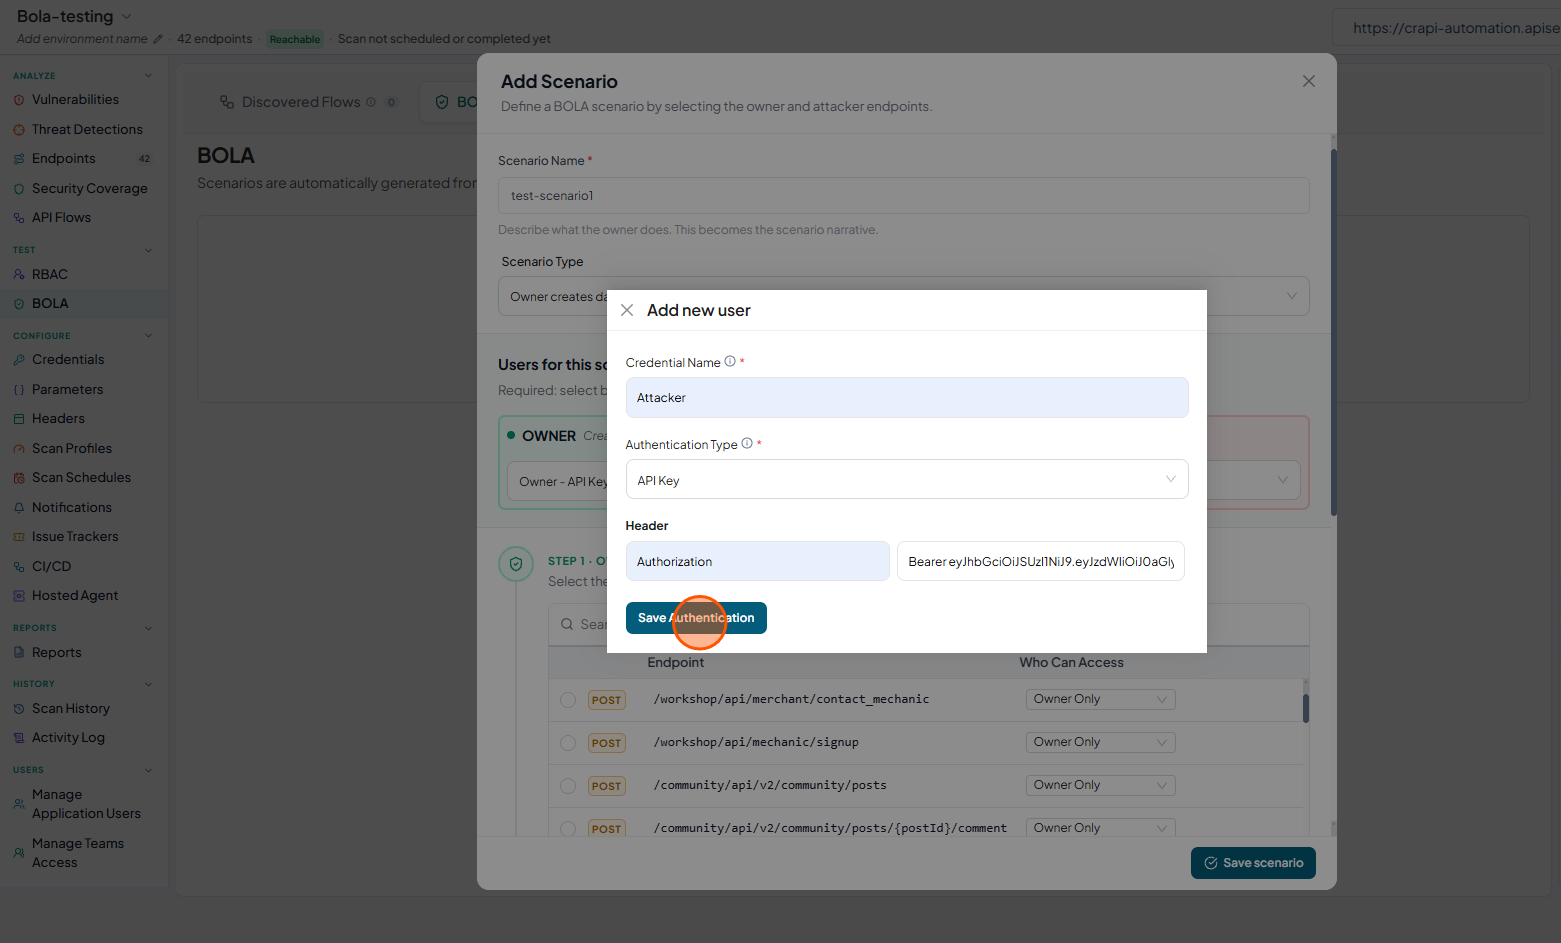
- Adding Attacker:
- In the Attacker section, click the Add new user dropdown and select Add new user

- Fill the details and Click "Save Authentication"
- In the Attacker section, click the Add new user dropdown and select Add new user
- In the Owner section, click the Add new user dropdown and select Add new user
- In Step 1 · Owner Endpoint, select the endpoint that creates the resource
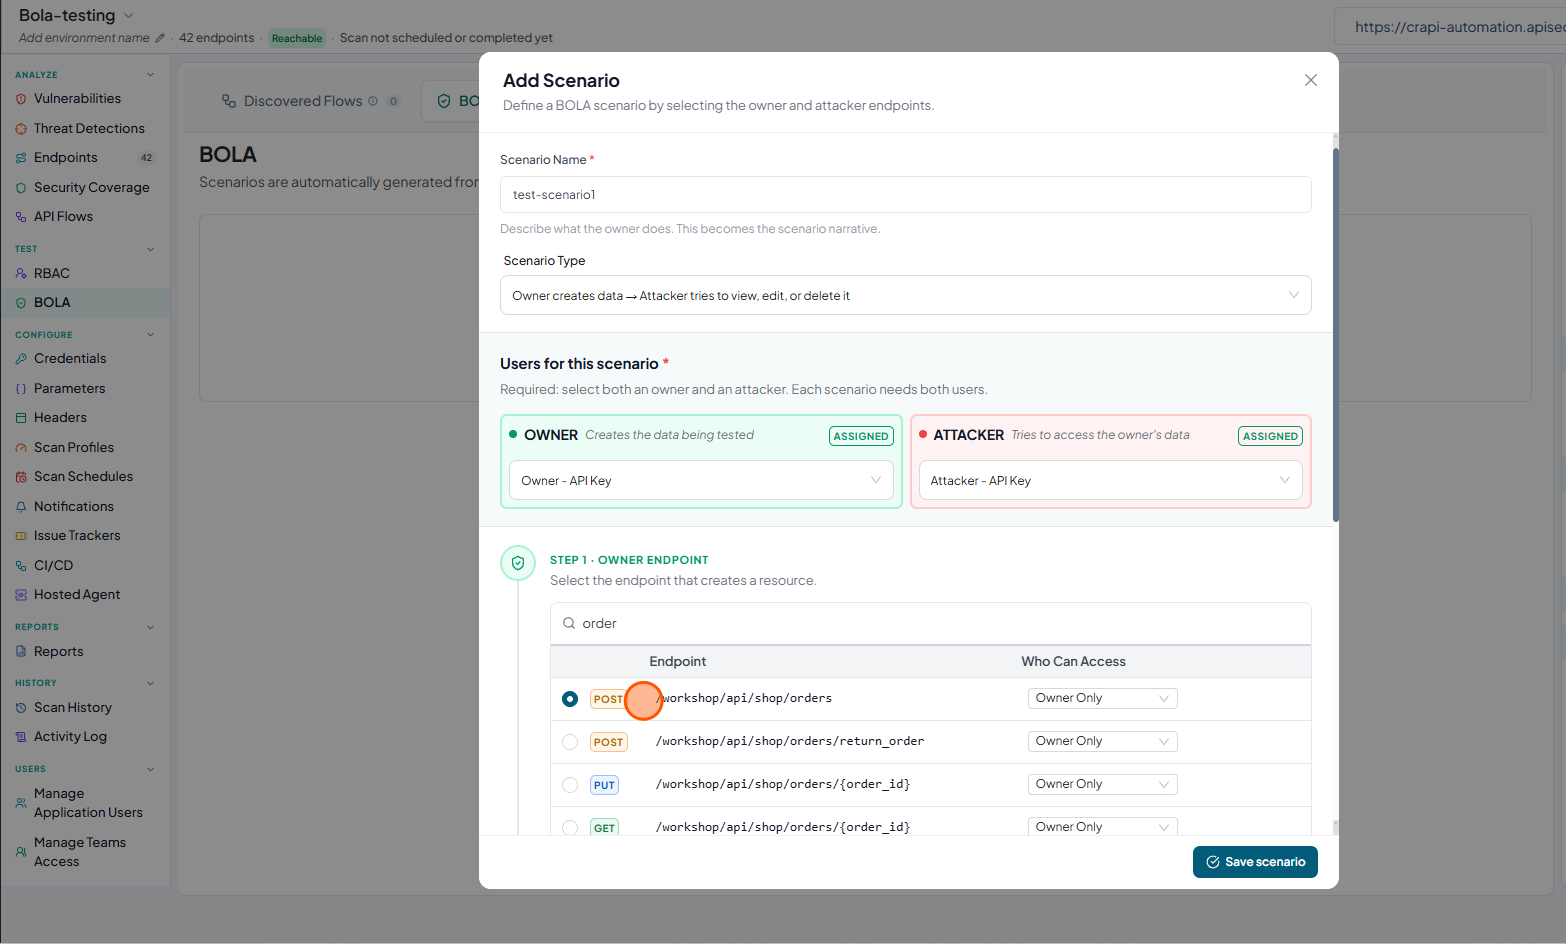
- In Step 2 · Attacker Endpoints, select one or more endpoints that the attacker will use to perform an attack by attempting unauthorized actions on the Owner’s resource
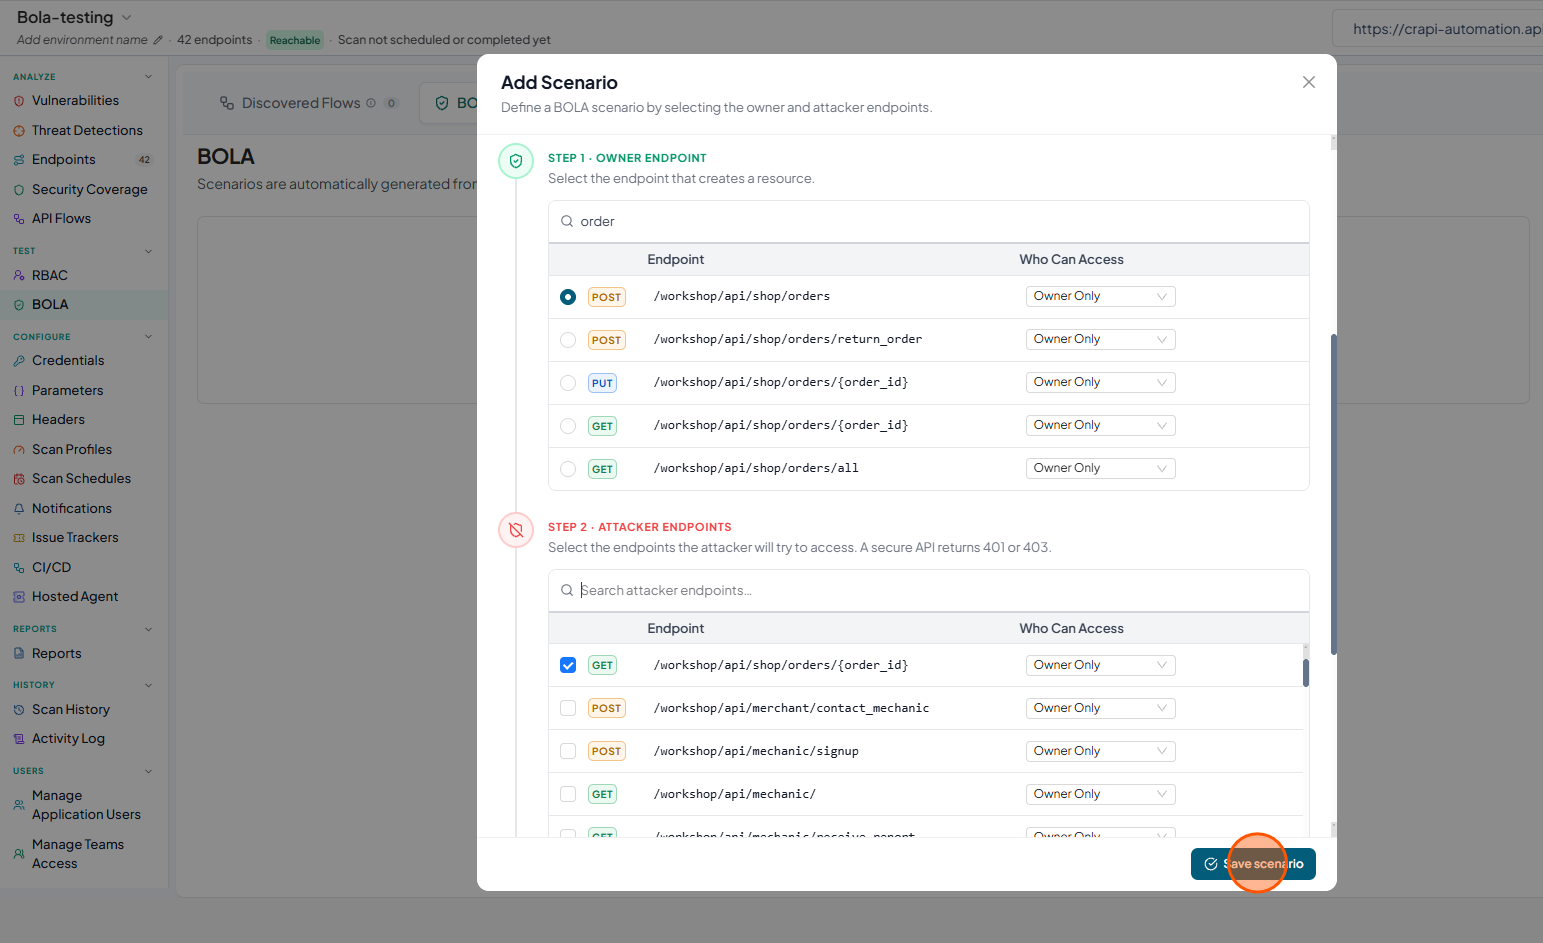
- Click Save scenario
-
Once the scenario is properly configured, it appears in the Active in your scans section, indicating that it is validated, enabled, and actively running in your security tests.