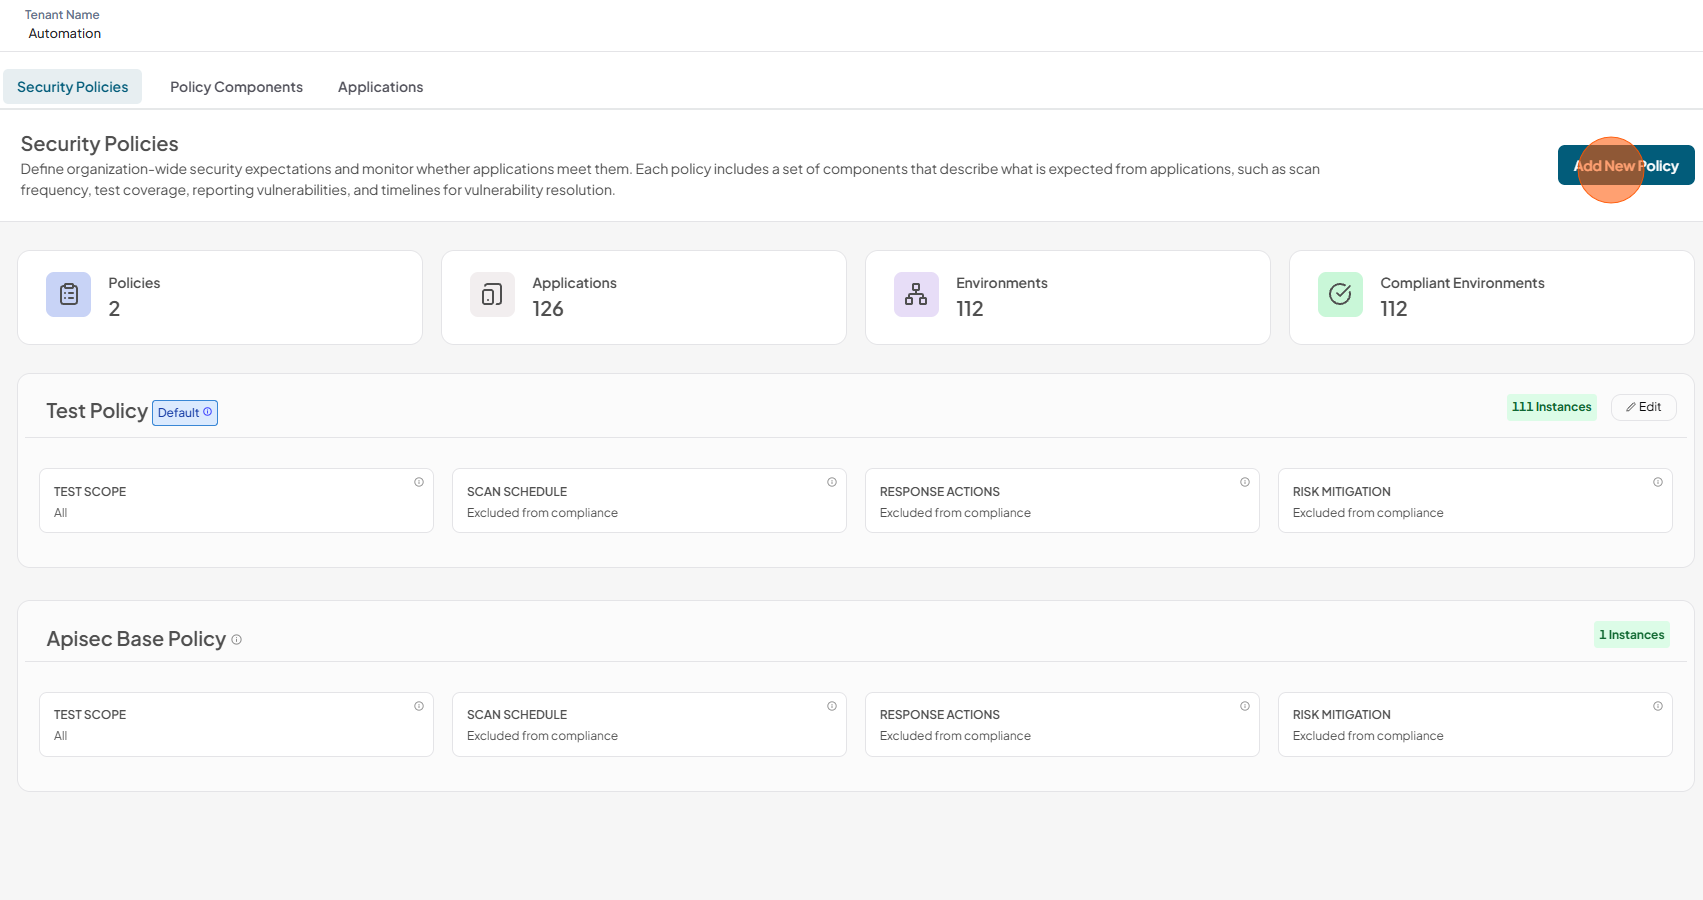
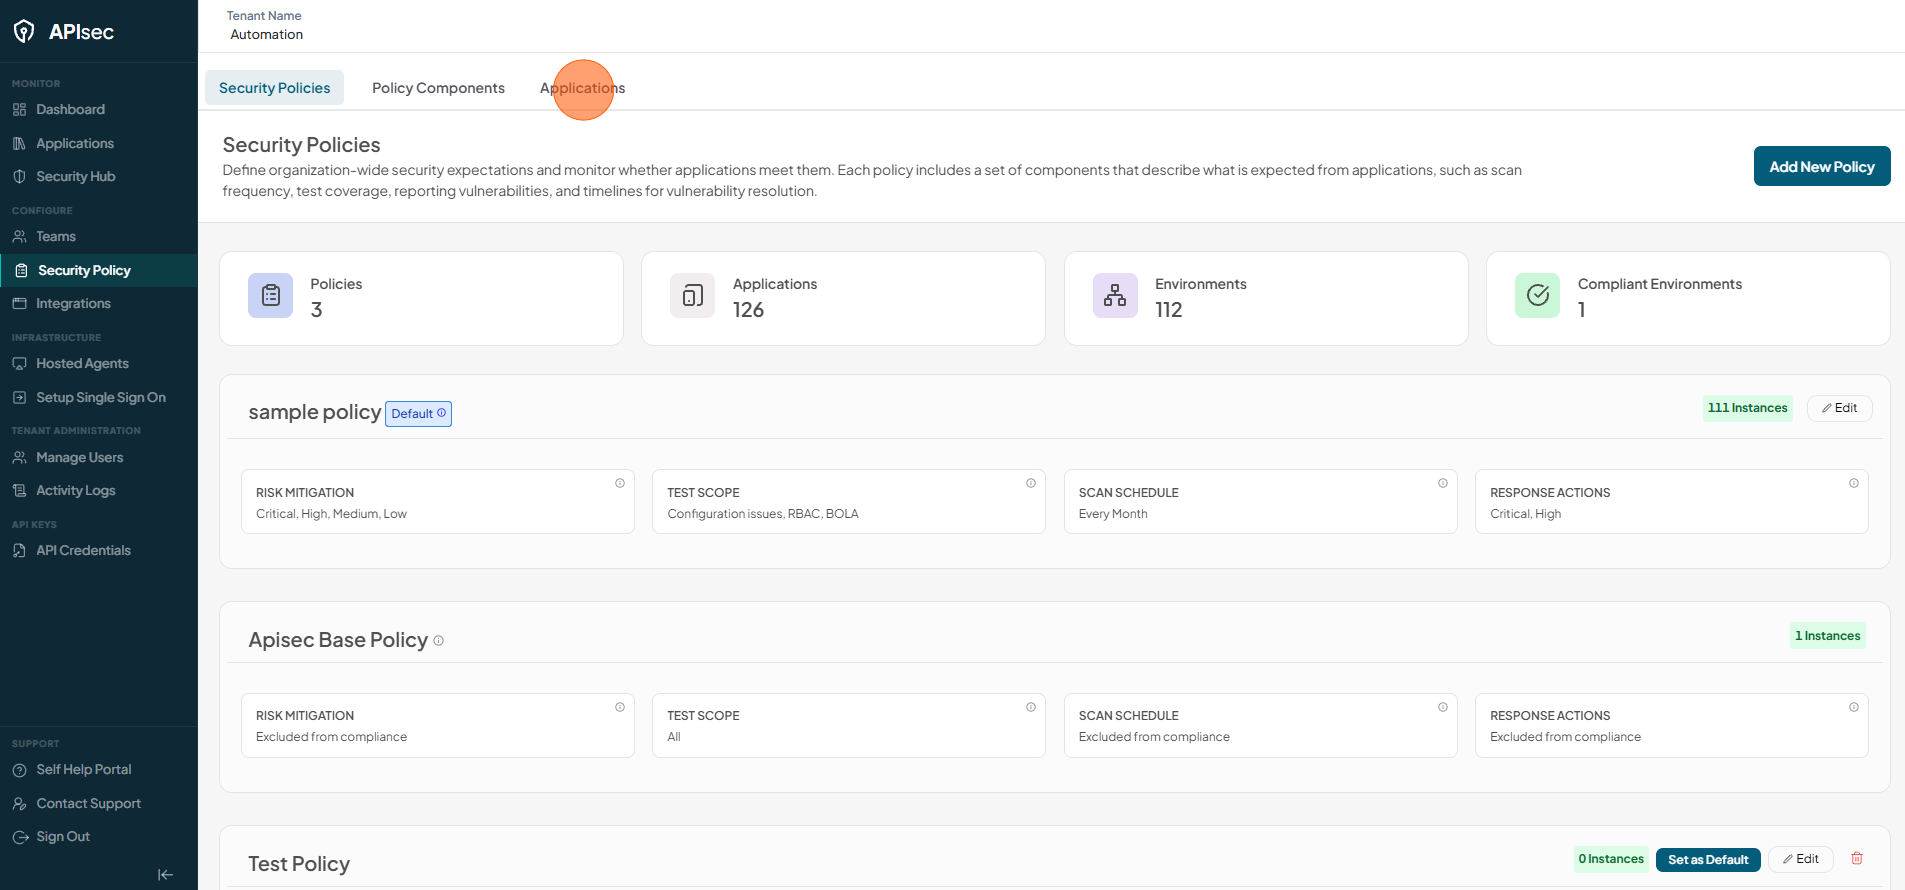
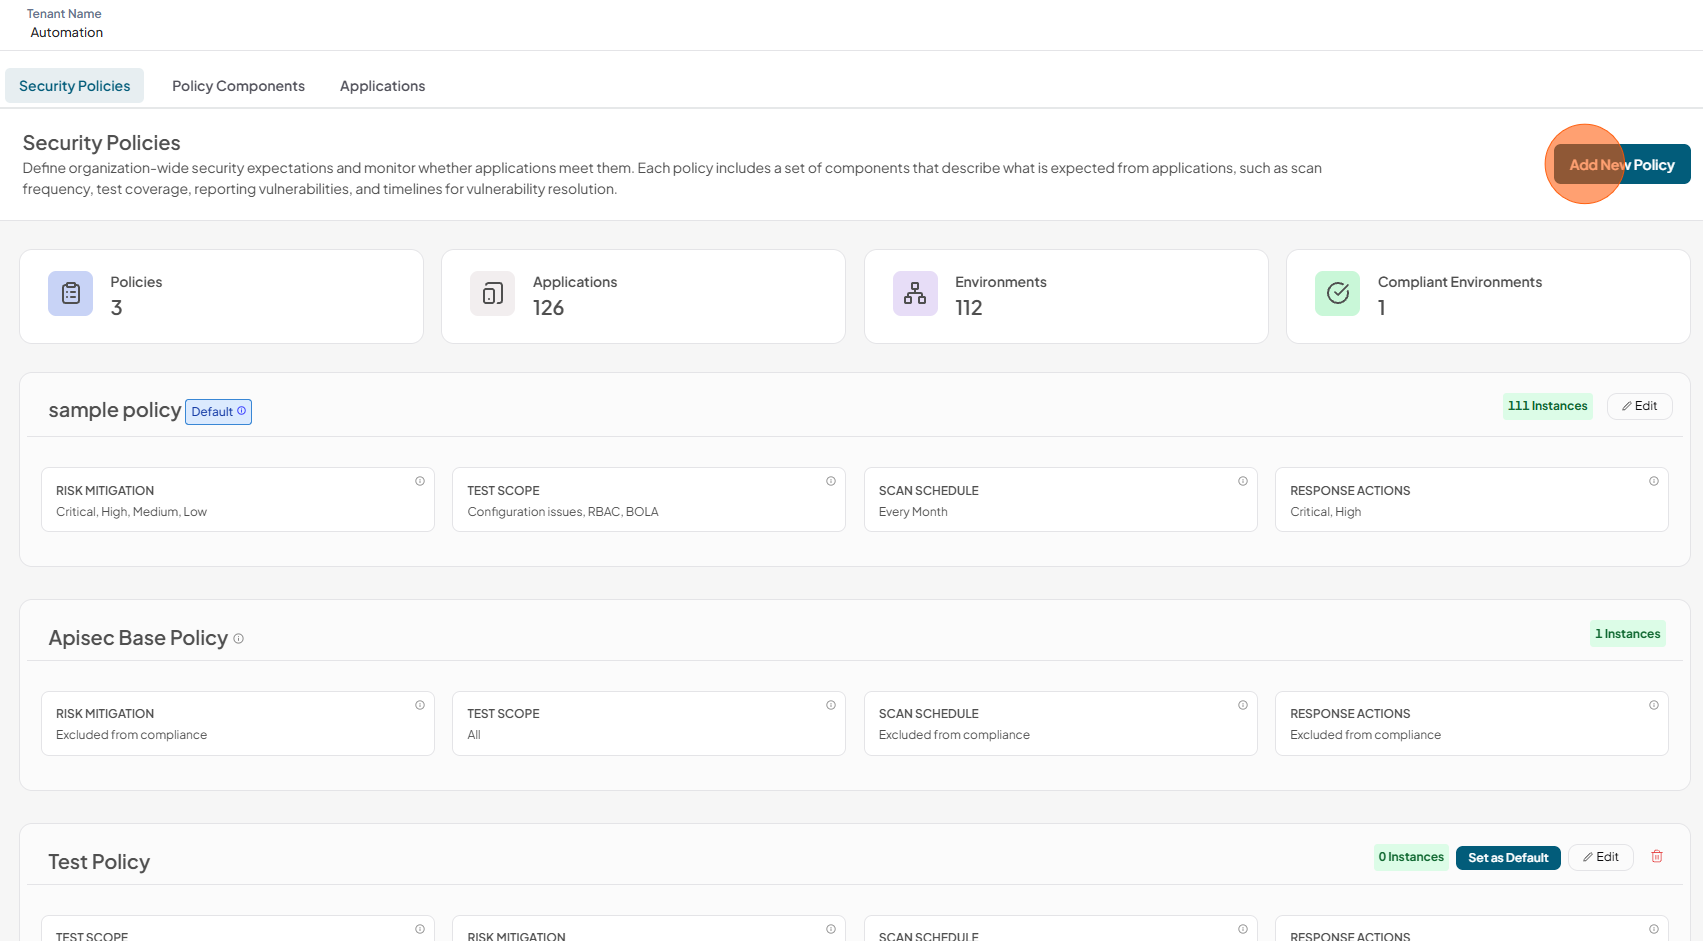
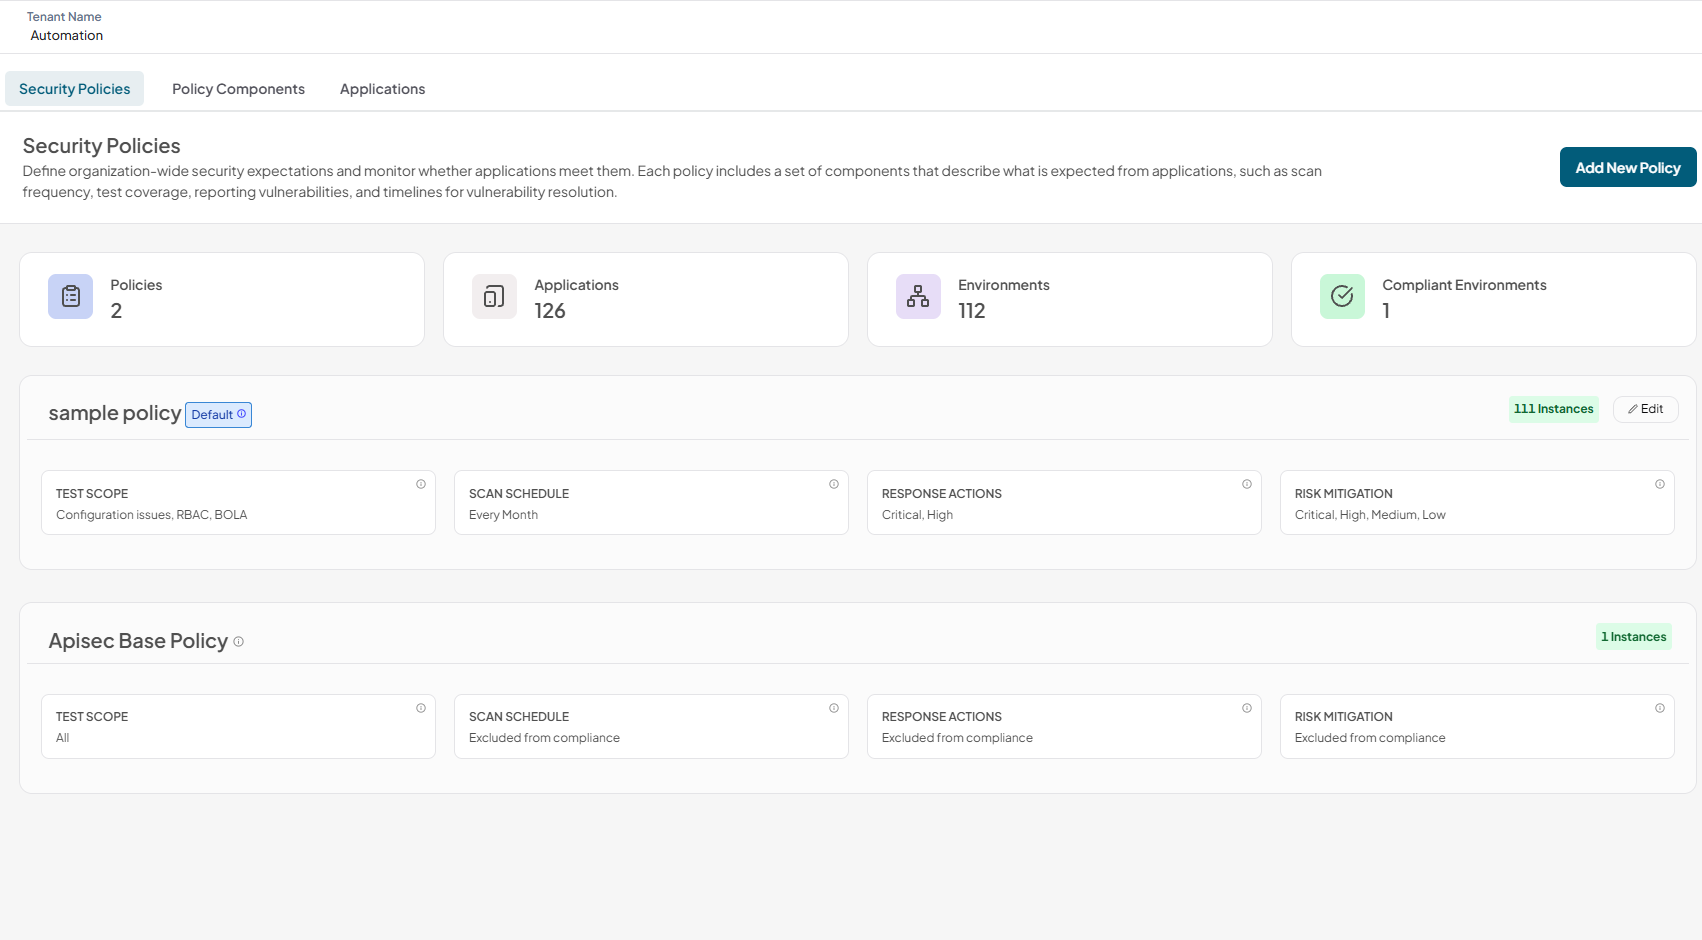
Security Policy
Security Policies are a way for administrators to monitor and configure applications organization wide.
Let’s say you want all your applications to be scanned daily. You can tell each team to configure their applications with a daily scheduled scan. But someone can miss an application, or maybe an application can be offline during the scheduled window. As an administrator you can create a policy to check all your applications have actually been scanned daily for the past few days, being able to tell at a glance if some applications are not behaving like expected.
There are few such behaviours you can configure within a policy, with more being added regularly.
Visit Security Policy
-
Open your browser and visit: https://<your-tenant>.apisecapps.com
-
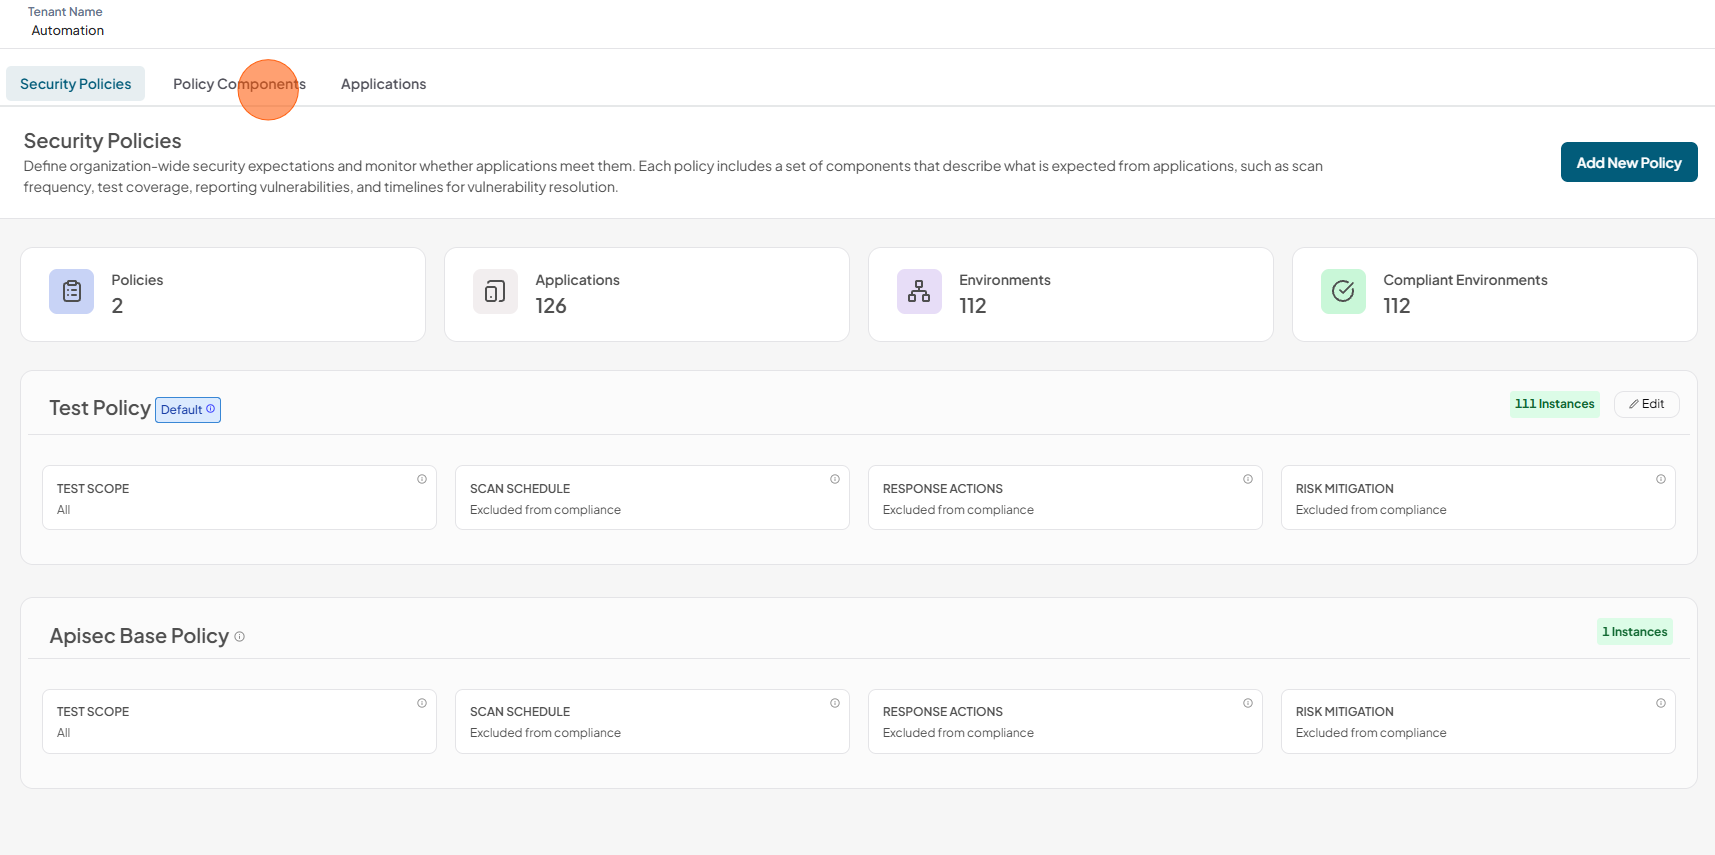
Click on Security Policy
-
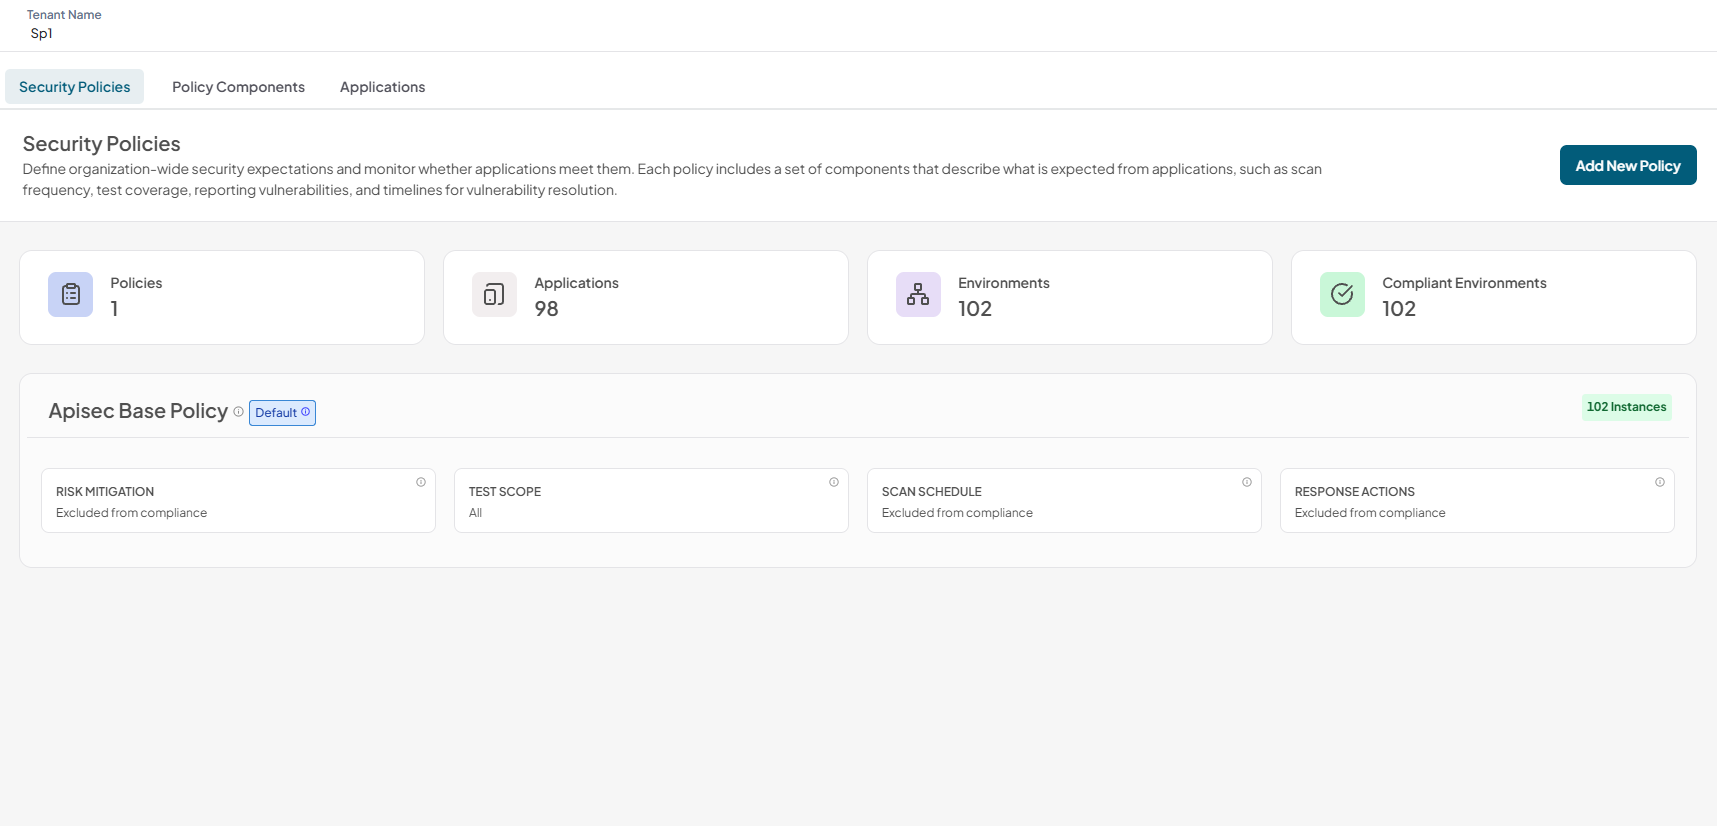
Verify the APIsec Base Policy.
Creating Components
Before creating the first policy, we need to create a few components, which are the building blocks for the policies.Each component defines an expectation, configuration or constraint which will apply to an application.
To create components
-
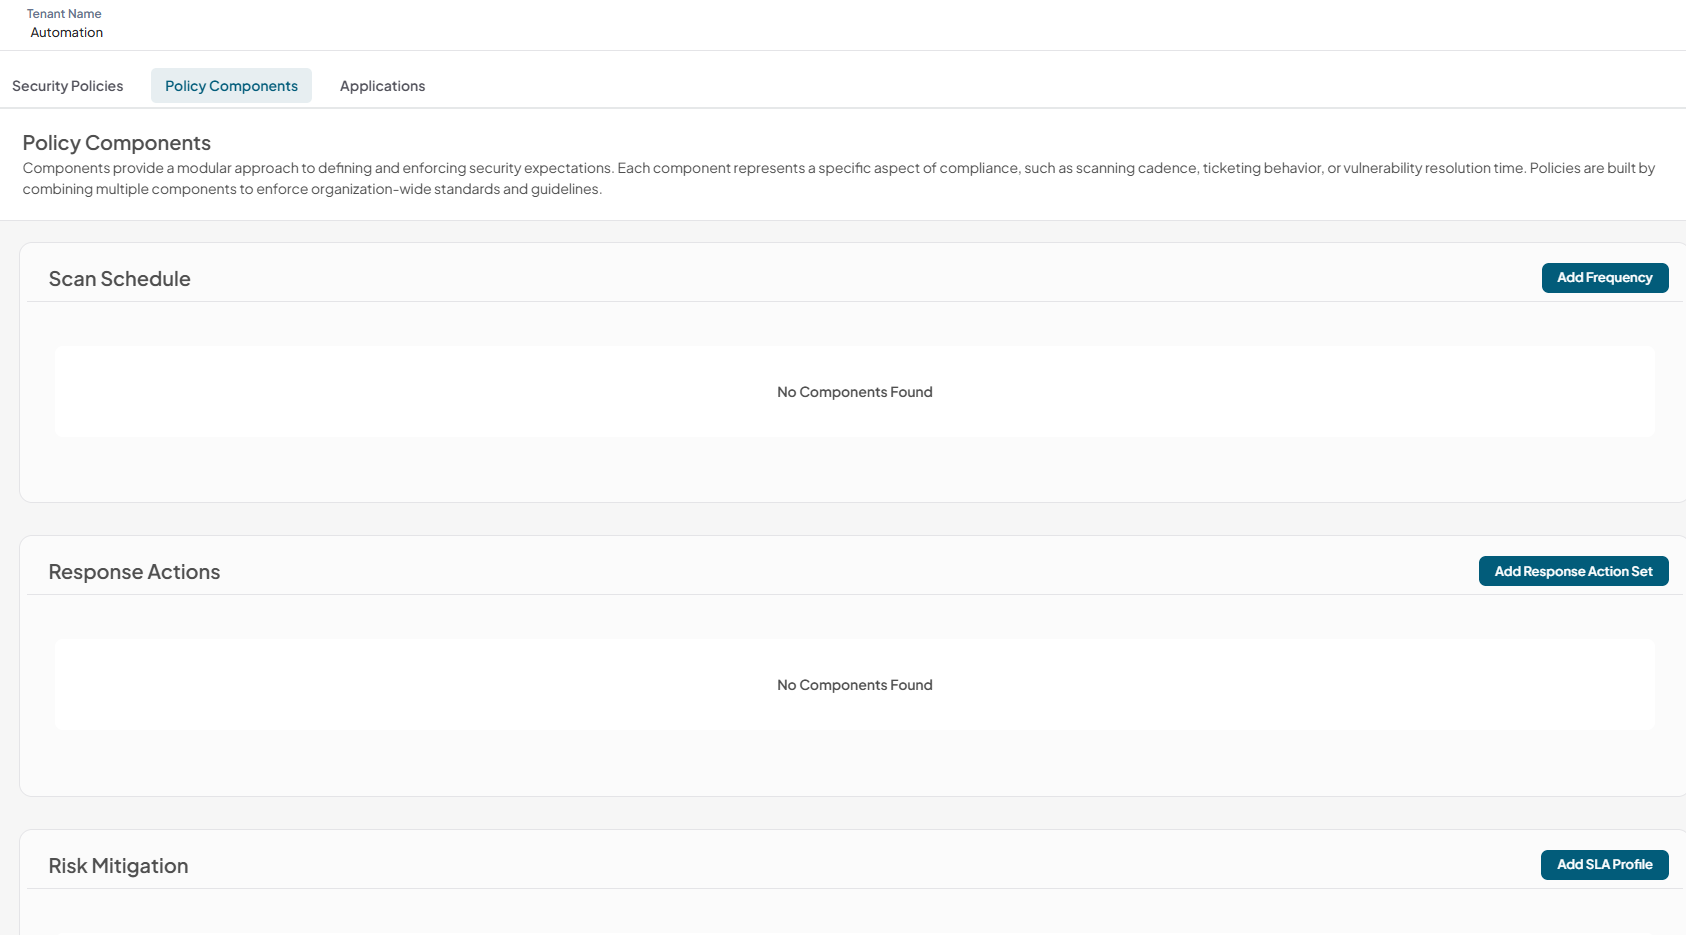
Click on Policy Components Tab
-
Create new components here
-
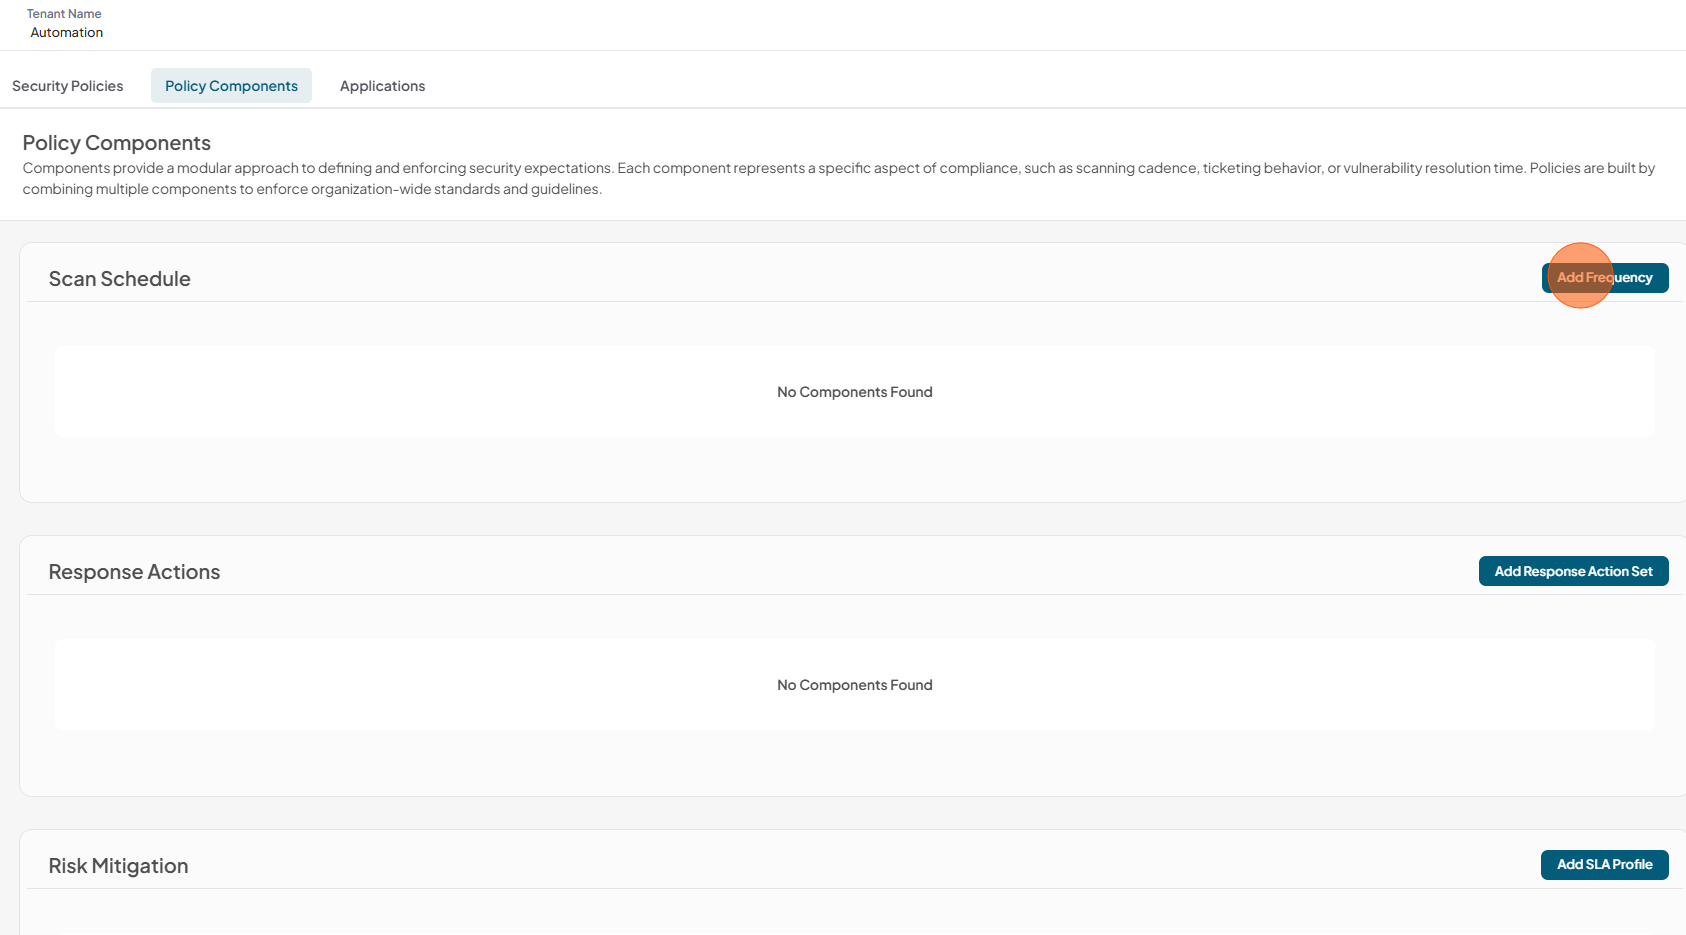
Scan Schedule Component
Specify how frequently applications need to be scanned — every few hours, daily, weekly, or monthly — to ensure continuous security coverage and timely detection of new risks.
1.Click Add Frequency
2.Enter the following details for Scan Schedule component
- Component Name: Enter unique name for the component
- Frequency: Select frequency (every few hours, daily, weekly, or monthly)
- Description: Description for the component
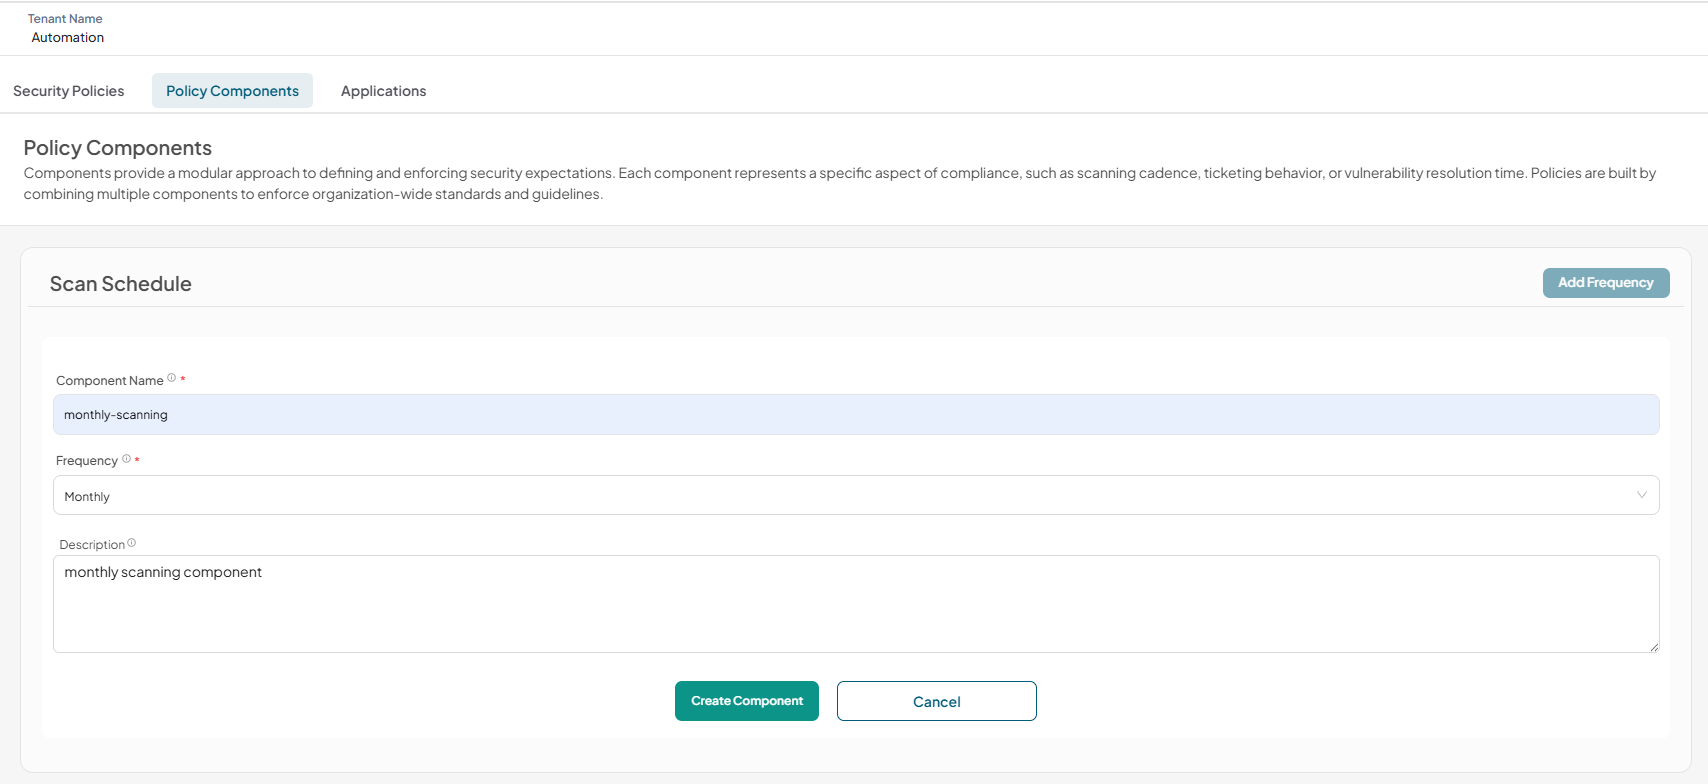
3.Click Create Component
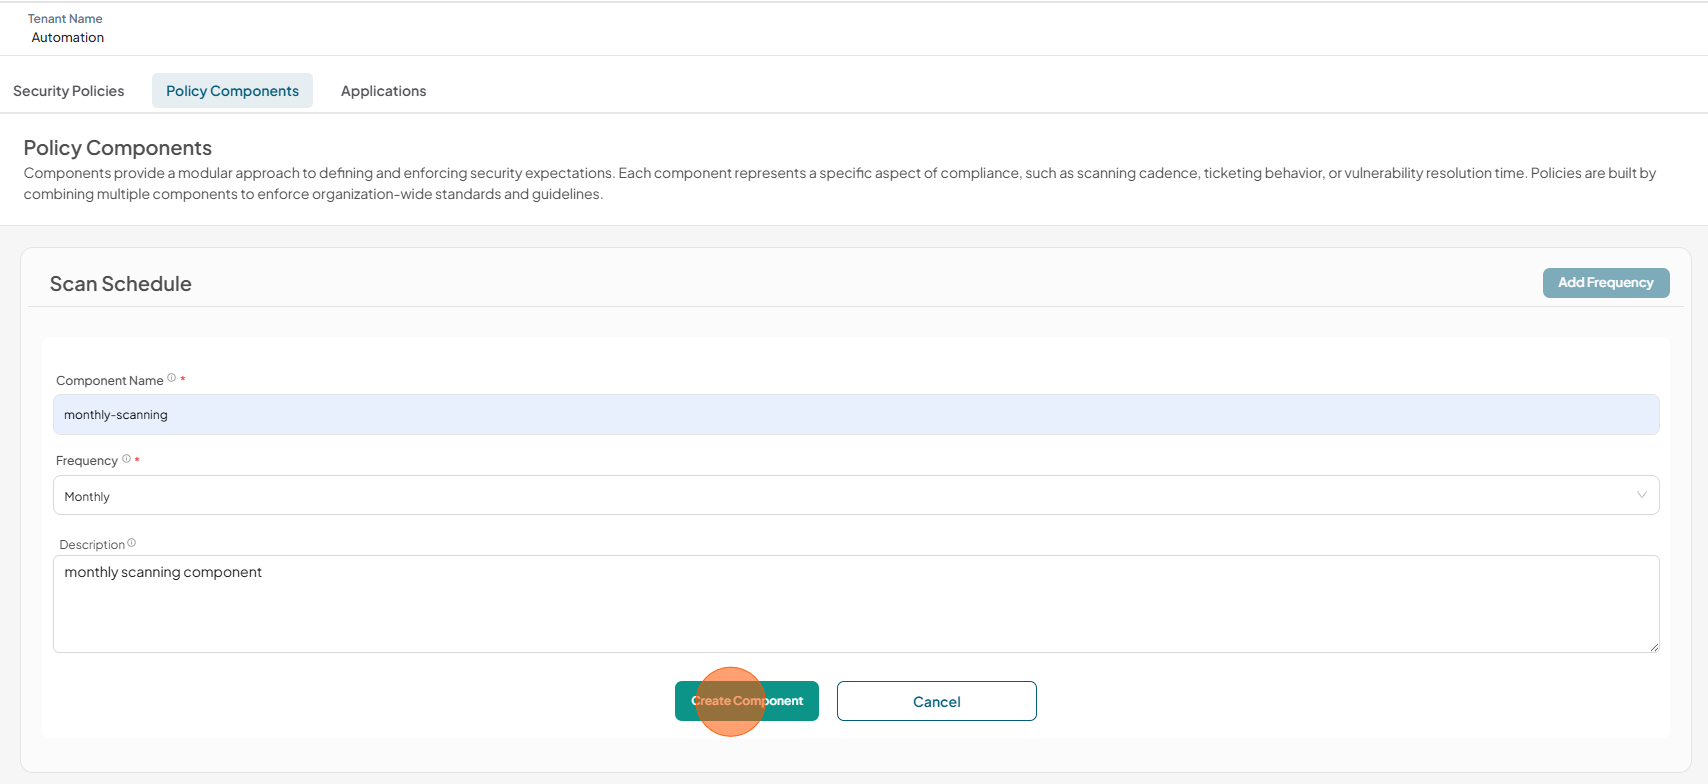
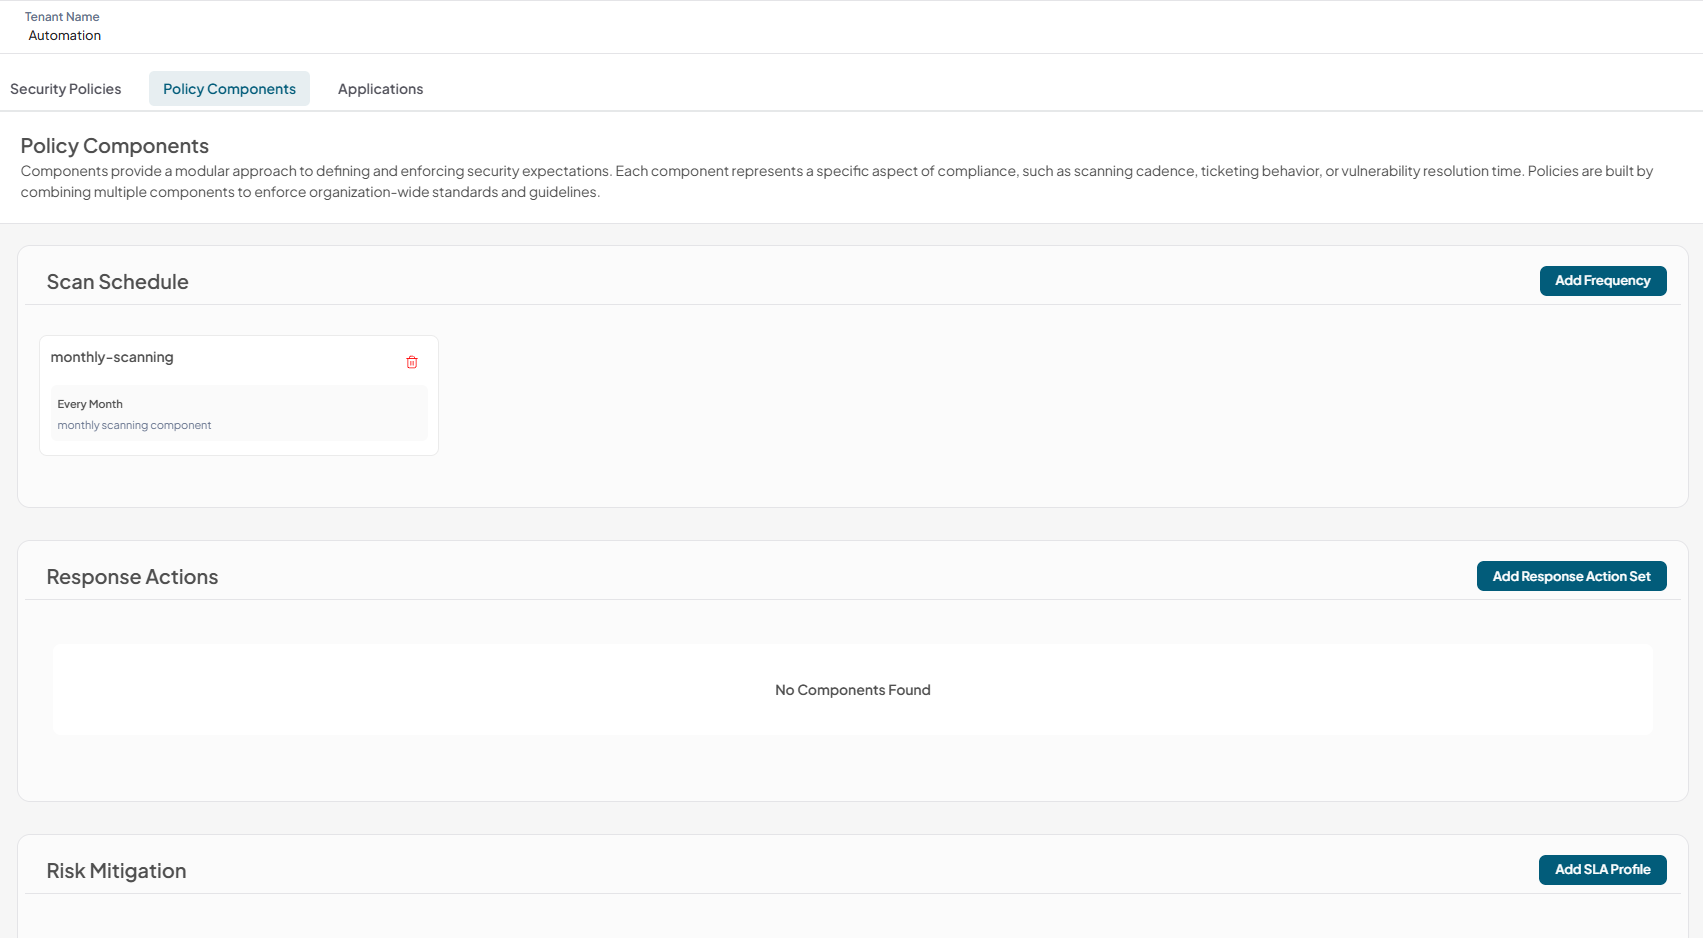
4.Component has been successfully added to Scan Schedule
-
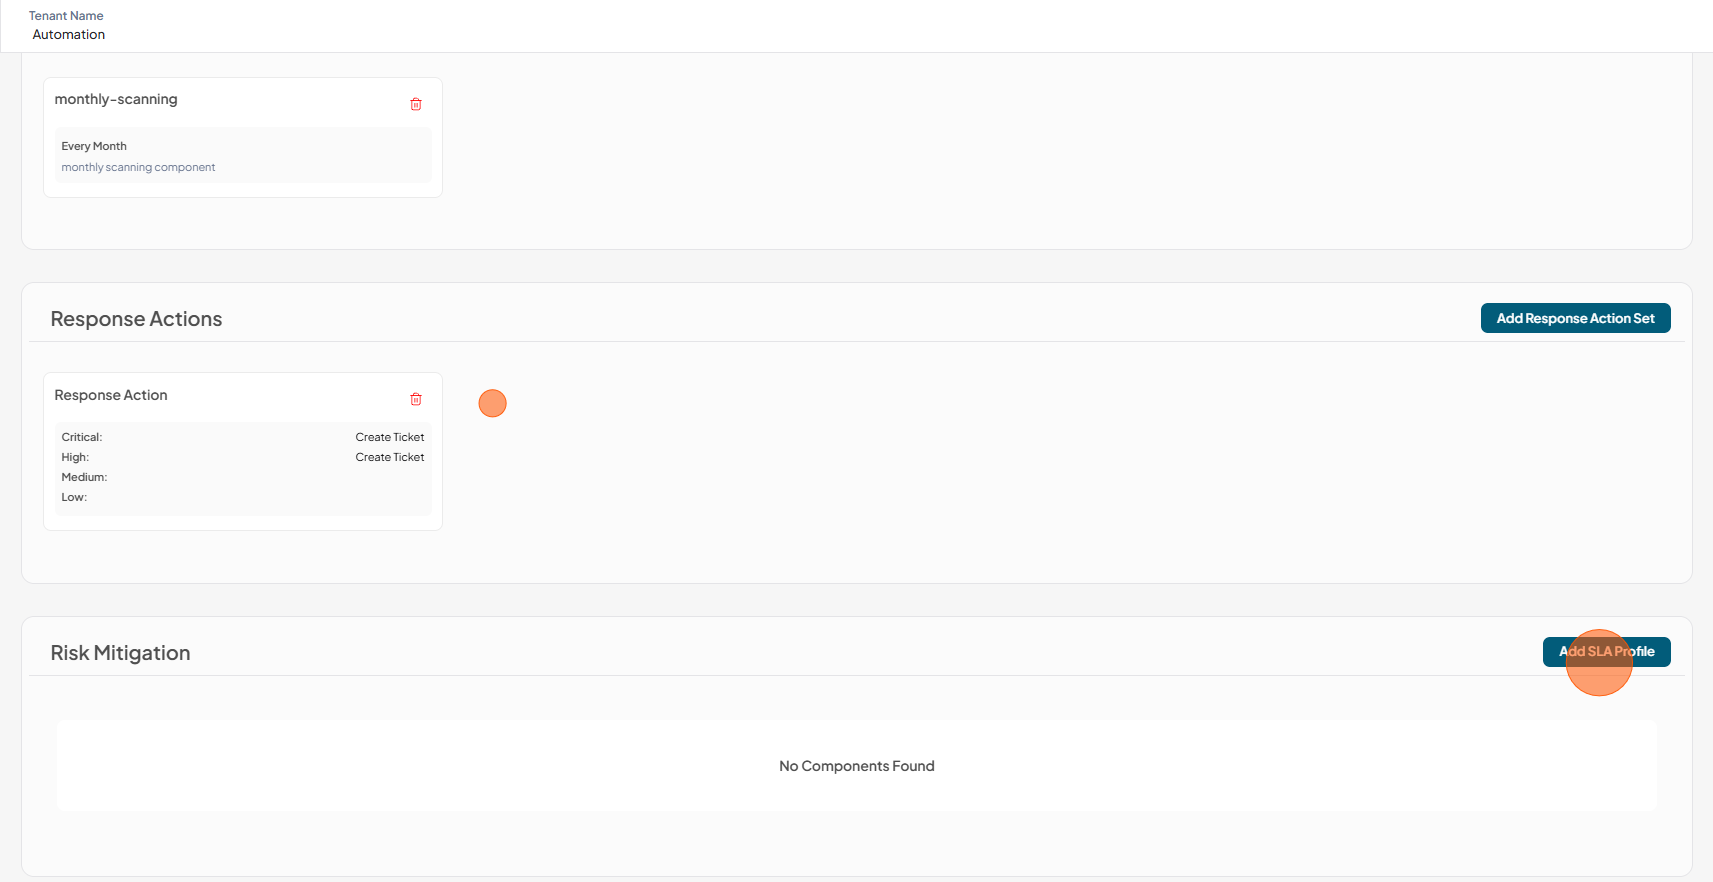
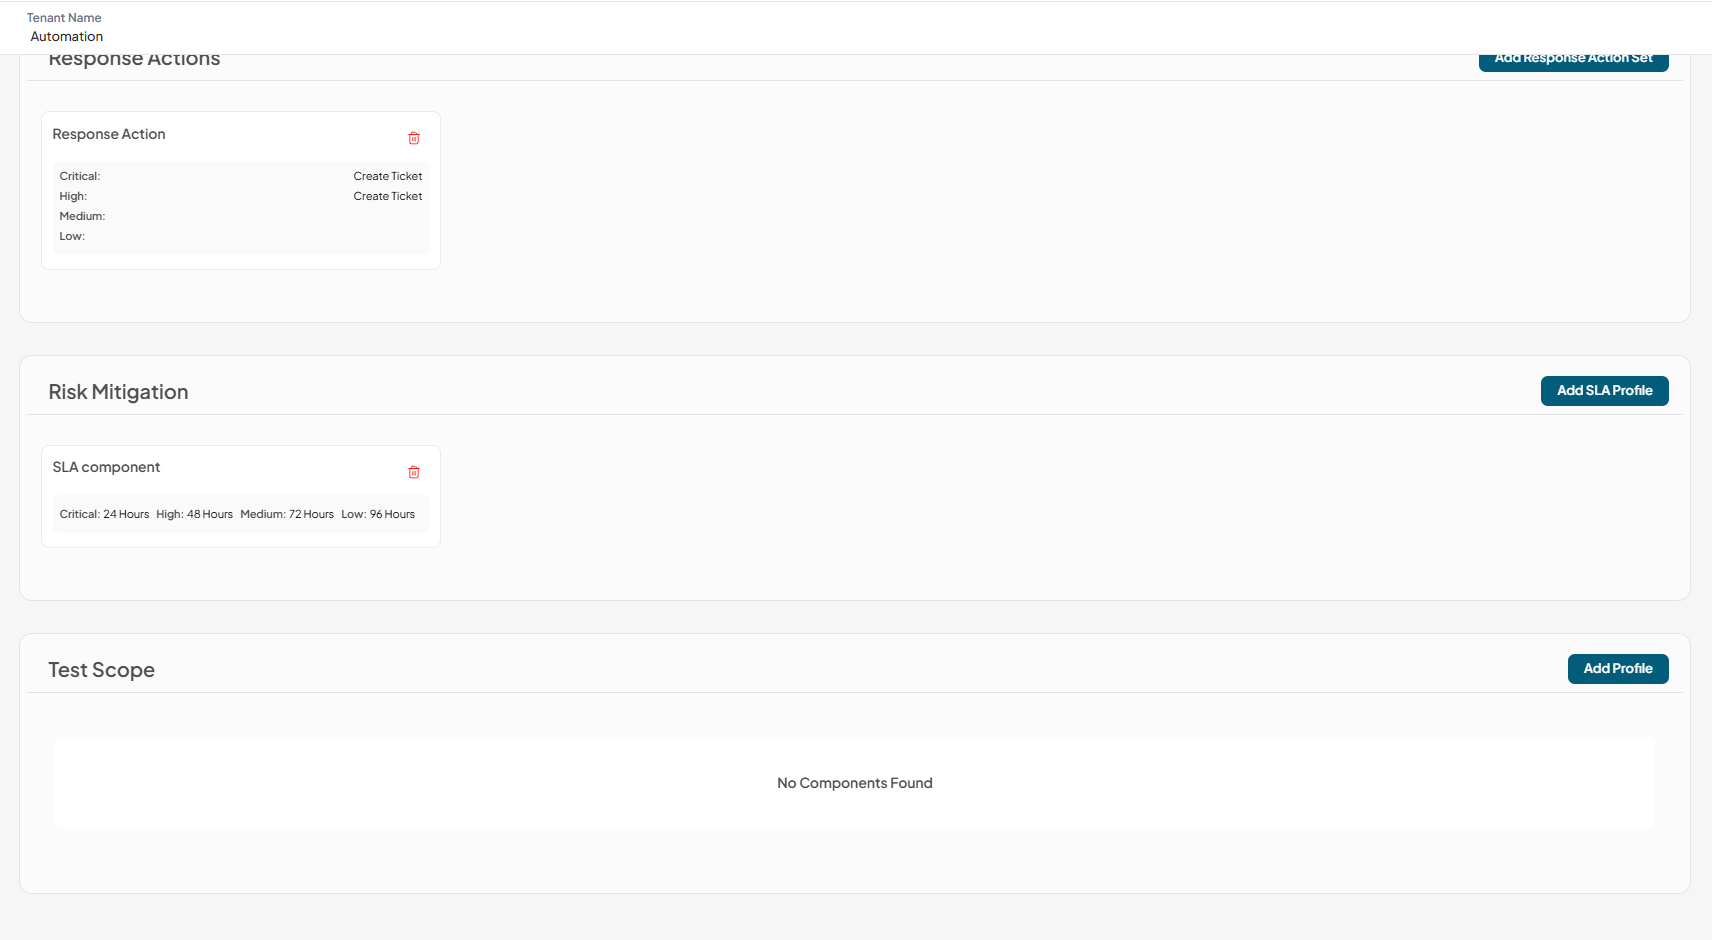
Response Actions
Define how newly discovered vulnerabilities should be handled. For example, automatically creating a ticket when a vulnerability meets a defined severity level ensures issues are appropriately tracked and routed to engineering teams for resolution.
1.Click Add Response Action Set

2.Enter the following details for Response Actions component
- Component Name: Enter unique name for the component
- Response Actions: Select response action (Creating ticket)
- Severity Selection: Select severity level (Critical, High, Medium and Low)
- Description: Description for the component
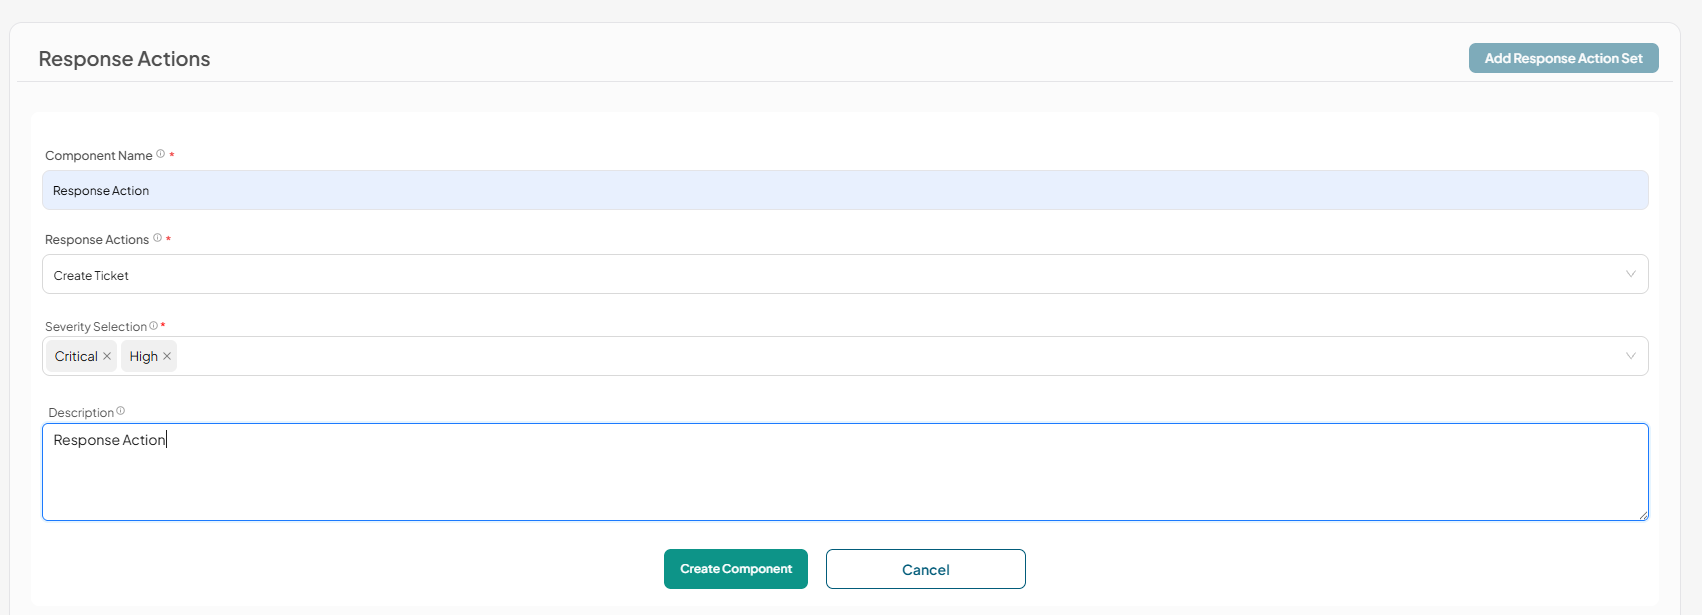
3.Click Create Component
4.Component has been successfully added to Response Actions

-
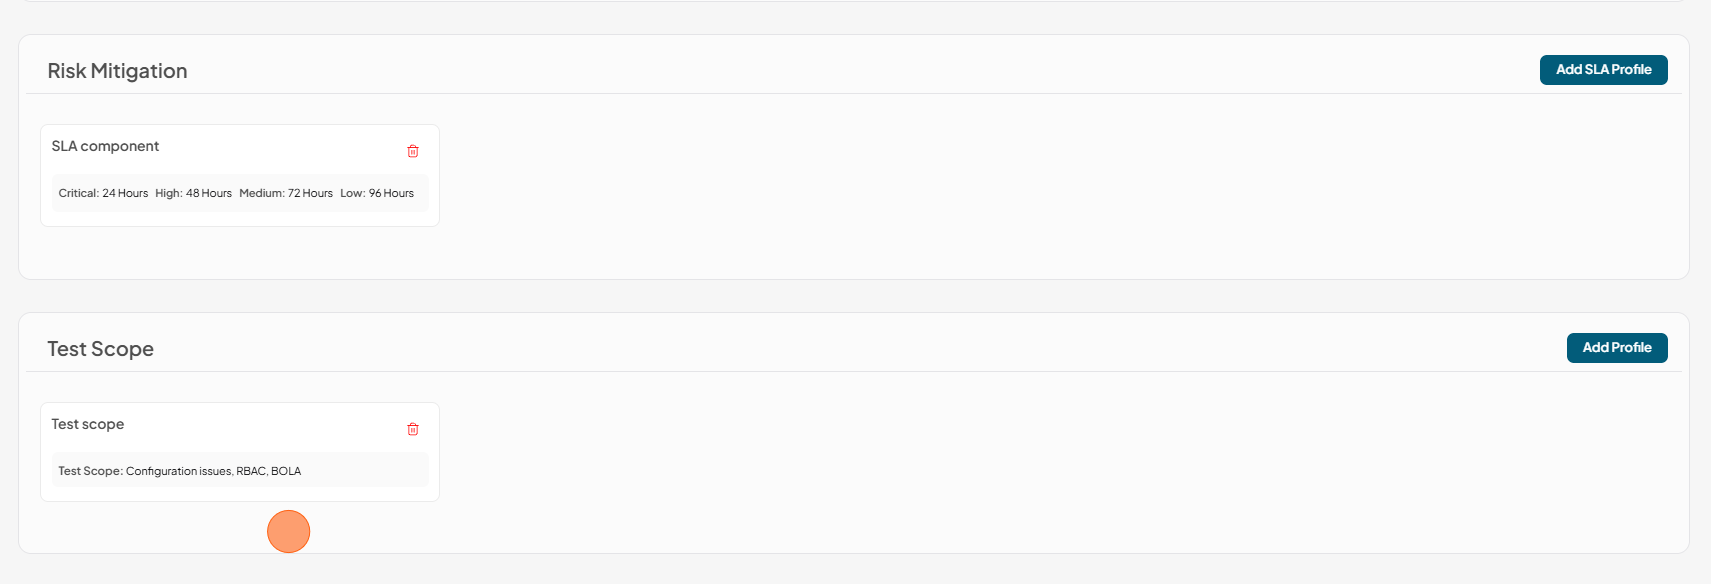
Risk Mitigation
Ensure vulnerabilities are remediated within the SLA defined in the policy. To stay compliant, active vulnerabilities must be resolved within the established timelines, thereby reinforcing accountability and reducing long-term exposure.
1.Click Add SLA Profile
2.Enter the following details for SLA component
- Component Name: Enter unique name for the component
- Time to fix new vulnerabilities: Select time frame for each vulnerability (Days or Hours)
- Description: Description for the component
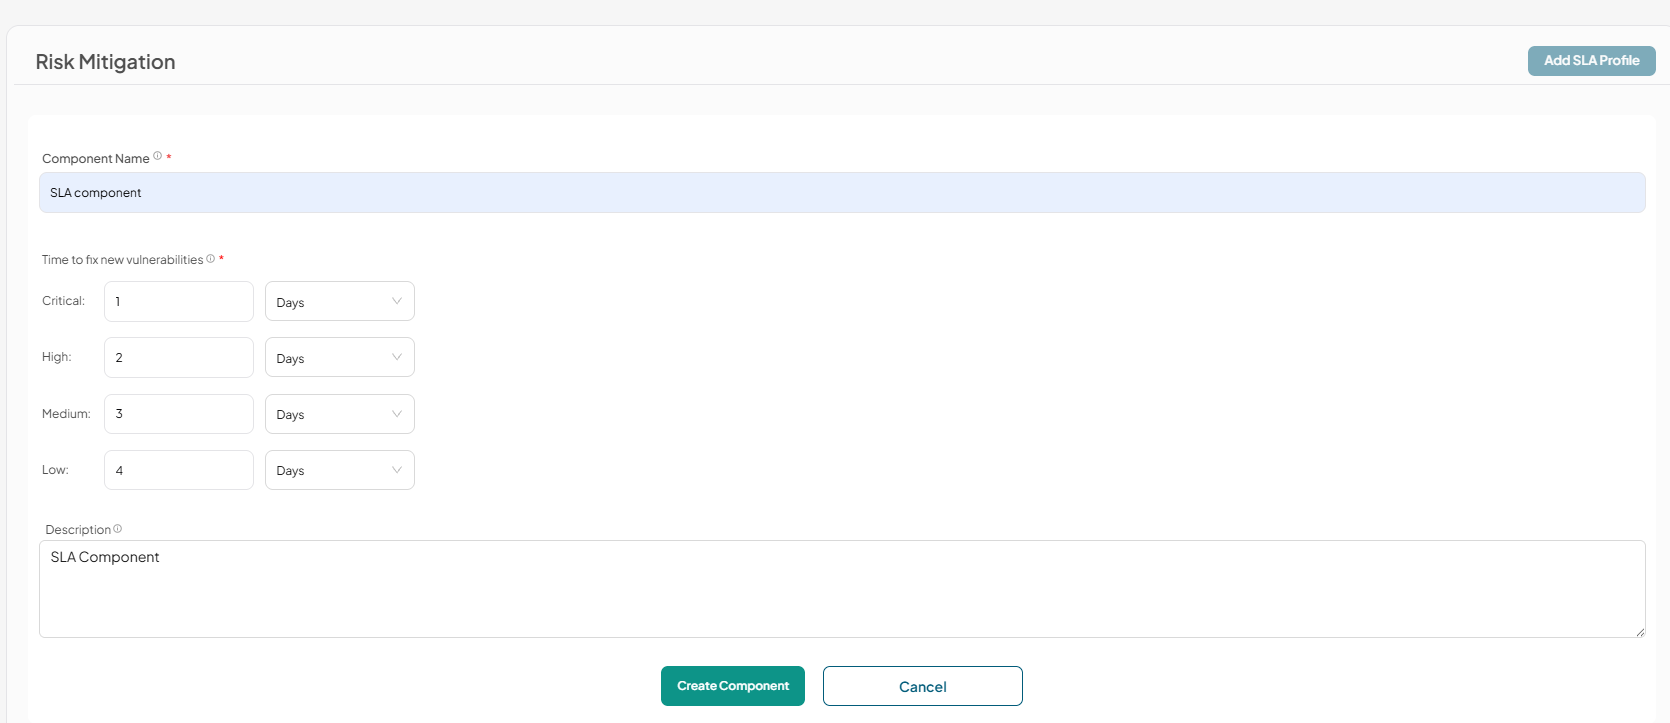
3.Click Create Component
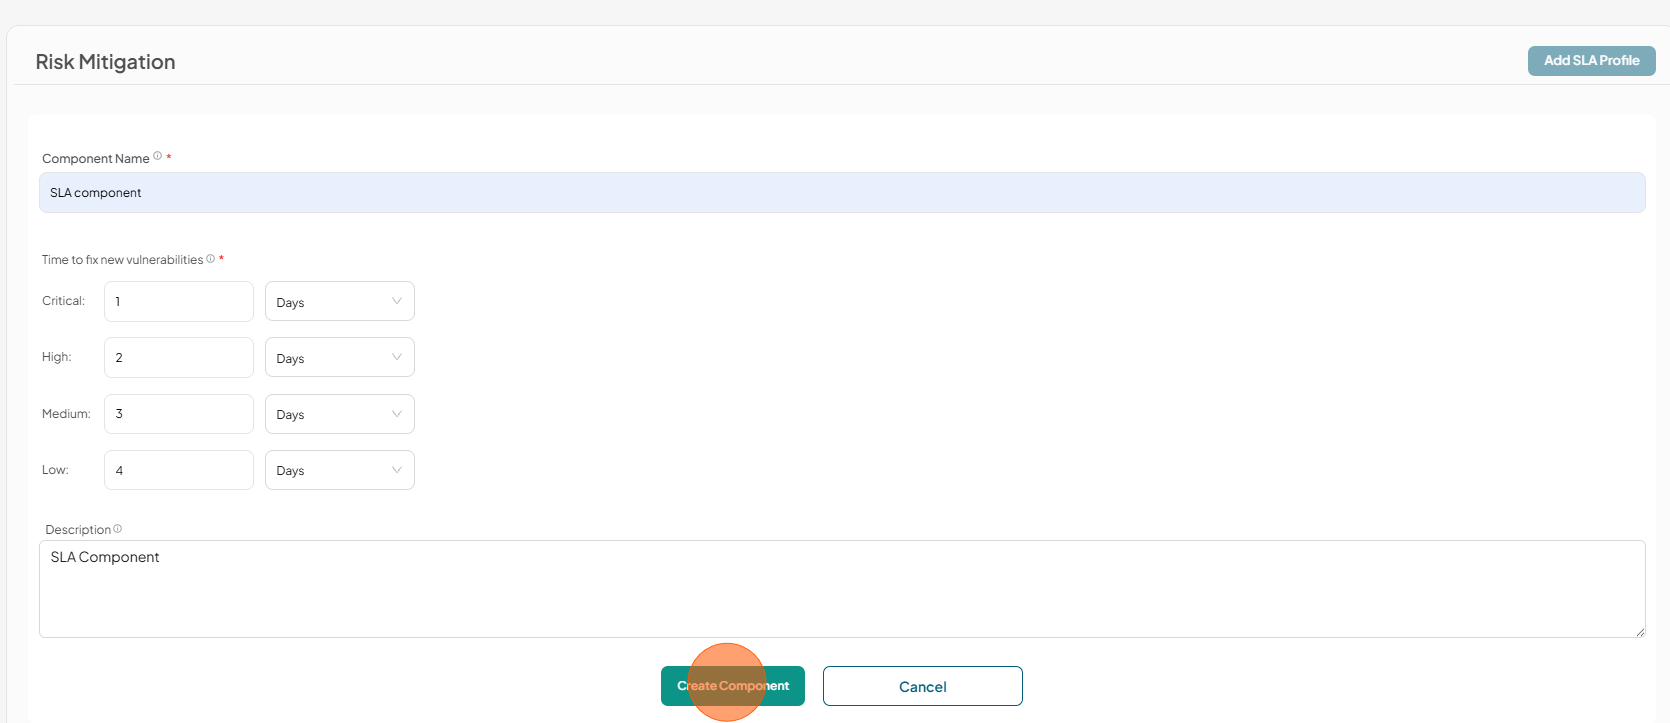
4.Component has been successfully added to Risk Mitigation
-
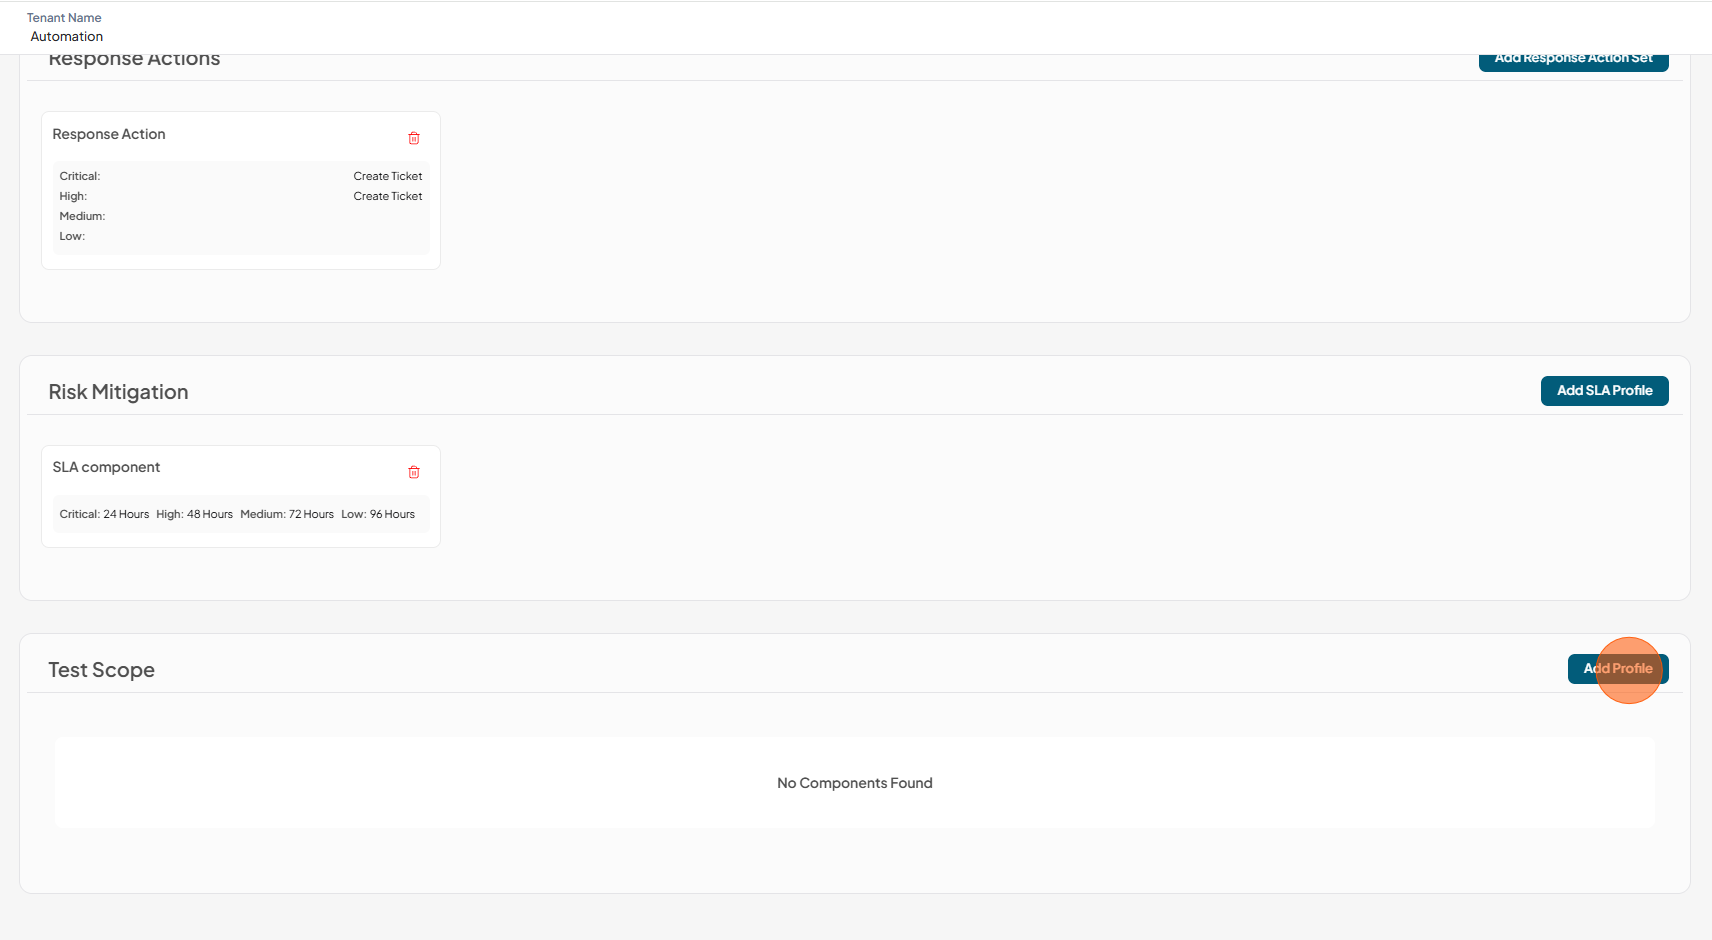
Test Scope
Execute the required test categories for each application. Applications must run these selected category types to remain compliant with their assigned policy.
In order to be compliant with this component, applications must have the required configurations for the selected categories.
- Broken authentication: The application must have at least one authentication configured
- RBAC: The application must have an RBAC permissions mapping enabled for testing
- BOLA: The application must have a valid BOLA attack scenario configured.
To create Test Scope components
1.Click Add Profile
2.Enter the following details for Test Scope component
- Component Name: Enter unique name for the component
- Test Scope: Select test scope (Creating ticket)
- Description: Description for the component
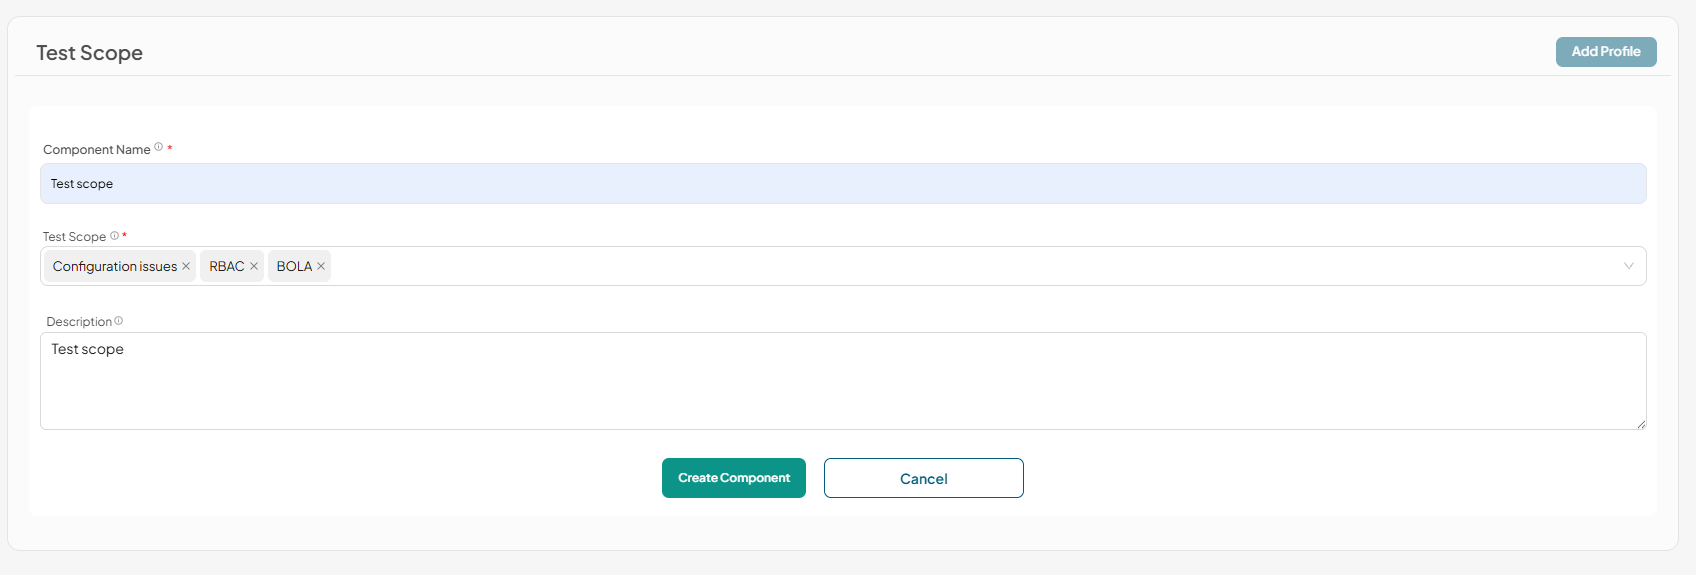
3.Click Create Component
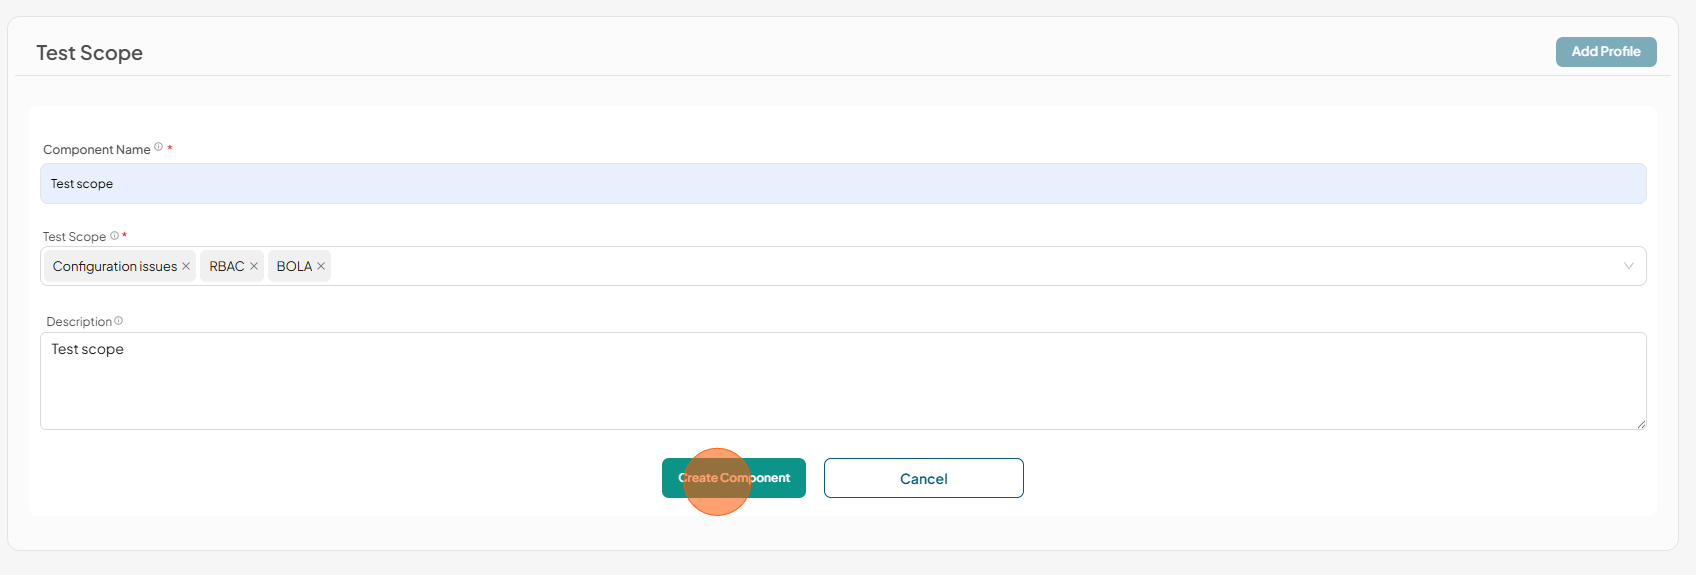
4.Component has been successfully added to Test Scope
-
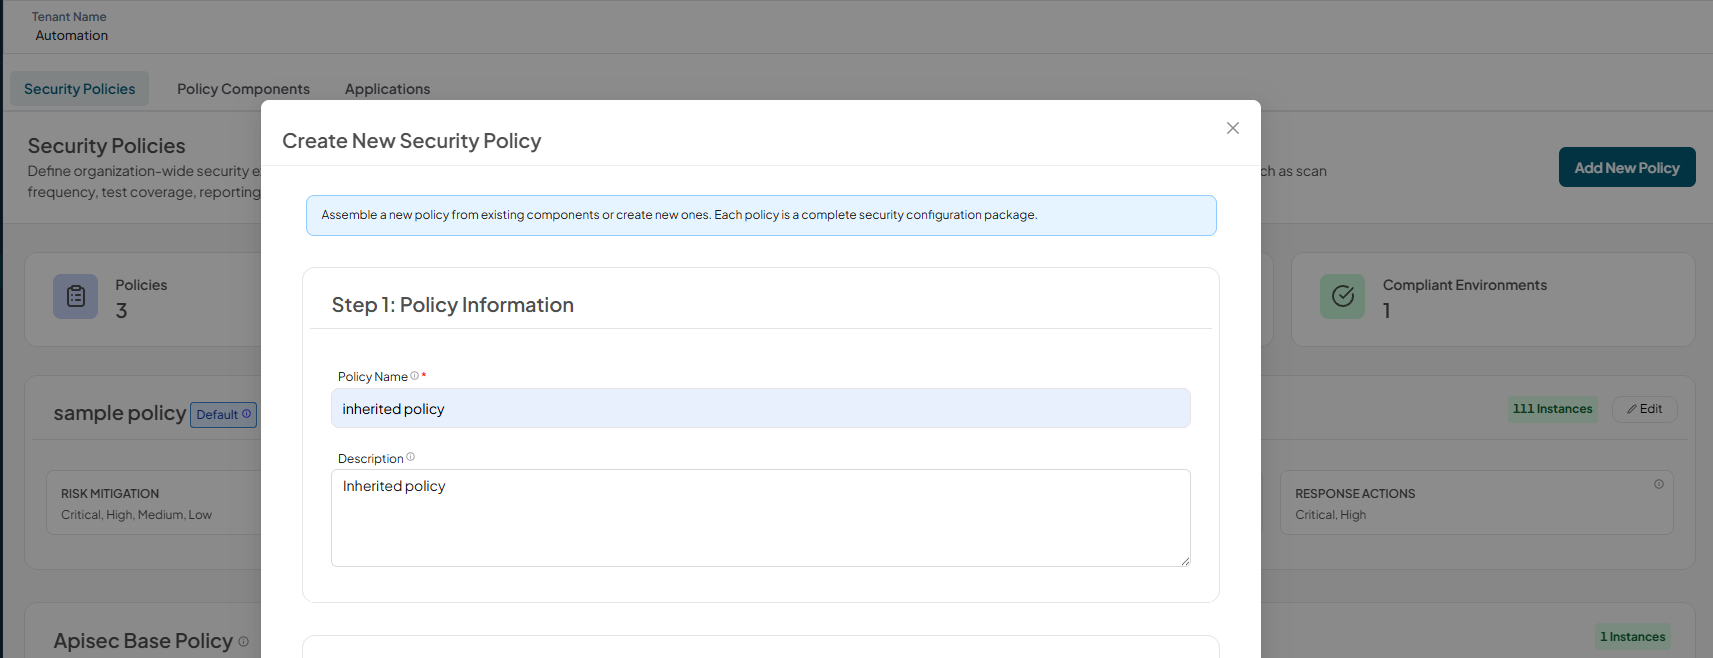
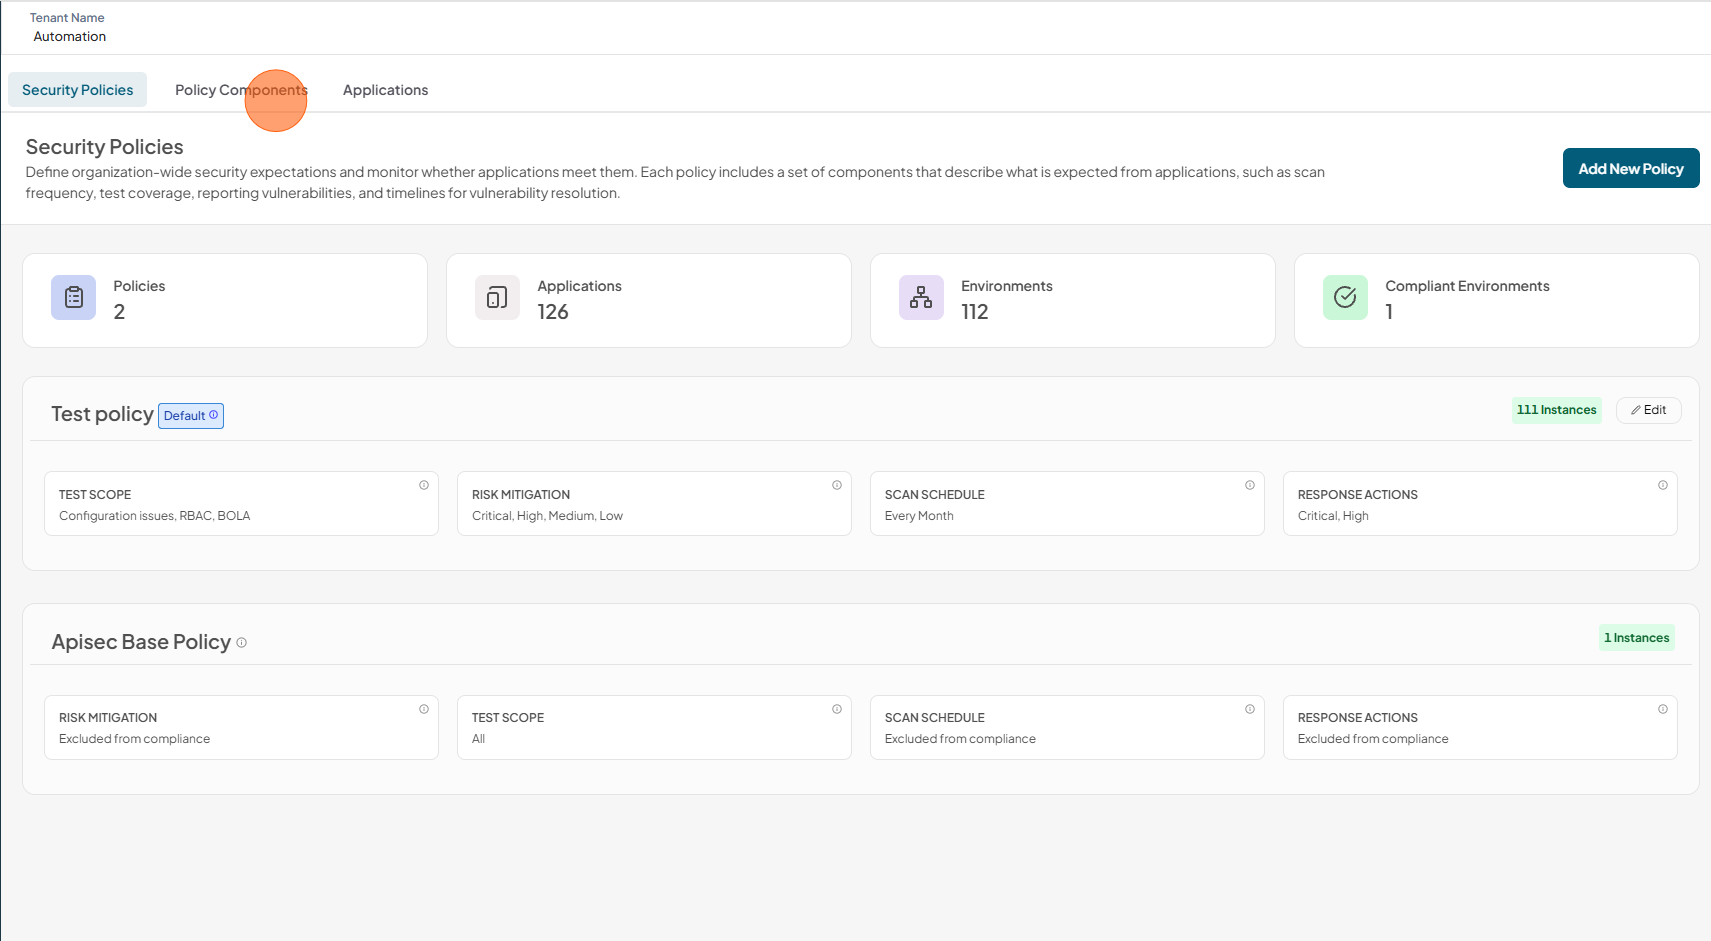
Creating Policy
-
Click Security Policies tab

-
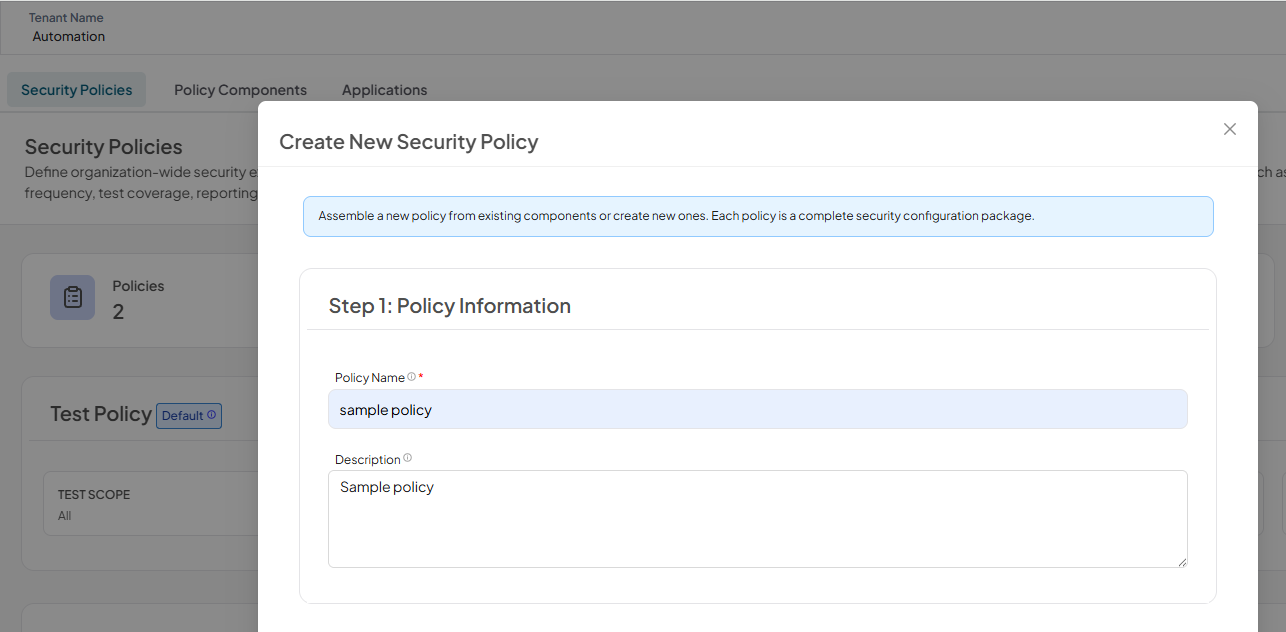
Click Add New Policy
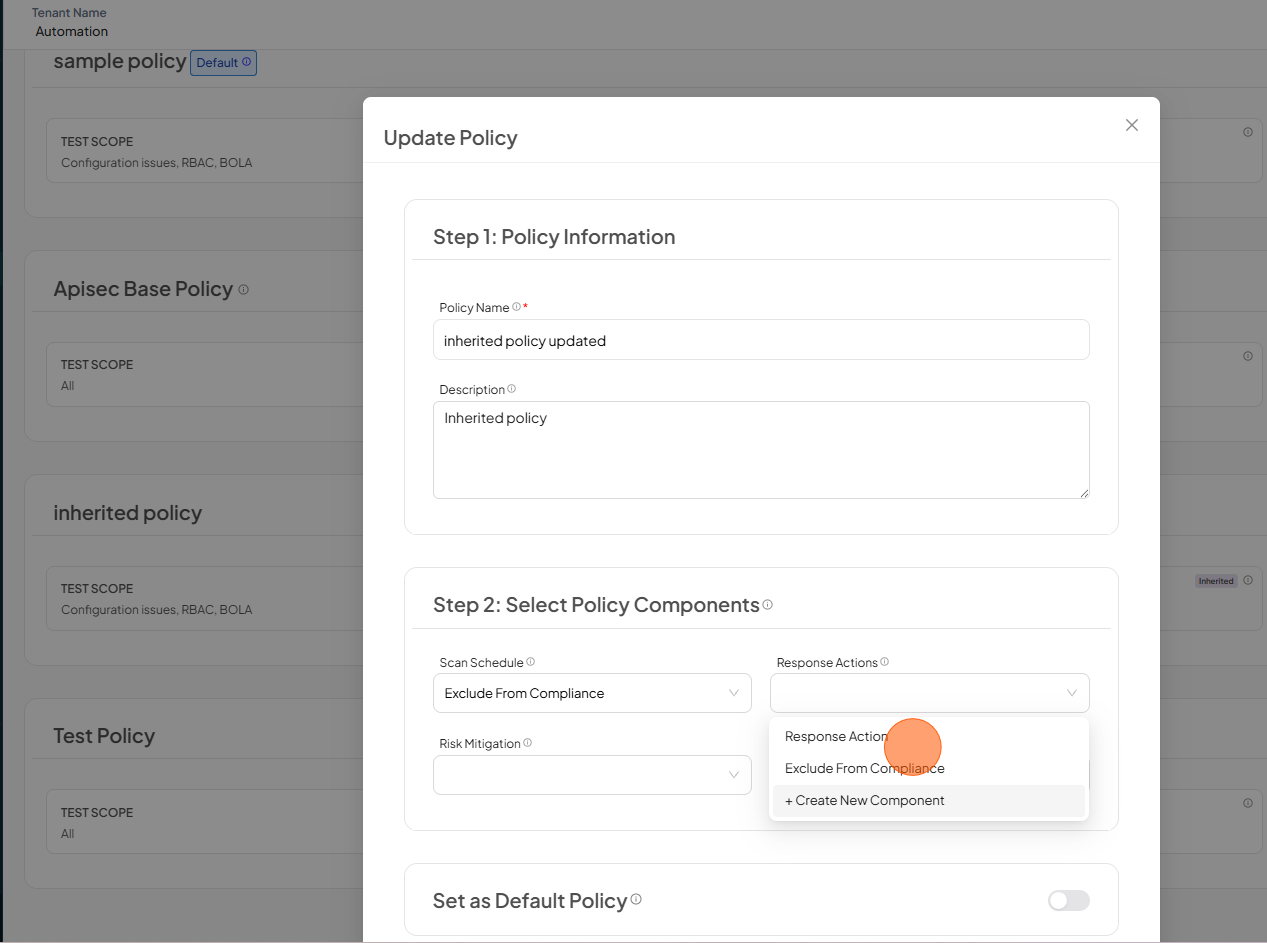
Step 1: Policy Information: Enter the following details
- Policy Name: Enter Unique policy name
- Description: Enter description for the policy
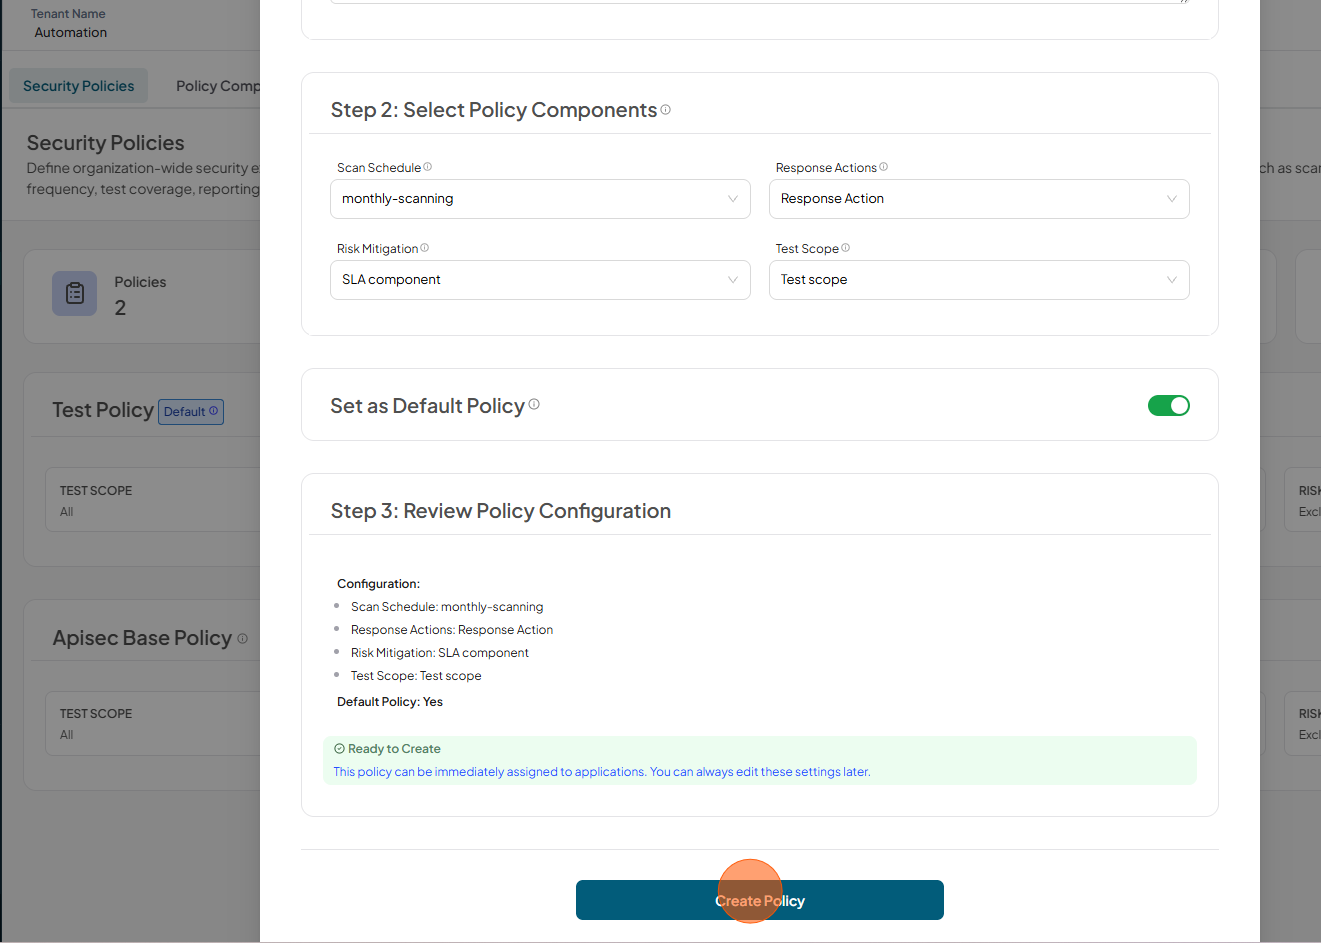
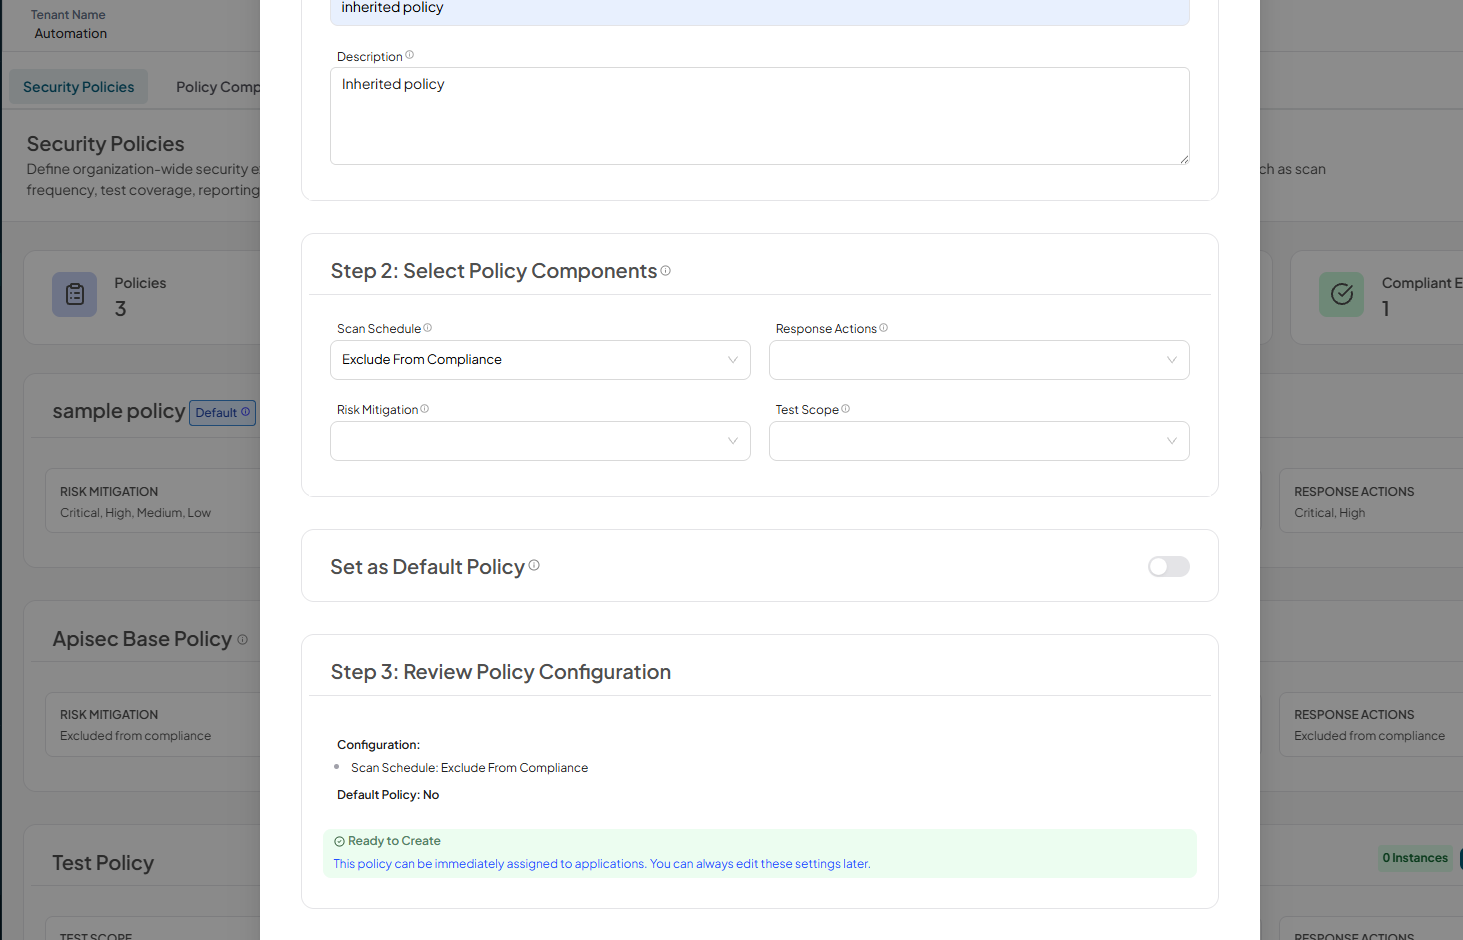
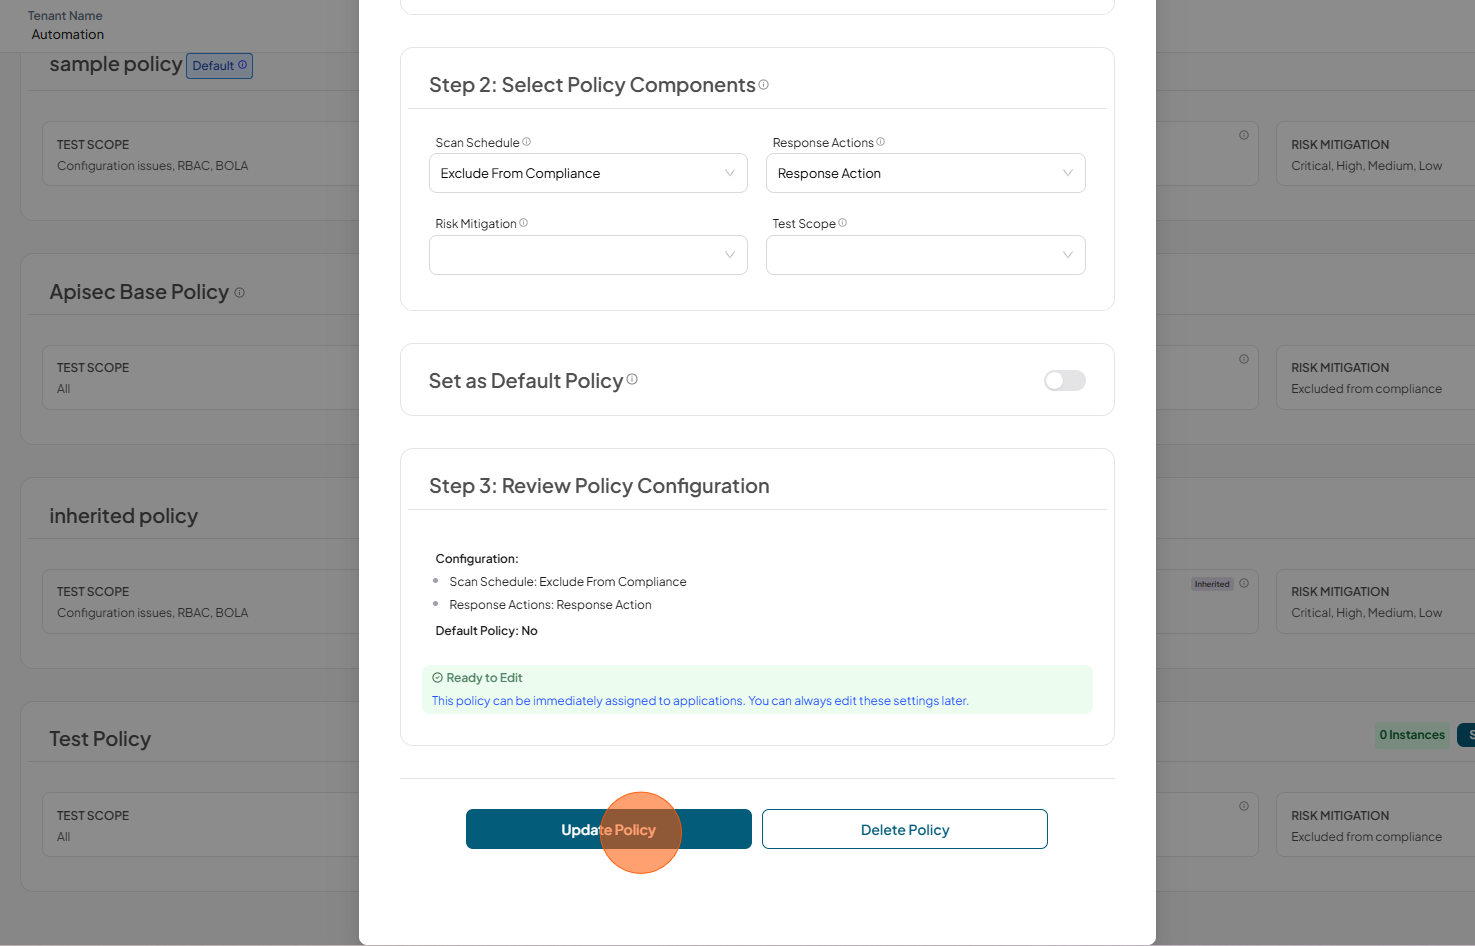
Step 2: Select Policy Components: Select the existing component or exclude components or create and add component.
- Scan Schedule: Select Scan Schedule component or exclude component or create and add a new Scan schedule component
- Response Actions: Select Response Actions component or exclude component or create and add a new Response Actions component
- Risk Mitigation: Select Risk Mitigation component or exclude component or create and add a new Risk Mitigation component
- Test Scope: Select Test Scope component or exclude component or create and add a new Test Scope component
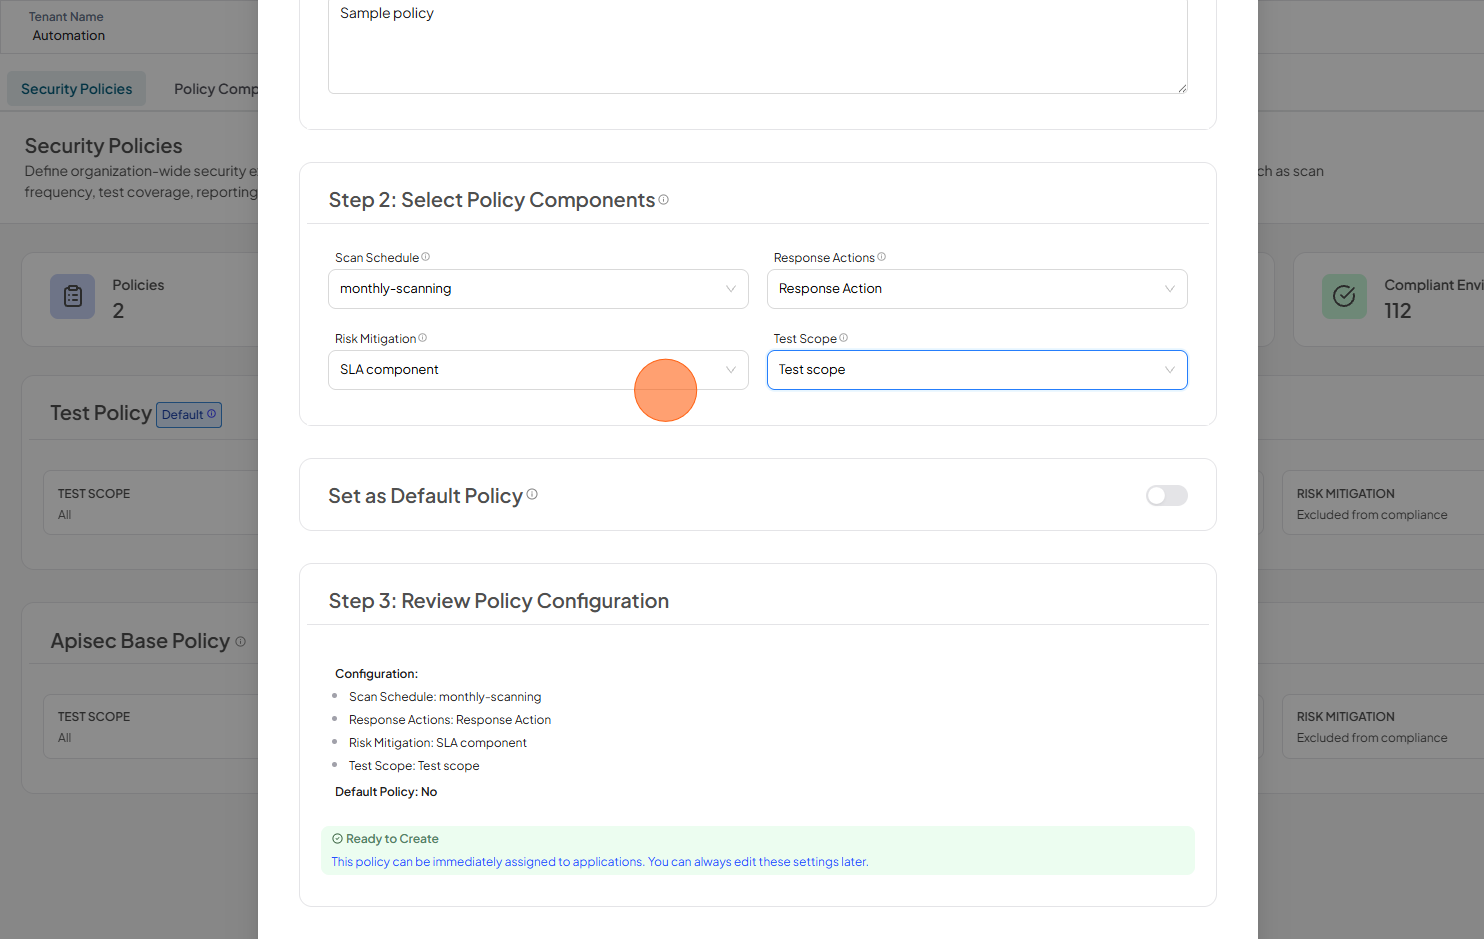
The first policy you create will always be marked as the default policy for the organization. This means all applications will be assigned to this policy unless you explicitly assign them to a different policy.
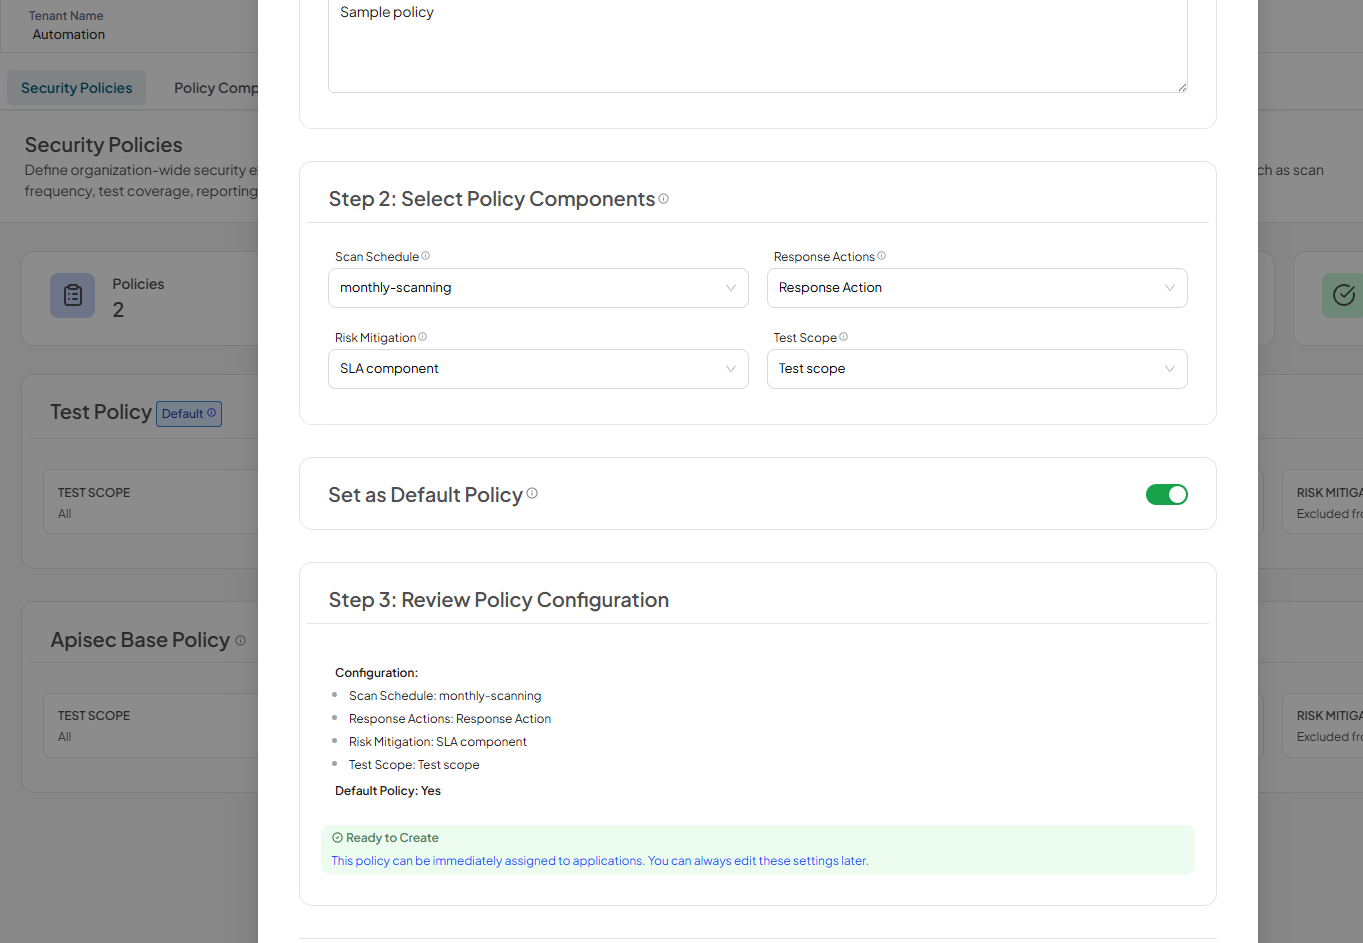
Step 3: Review Policy Configuration: Review and Click Create Policy
-
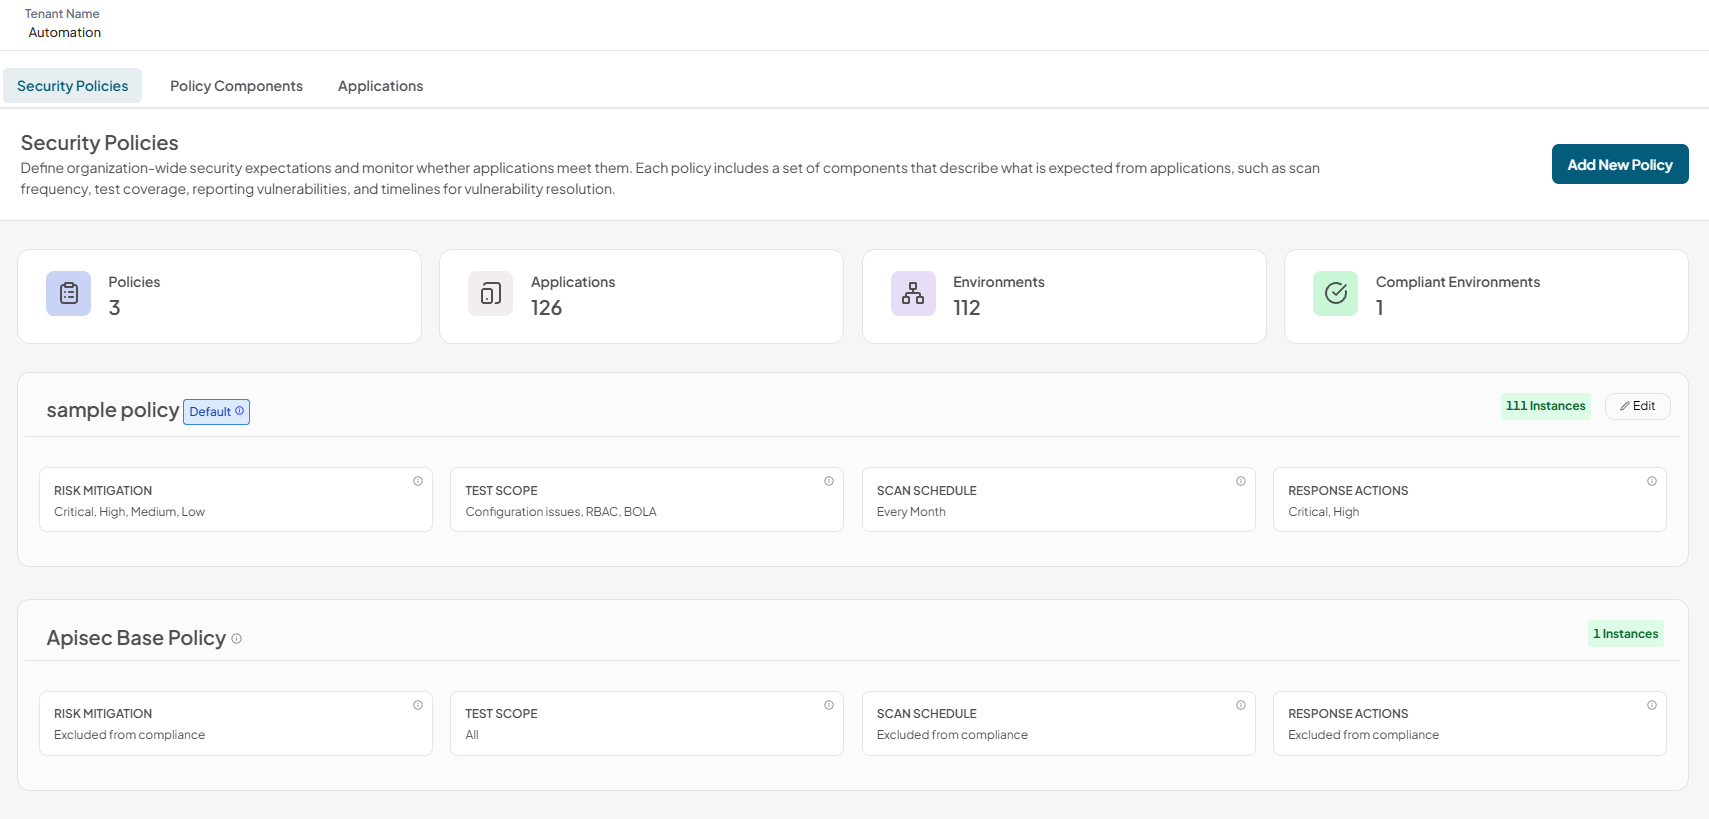
Verify the newly created policy.
 note
noteThe default policy is the policy which will be used to check the compliance of all applications without an assigned policy. A policy can be set as a default only if it has all of its components defined..
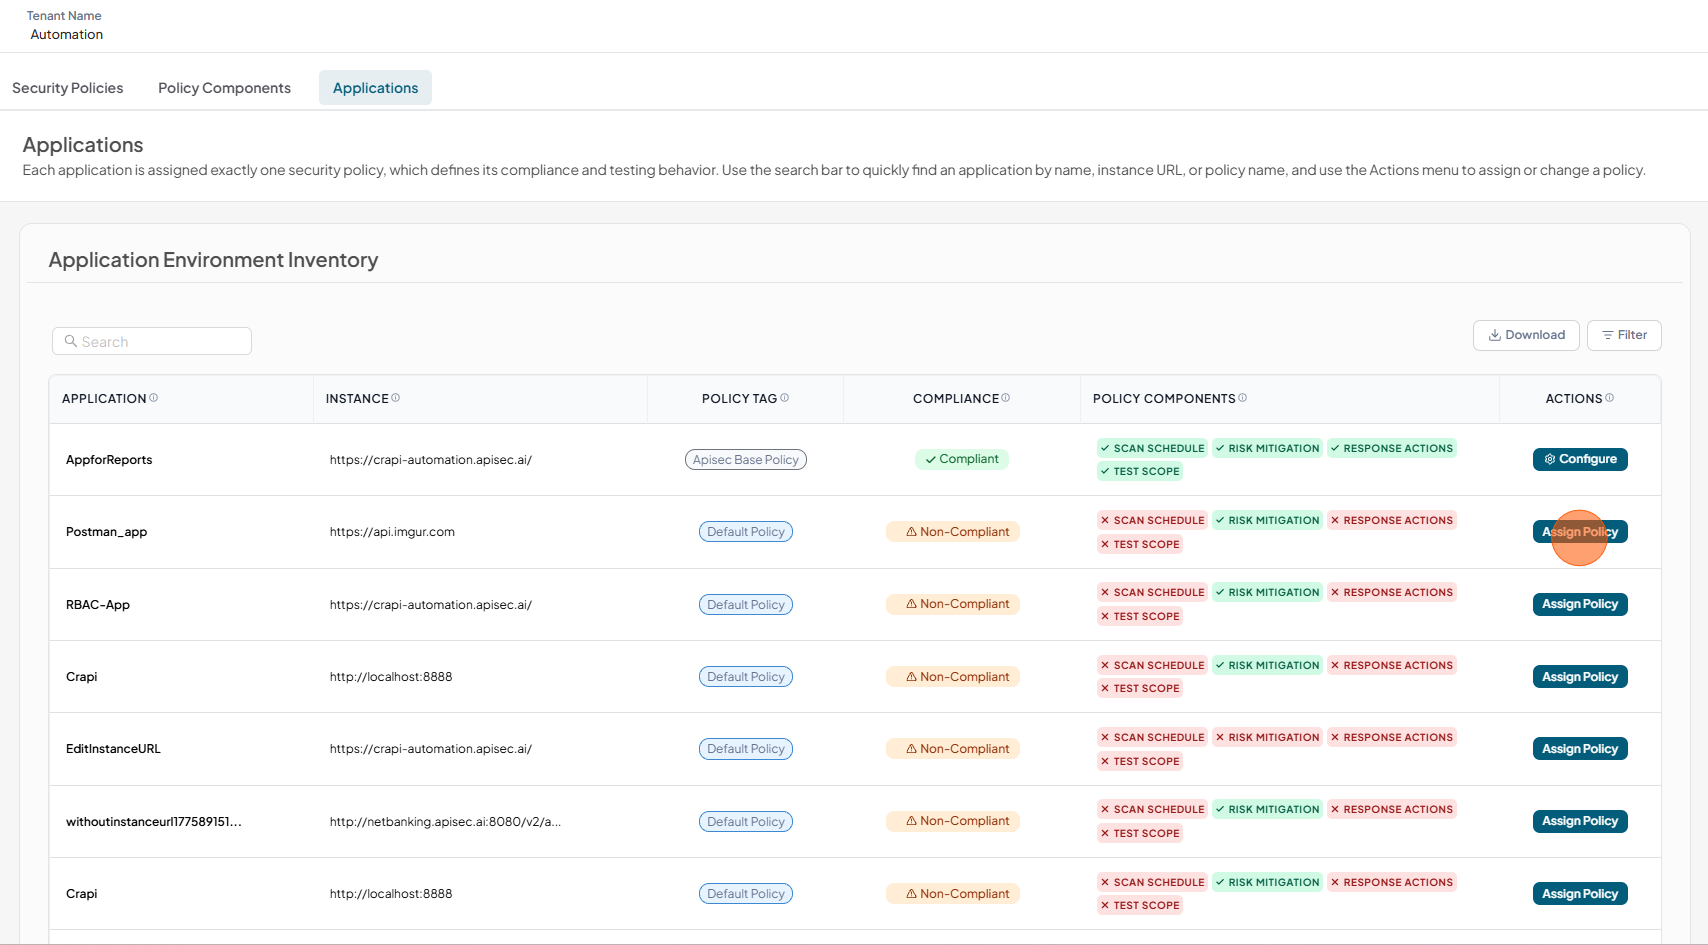
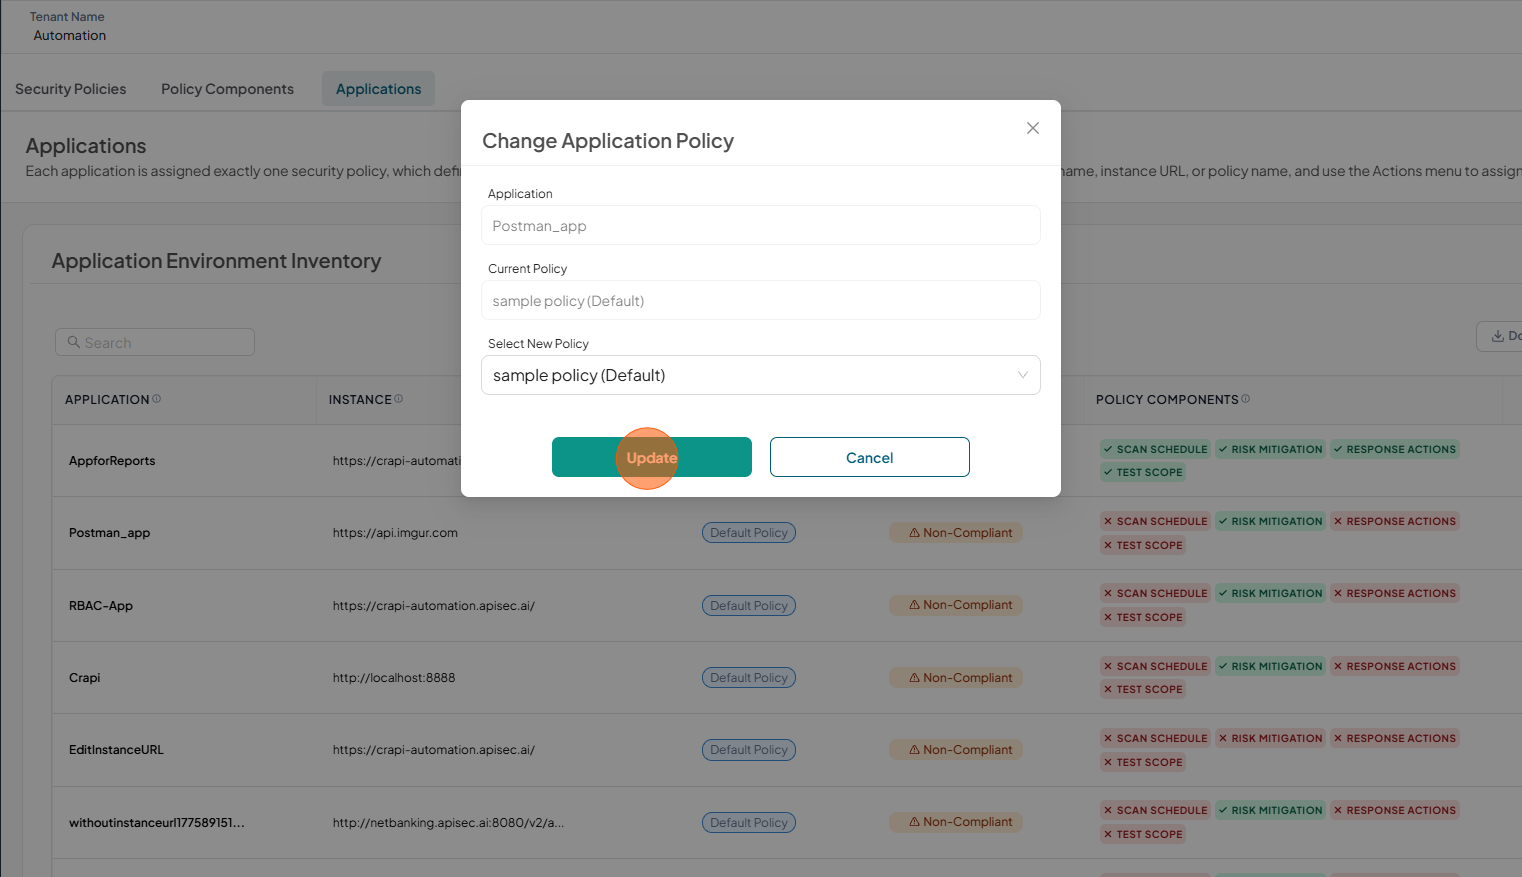
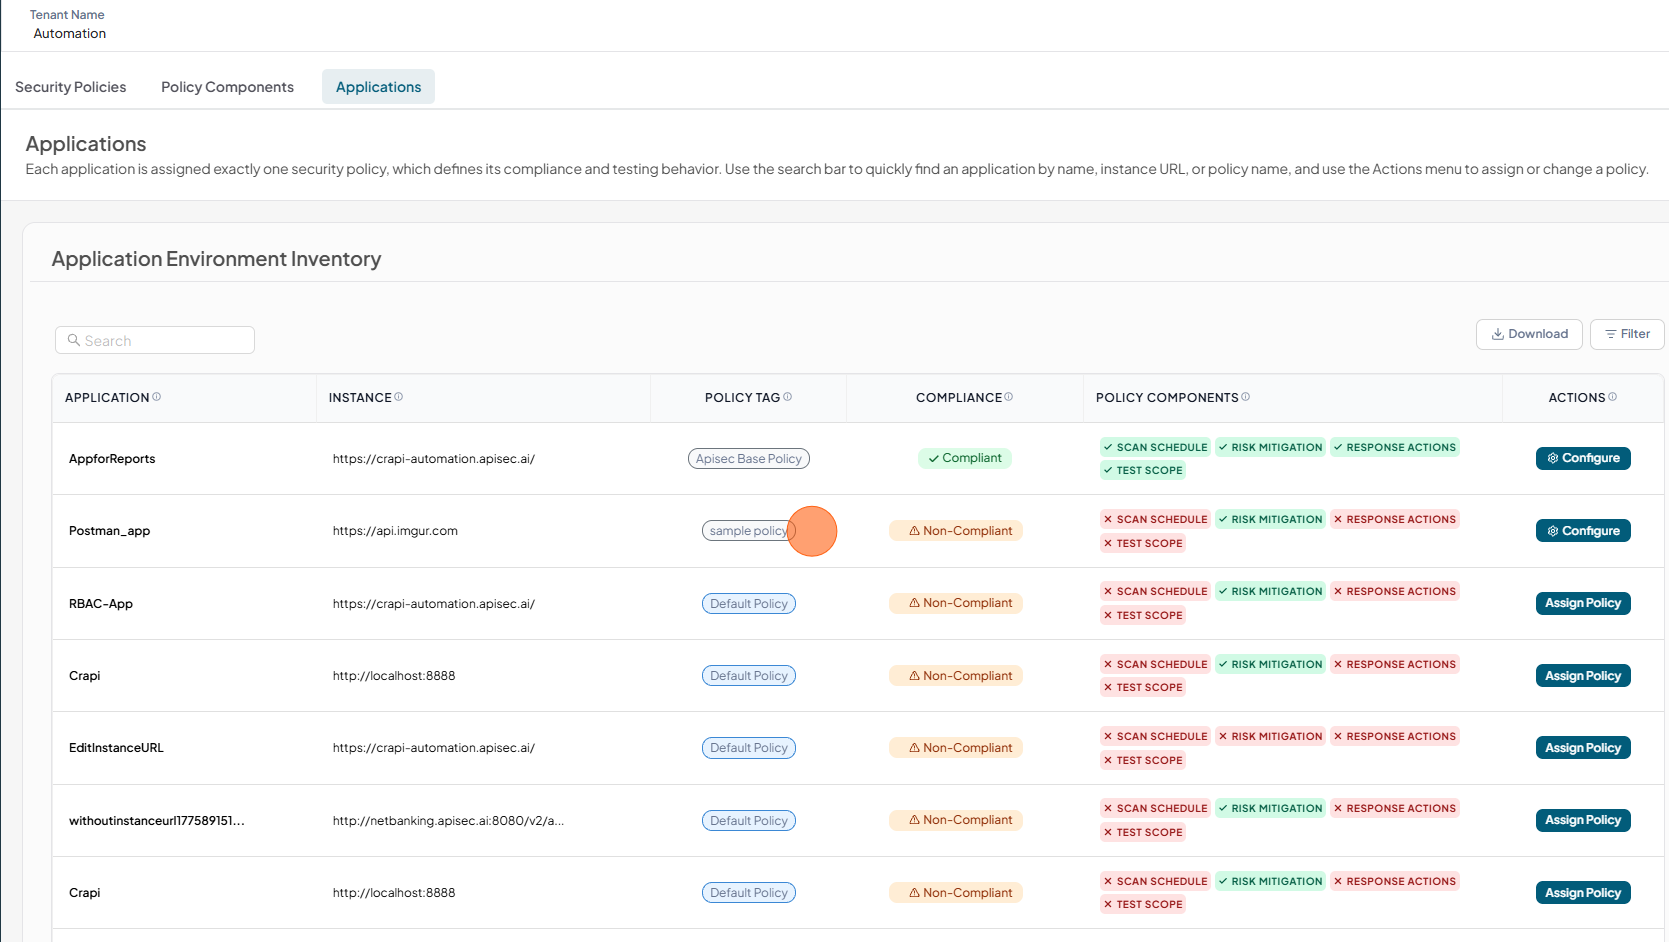
Assigning Policy
If we have only one policy, which applies to all of our applications. To assign policy for the application
-
Click Applications Tab
-
Click Configure of selected Application
-
Select new policy and click Update
-
Verify the new Policy name in the Policy tag. If the application violates its assigned security policy, the Compliance column will show "Non-Compliant". Policy Component column shows all the components and their status
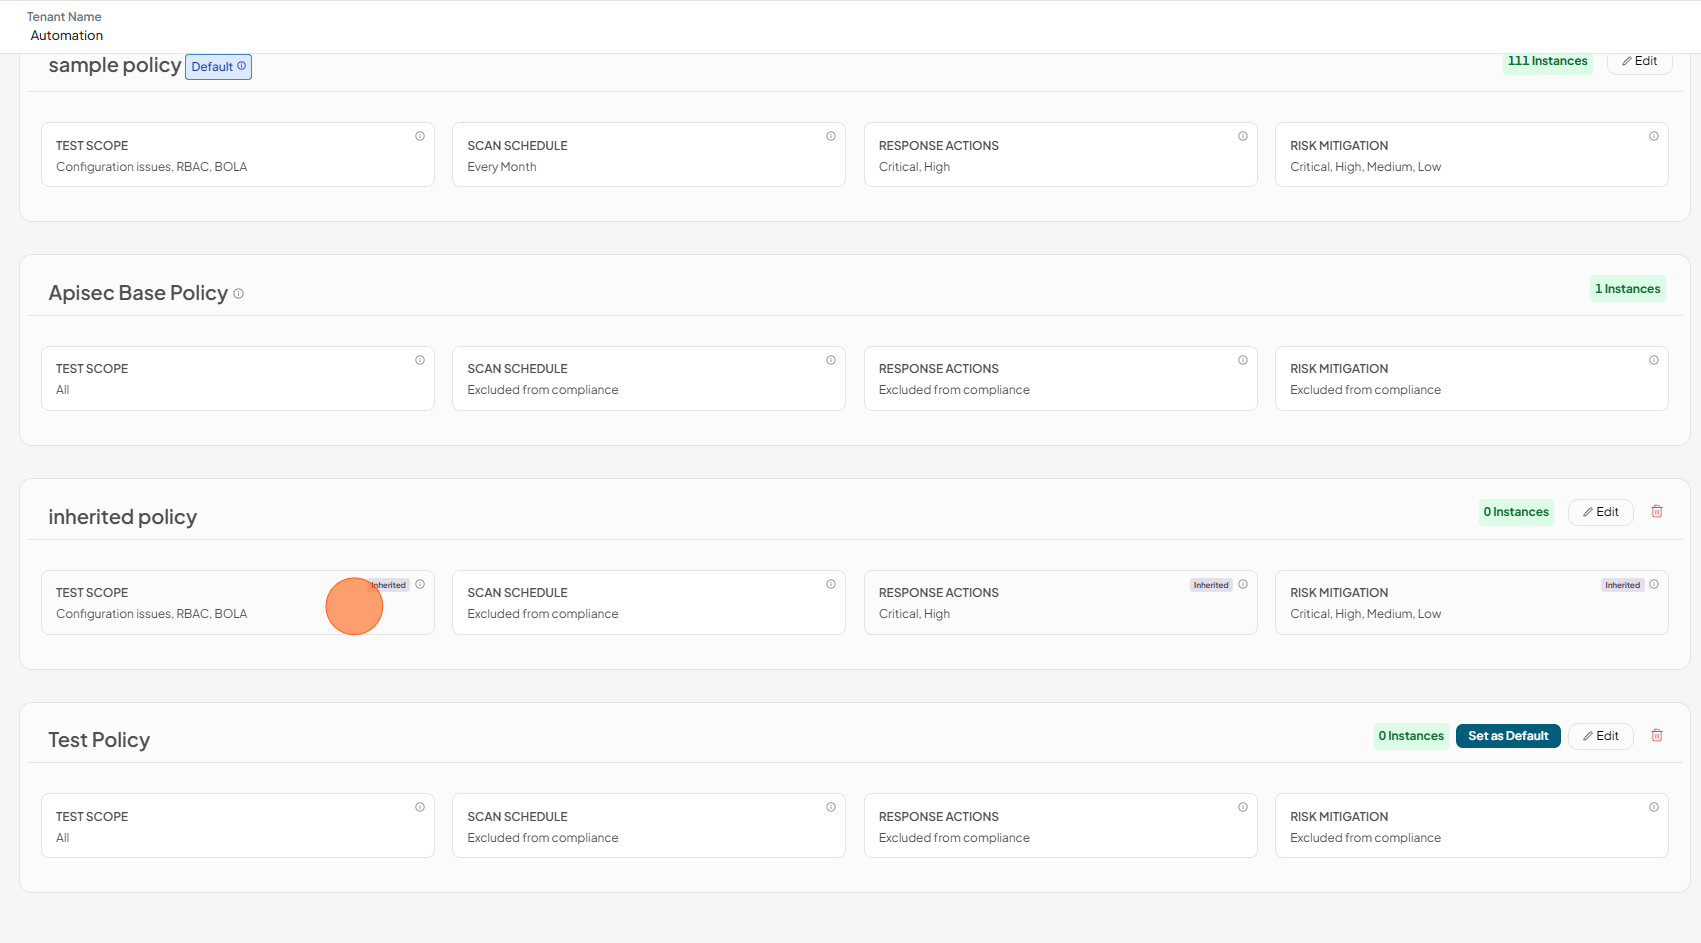
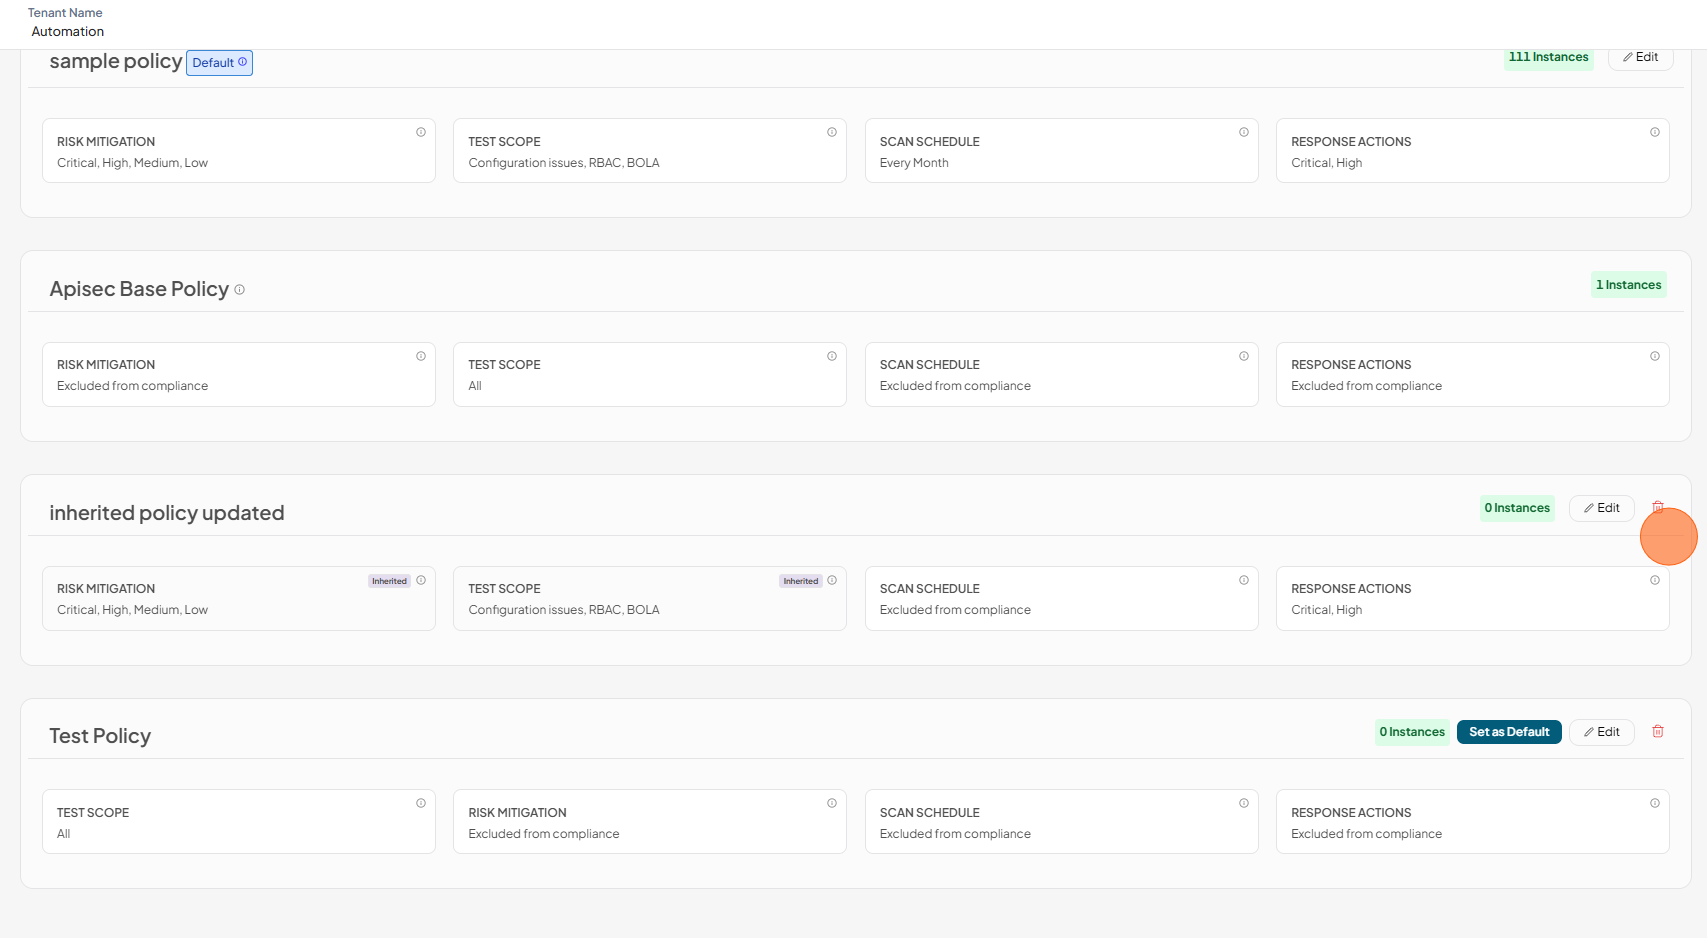
Policy Inheritance
Policies can inherit components from the default policy to allow overriding specific components. If the default policy changes its components, inherited components will also change.
1.Click Add New Policy
2.Enter policy information
3.In Select Policy Components, Select any one component
4.Review Policy Configuration and Click Create Policy
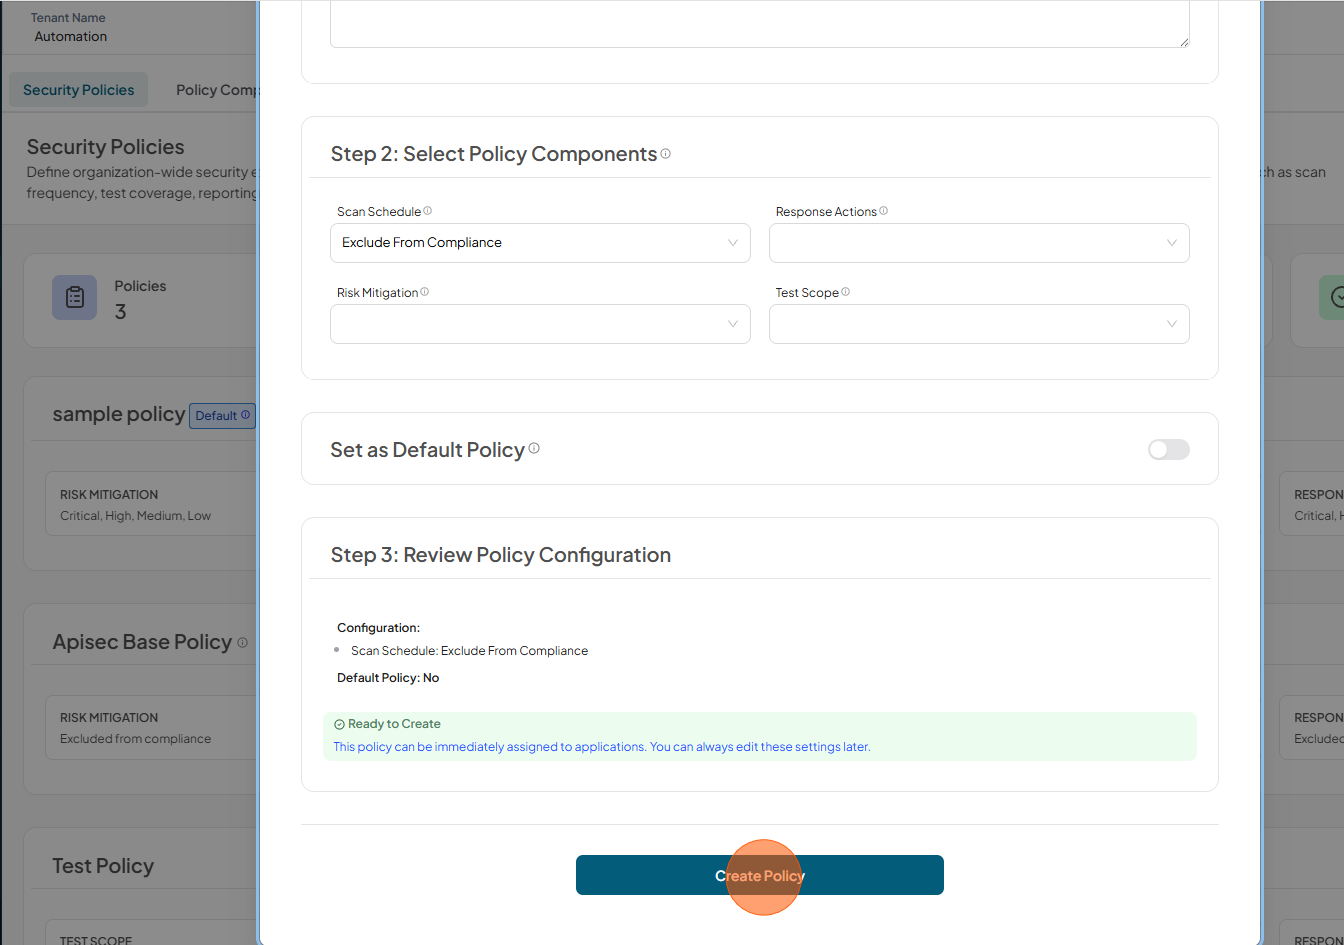
6.Verify the Policy and Observe the components marked as Inherited components
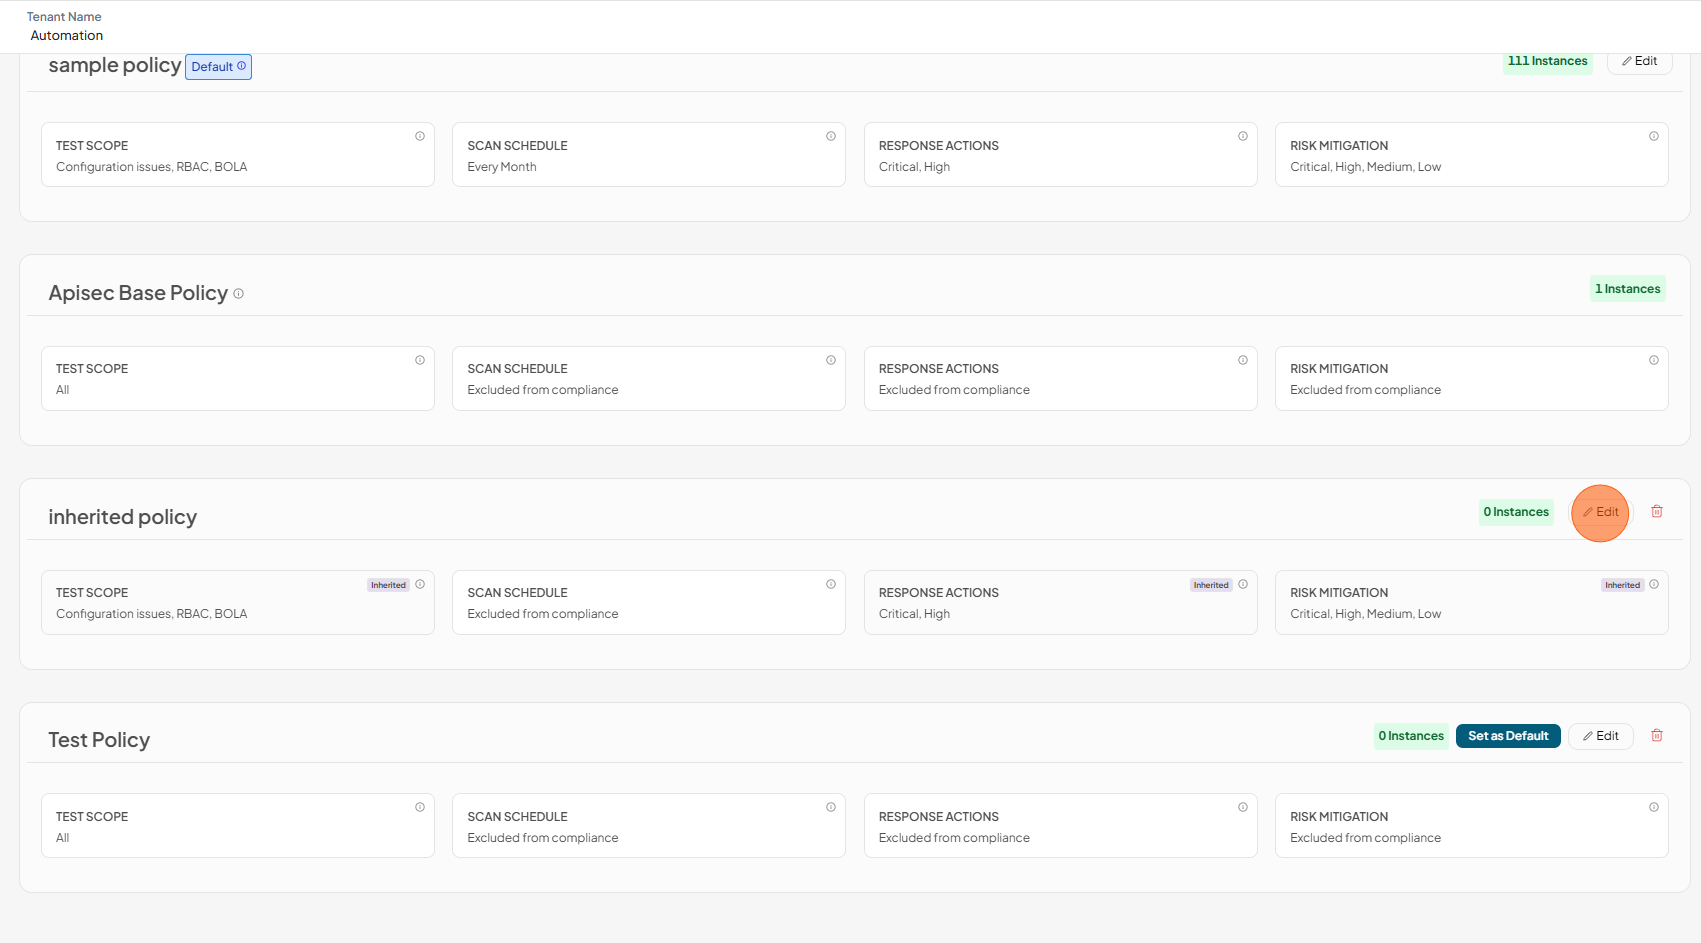
Edit Policy
To edit policy
-
Click on Edit
-
You can Update the Policy inormation or change the policy components
-
Review and Click Update Policy
Delete Policy
To Delete Policy
-
Click Delete for the selected policy
2.Click Confirm to delete
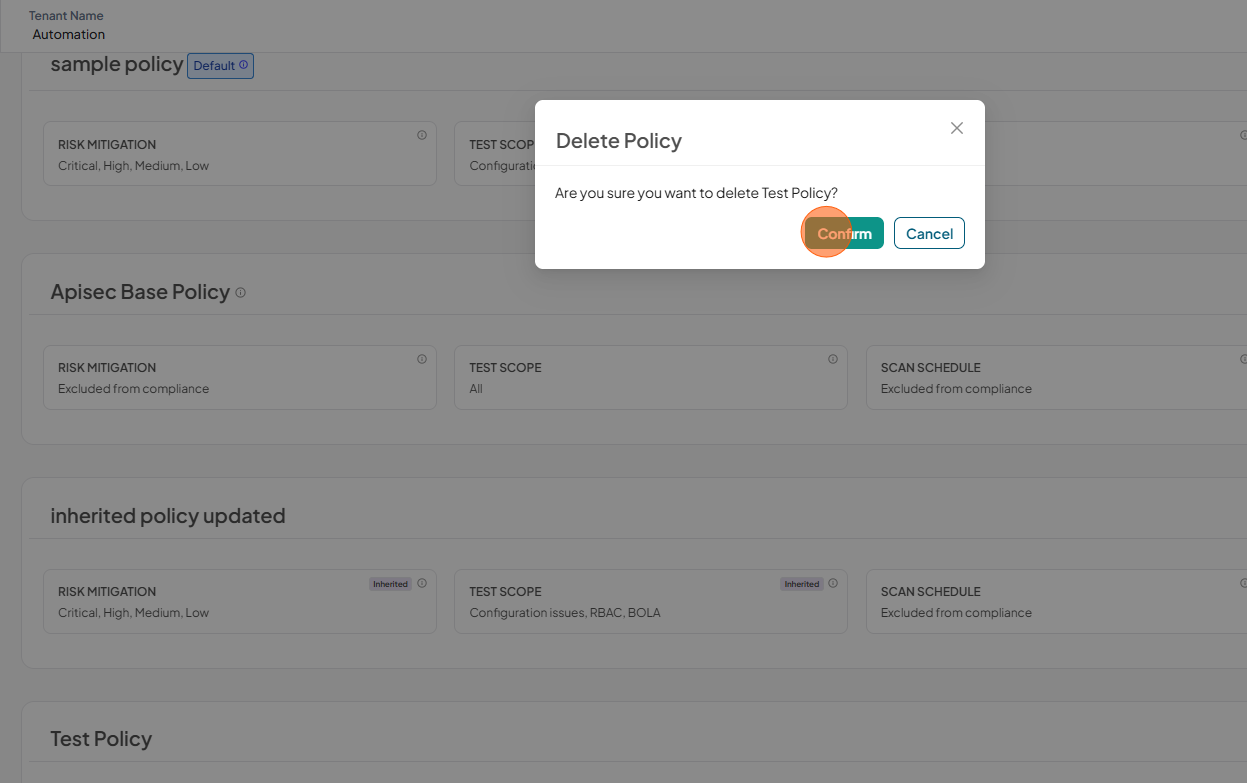
3.Policy has been deleted successfully
The default policy cannot be deleted.
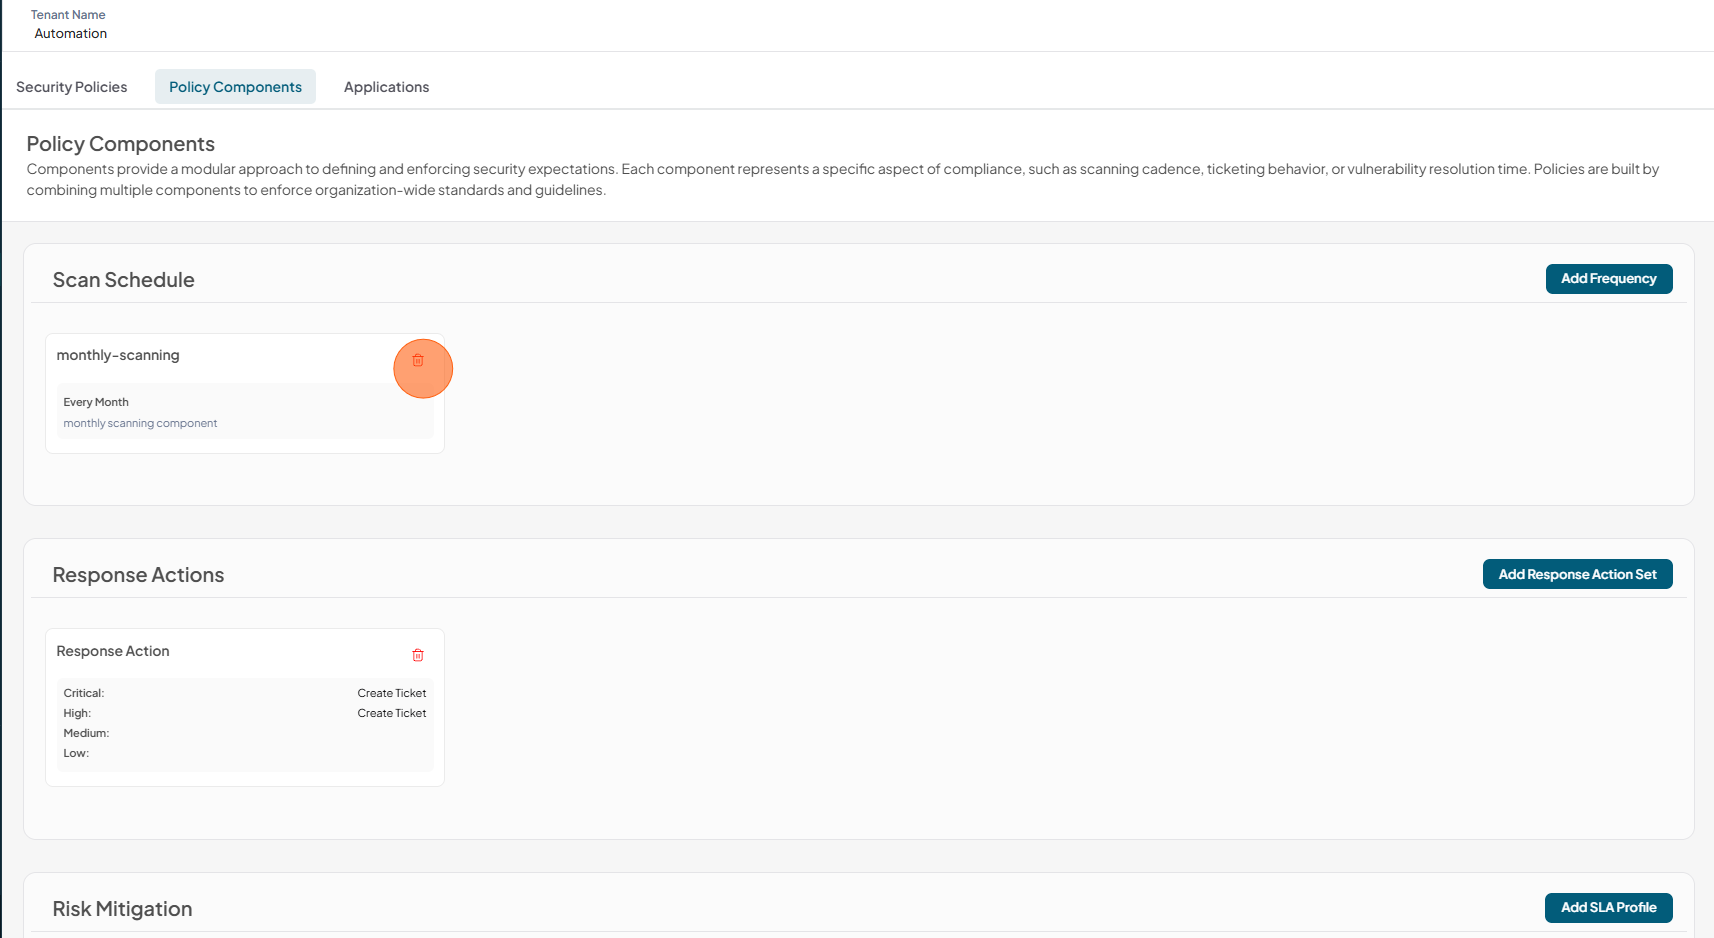
Delete Component
To delete component
-
Click Policy Components tab
-
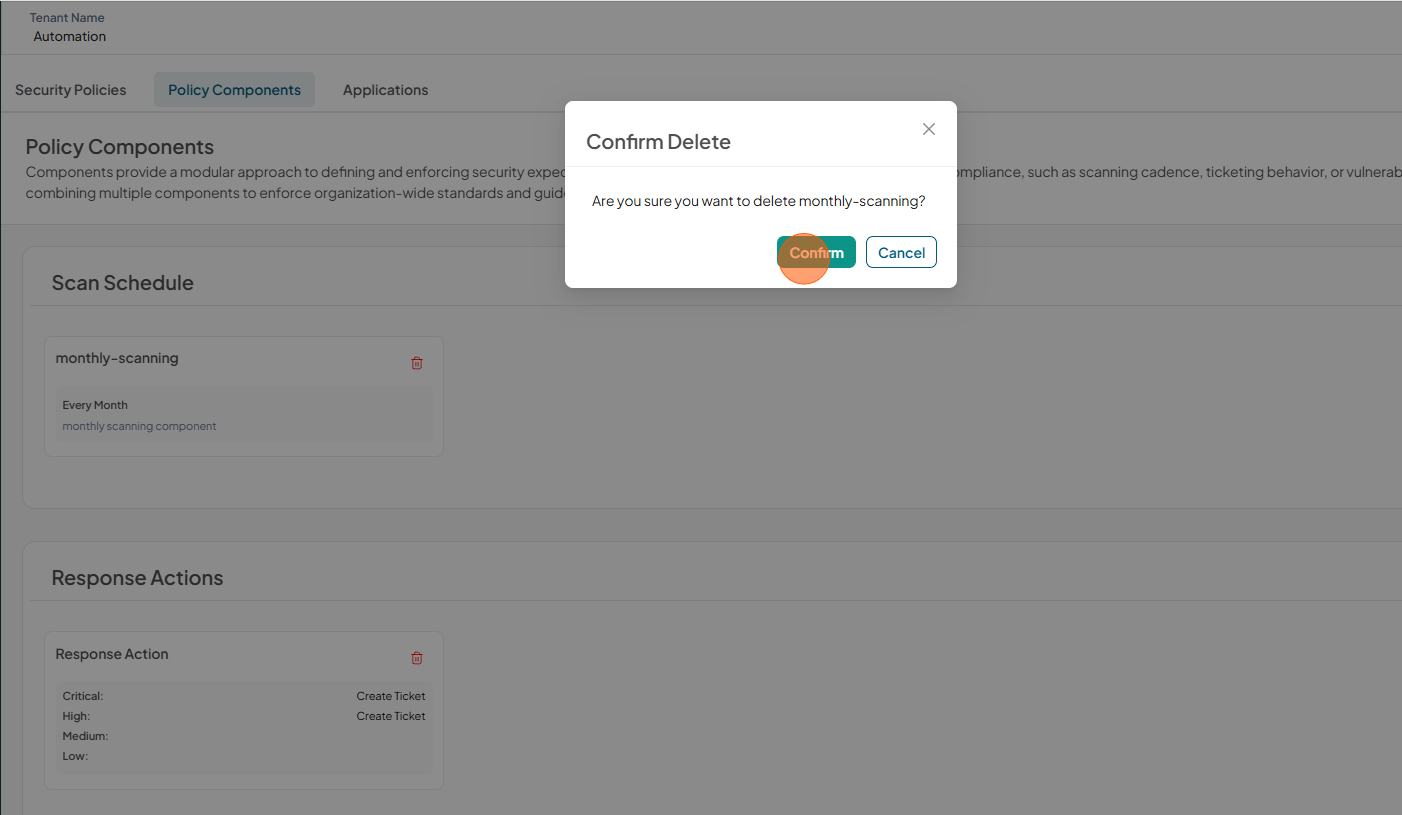
Click Delete for selected component
-
Click Confirm to delete
-
Component has been successfully deleted
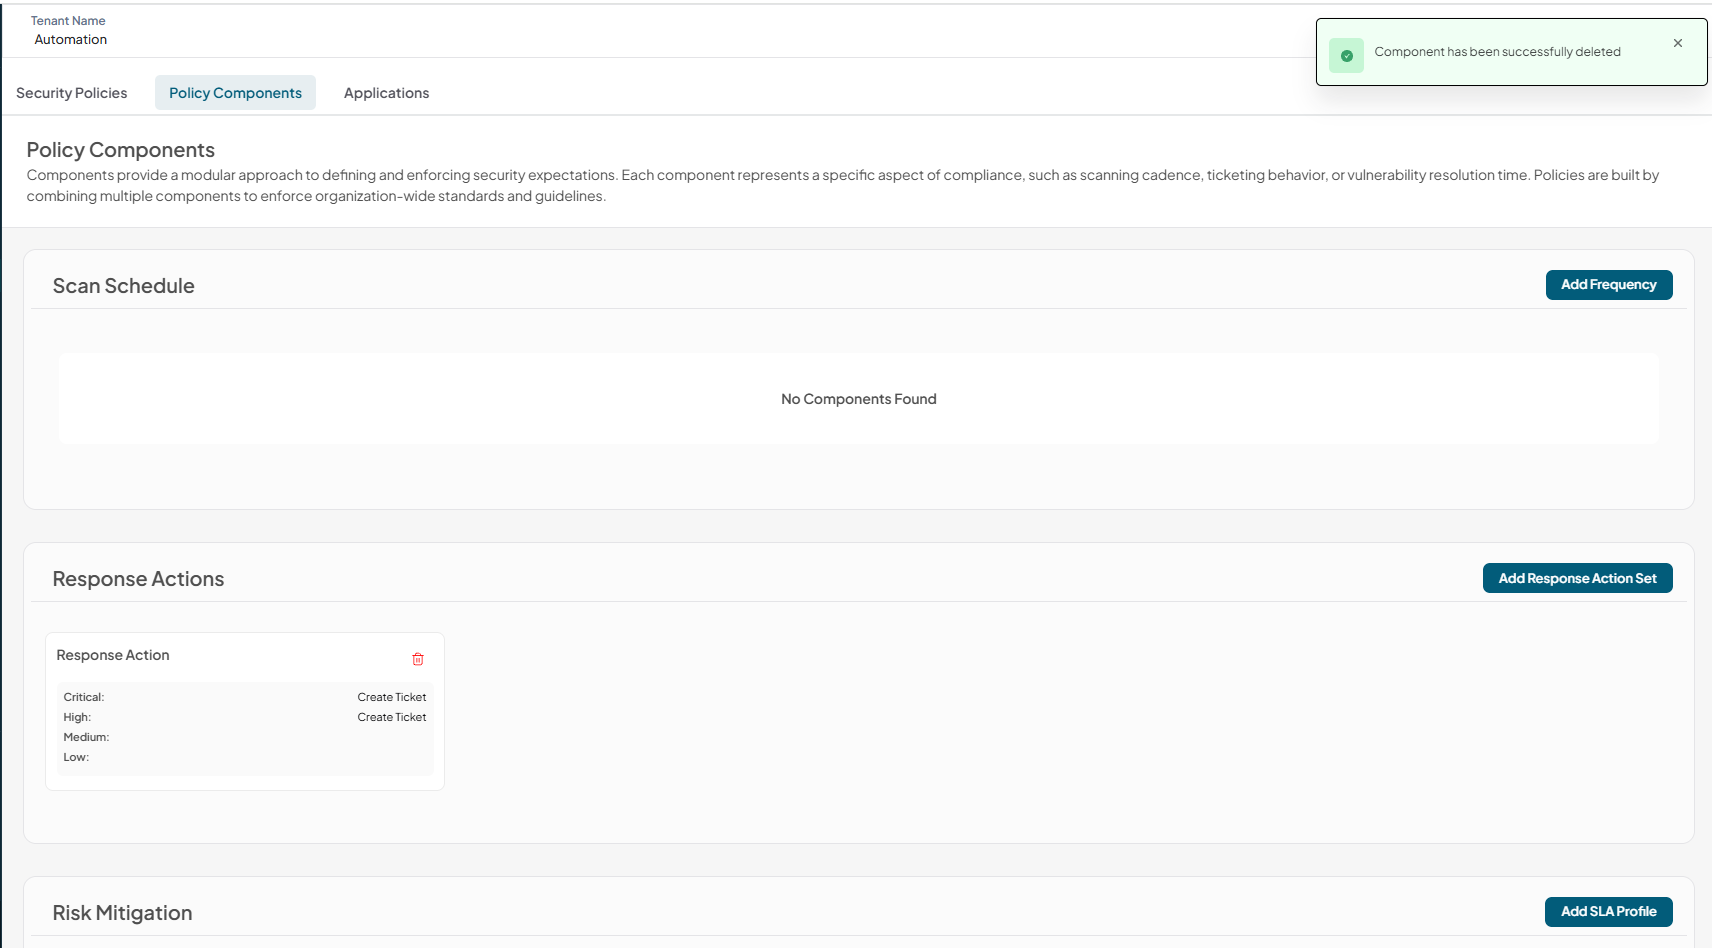
Components that are currently used by a policy cannot be deleted.