Overview: Configuring API Authentication
What is API Authentication?
API authentication is the process of verifying the identity of a client or user before granting access to API endpoints. Proper authentication ensures that only authorized users or applications can interact with protected resources, preventing unauthorized access and potential security threats.
Most APIs require authentication mechanisms such as API keys, OAuth tokens, or bearer tokens to control access and enforce security policies. Configuring authentication correctly is crucial to protect sensitive data, enforce role-based access control, and prevent unauthorized API usage.
Why Configure API Authentication?
1. Ensures Secure Access to API Endpoints
- Prevents unauthorized users from accessing protected resources.
- Validates client identities before allowing API requests.
2. Enforces Role-Based Access Control (RBAC)
- Assigns permissions based on user roles (admin, developer, read-only, etc.).
- Ensures that users only access endpoints they are authorized for.
3. Protects Against API Abuse
- Prevents automated bots from making unauthorized requests.
- Reduces the risk of API scraping, data theft, and denial-of-service attacks.
4. Improves Security and Compliance
- Helps meet industry security standards (e.g., OAuth 2.0, JWT, API Key security).
- Ensures APIs align with regulatory compliance requirements.
Common API Authentication Methods
1. API Key Authentication
- Uses a unique key to authenticate requests.
- Commonly passed in the request headers as Authorization: API_KEY.
2. OAuth 2.0
- Secure framework for token-based authentication and authorization.
- Used for third-party authentication and delegated permissions.
3. Bearer Token Authentication
- Uses access tokens for authentication, often in Authorization: Bearer TOKEN.
- Commonly used for securing APIs in web and mobile applications.
4. HMAC (Hash-based Message Authentication Code)
- Uses cryptographic hashing to verify request authenticity.
- Ensures request integrity and prevents tampering.
5. Certificate-Based Authentication
- Uses SSL/TLS certificates for identity verification.
- Typically used in enterprise environments for mutual authentication.
When to Configure API Authentication?
- Before deploying an API to production to enforce access controls.
- When integrating third-party services to ensure secure authentication.
- During security testing to verify authentication mechanisms are working as expected.
- As part of compliance enforcement to meet industry security standards.
How API Authentication Fits into API Security Strategy
Configuring authentication is a critical first step in API security. It should be complemented by:
- Authorization Controls: Ensuring users can only access what they are permitted to.
- Rate Limiting & Throttling: Preventing abuse from excessive API calls.
- Logging & Monitoring: Tracking authentication attempts and detecting suspicious activity.
By properly configuring API authentication, teams can safeguard APIs from unauthorized access, enforce security policies, and ensure data protection.
Configure Authentication
Navigate to URL
Open your browser and visit: https://<your-tenant>.apisecapps.com
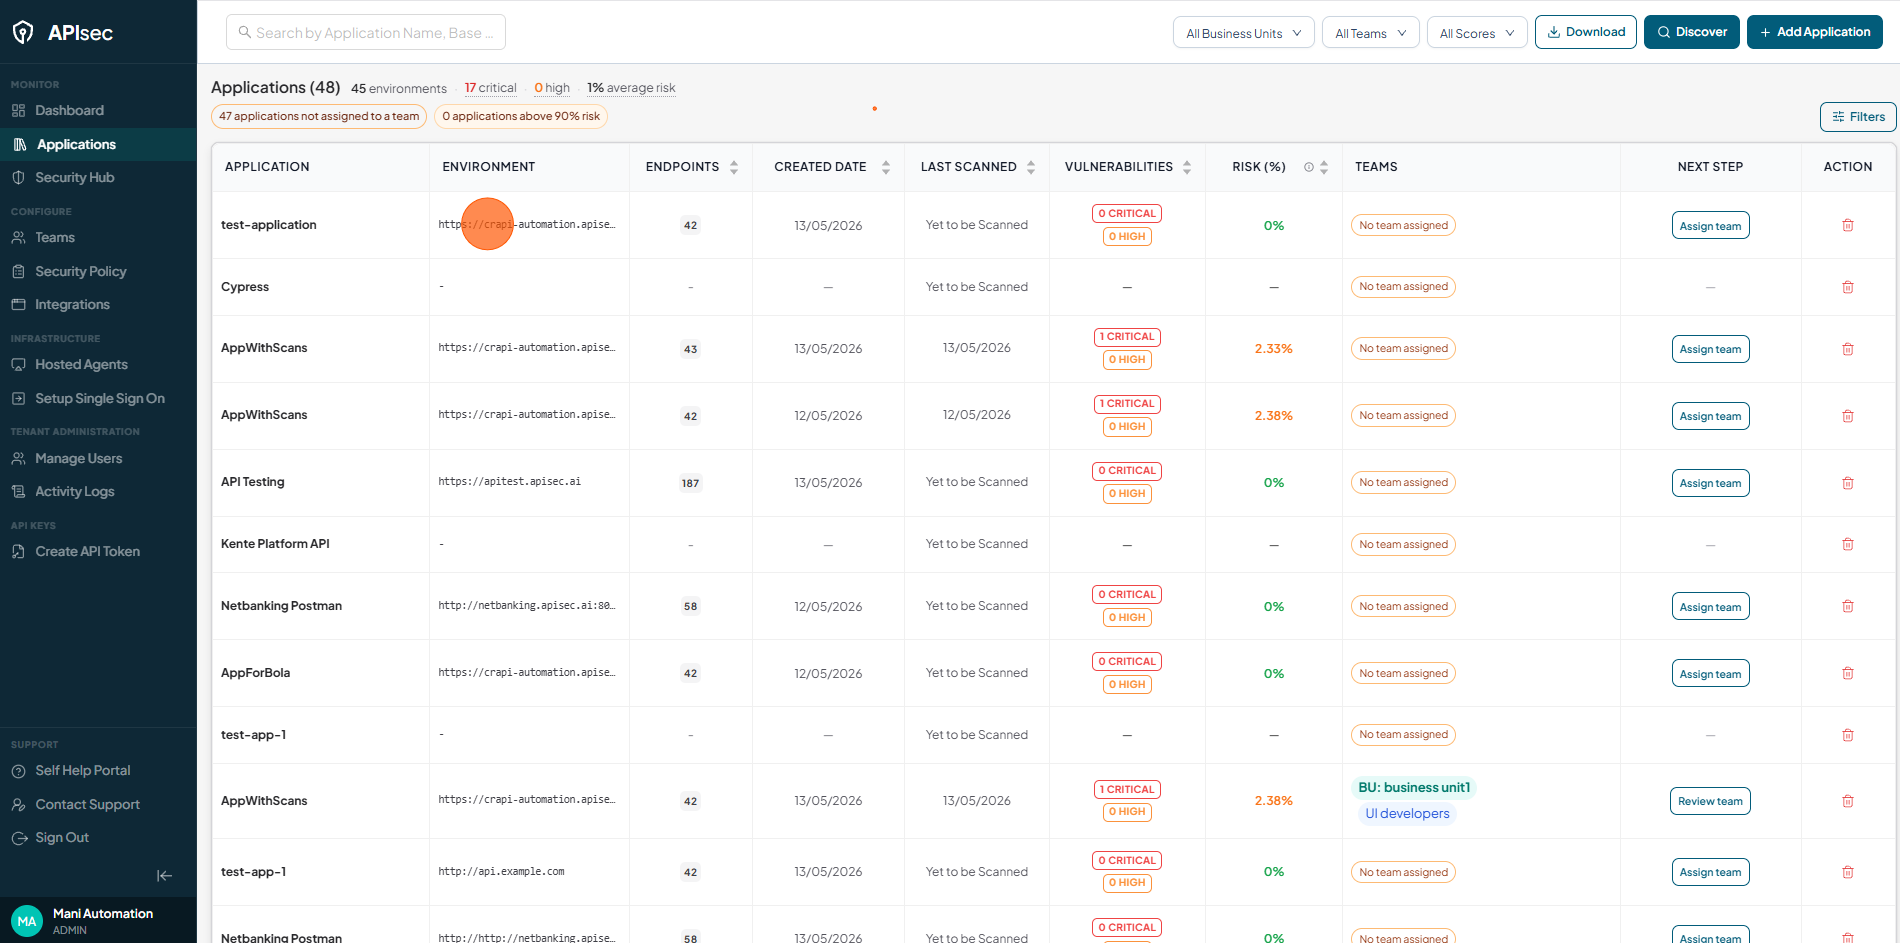
Visit the application
-
Click the required application.
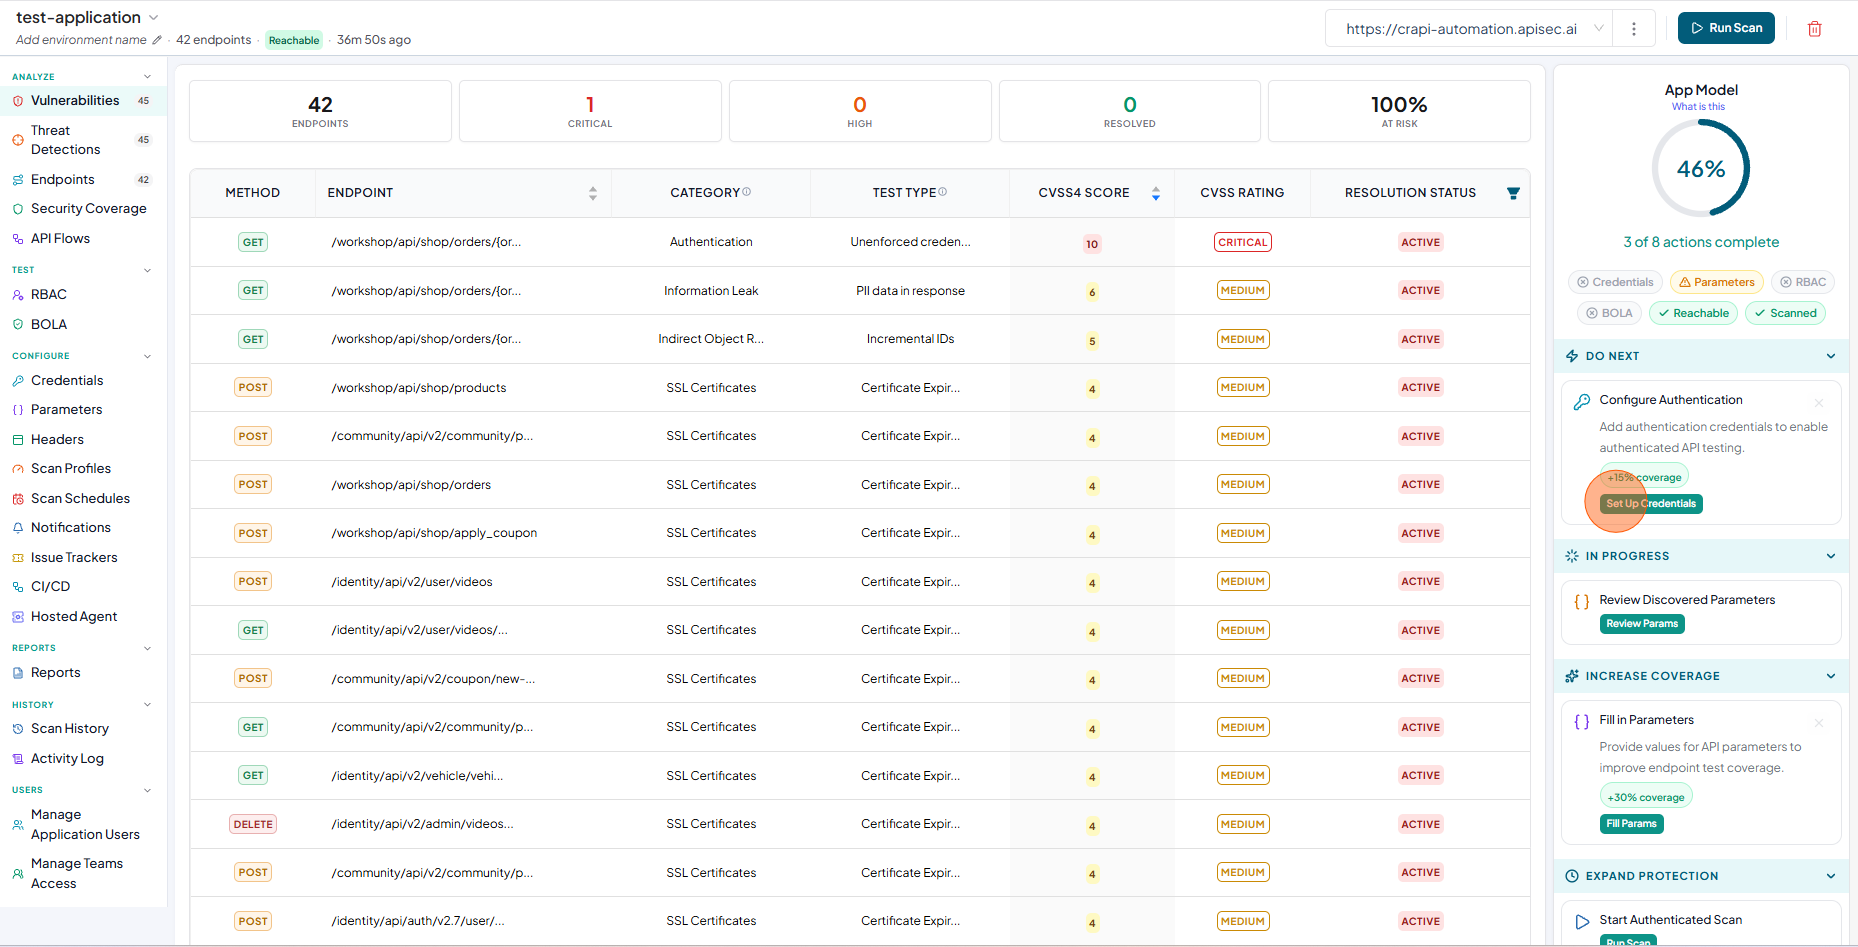
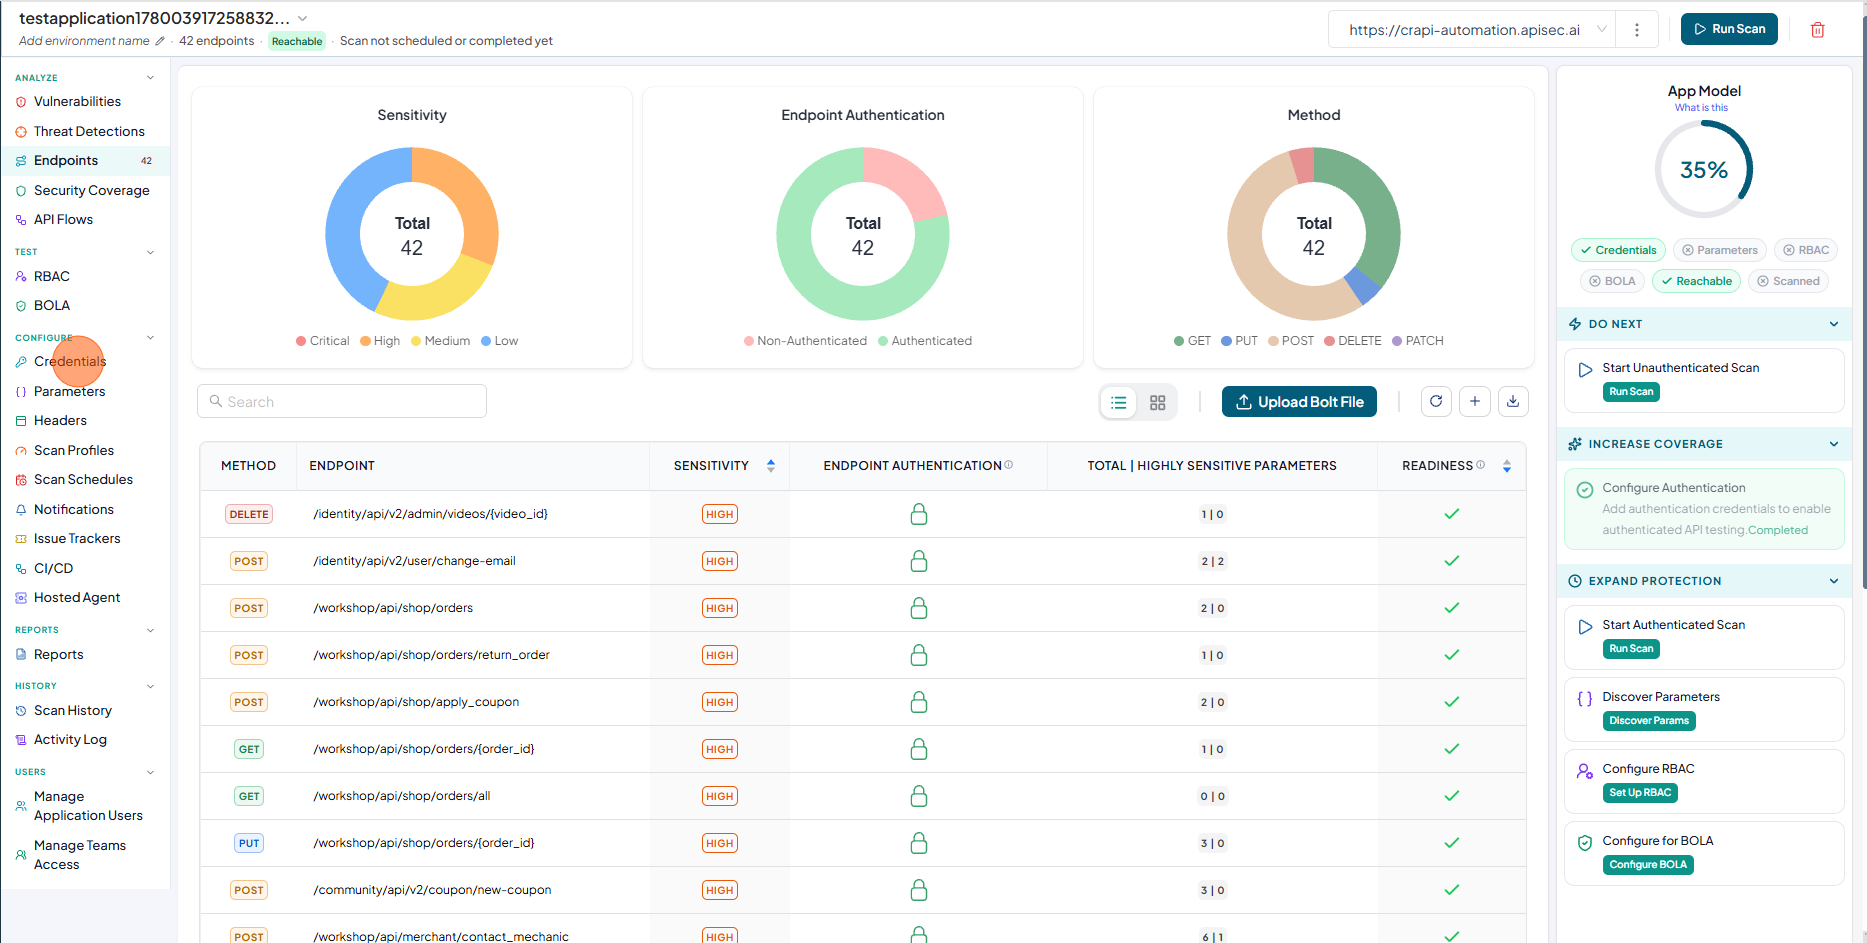
Configure Authentication
There are two ways to start with setting up the authentication.
-
Click Set Up Crdentials from the Guided actions
-
(Or) Click Credentials from sidebar
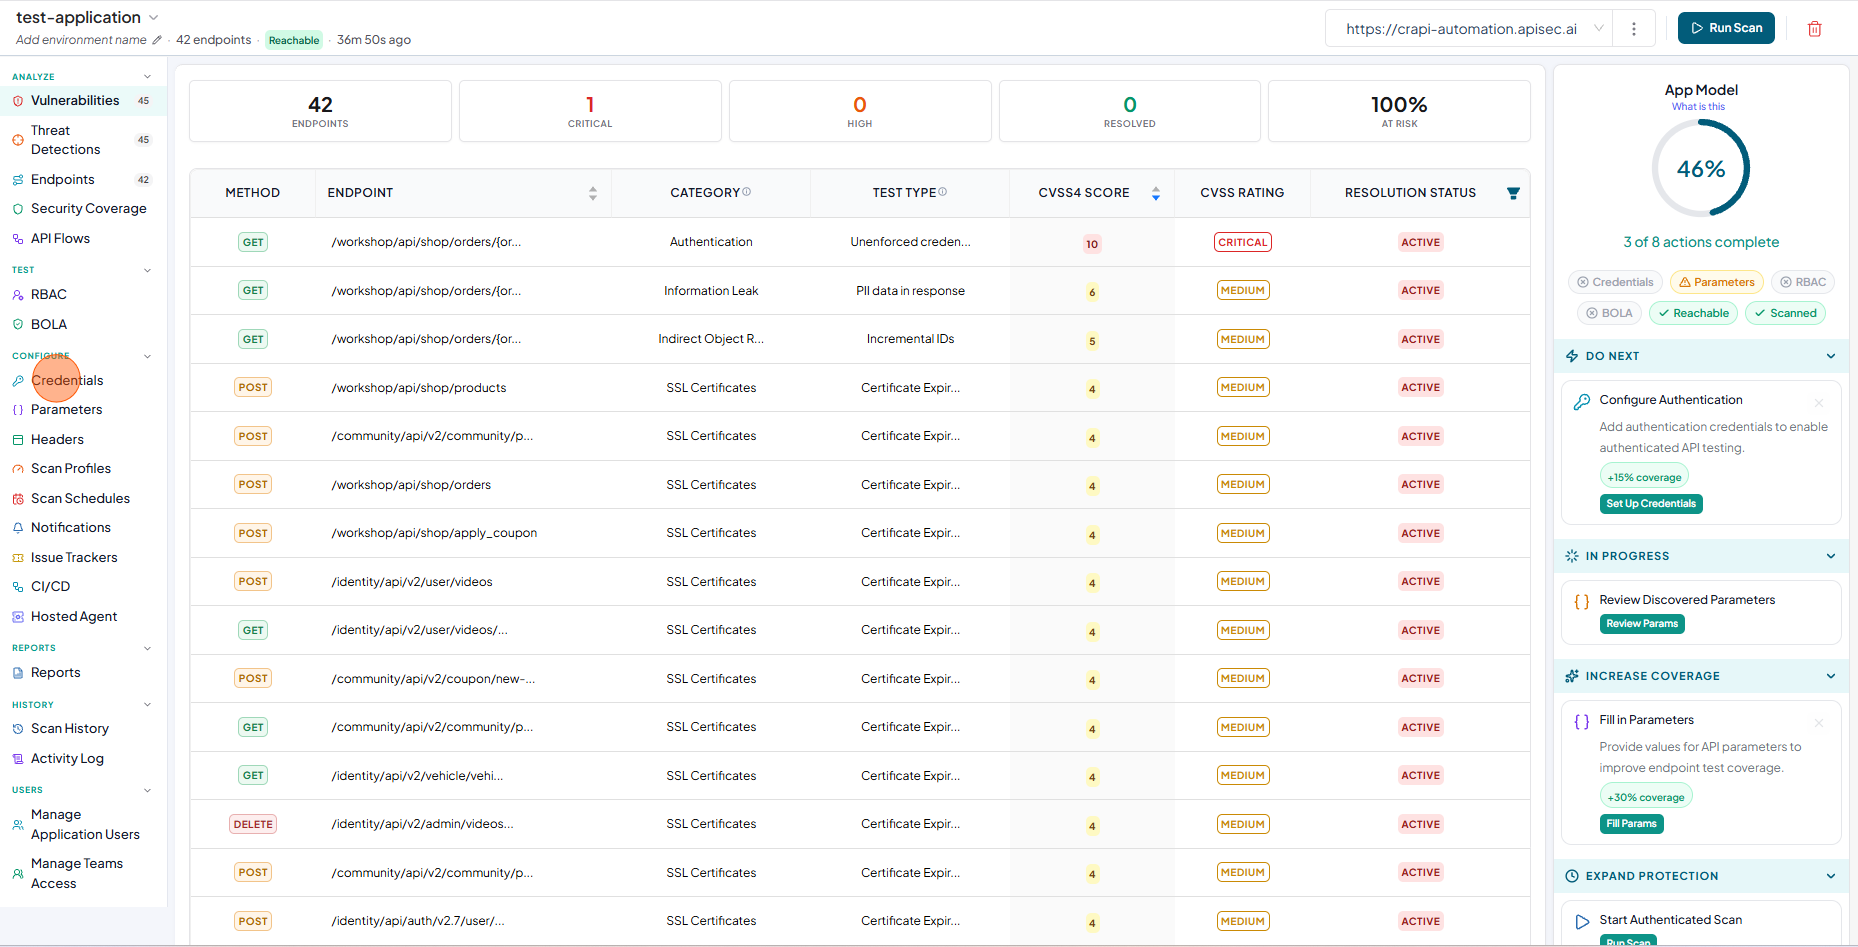
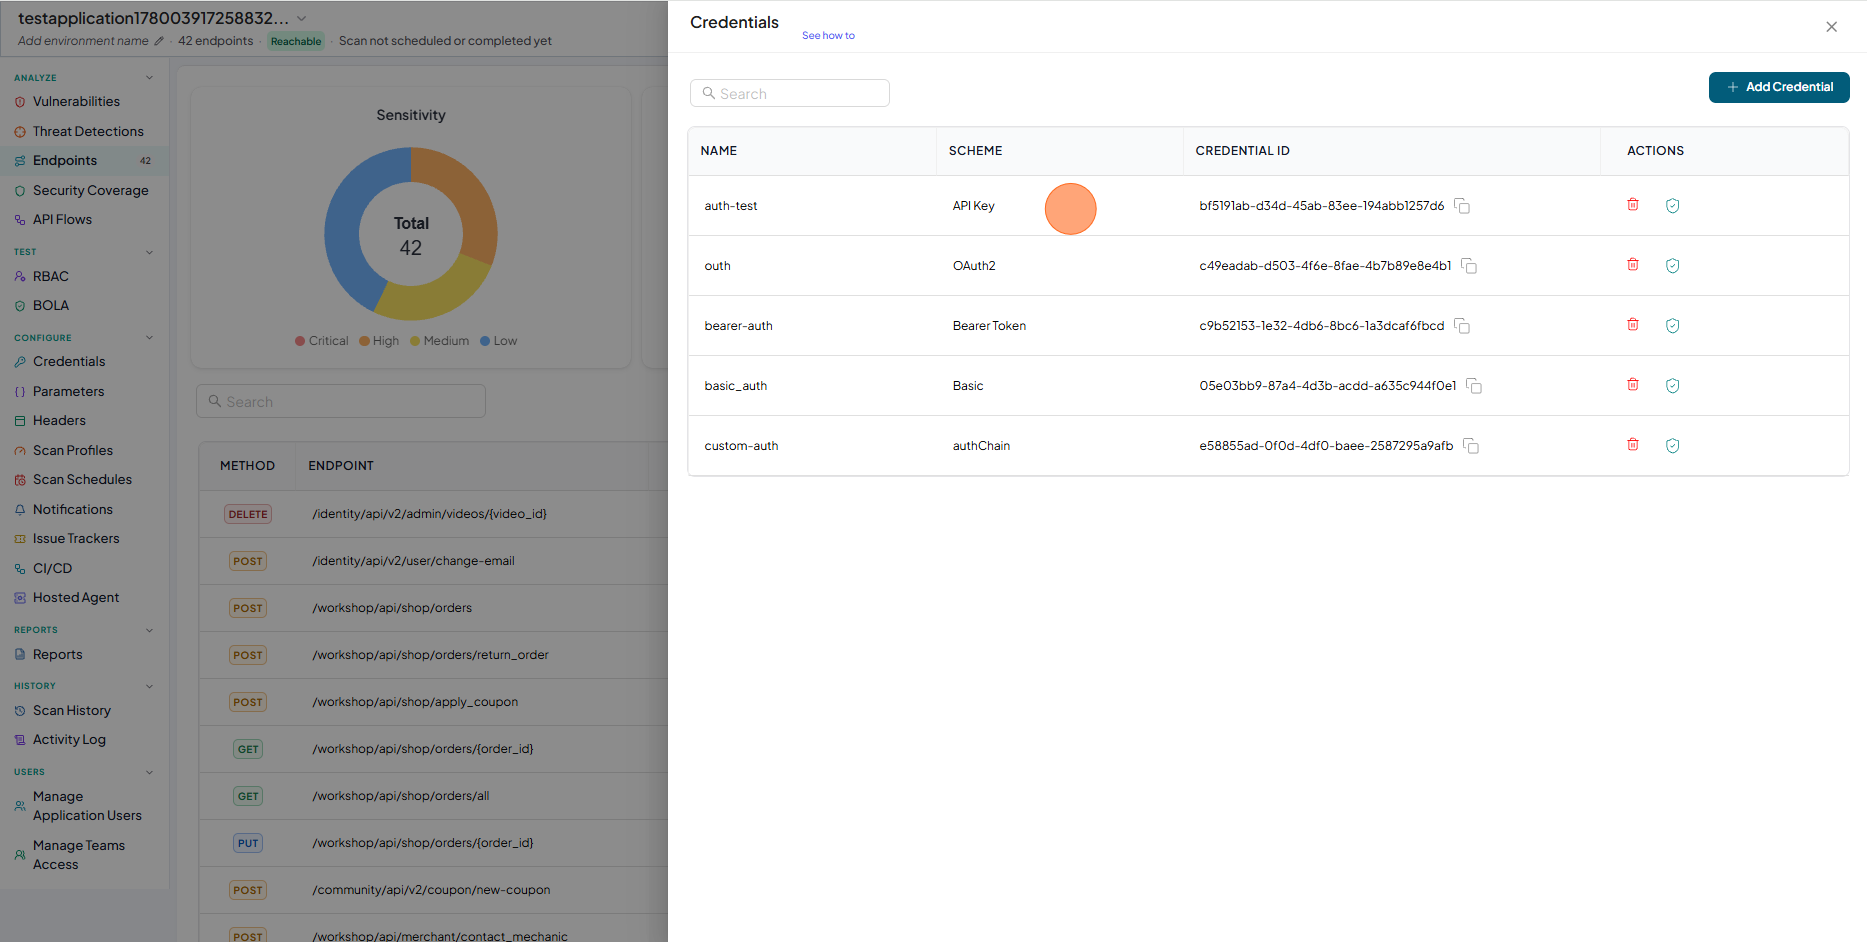
-
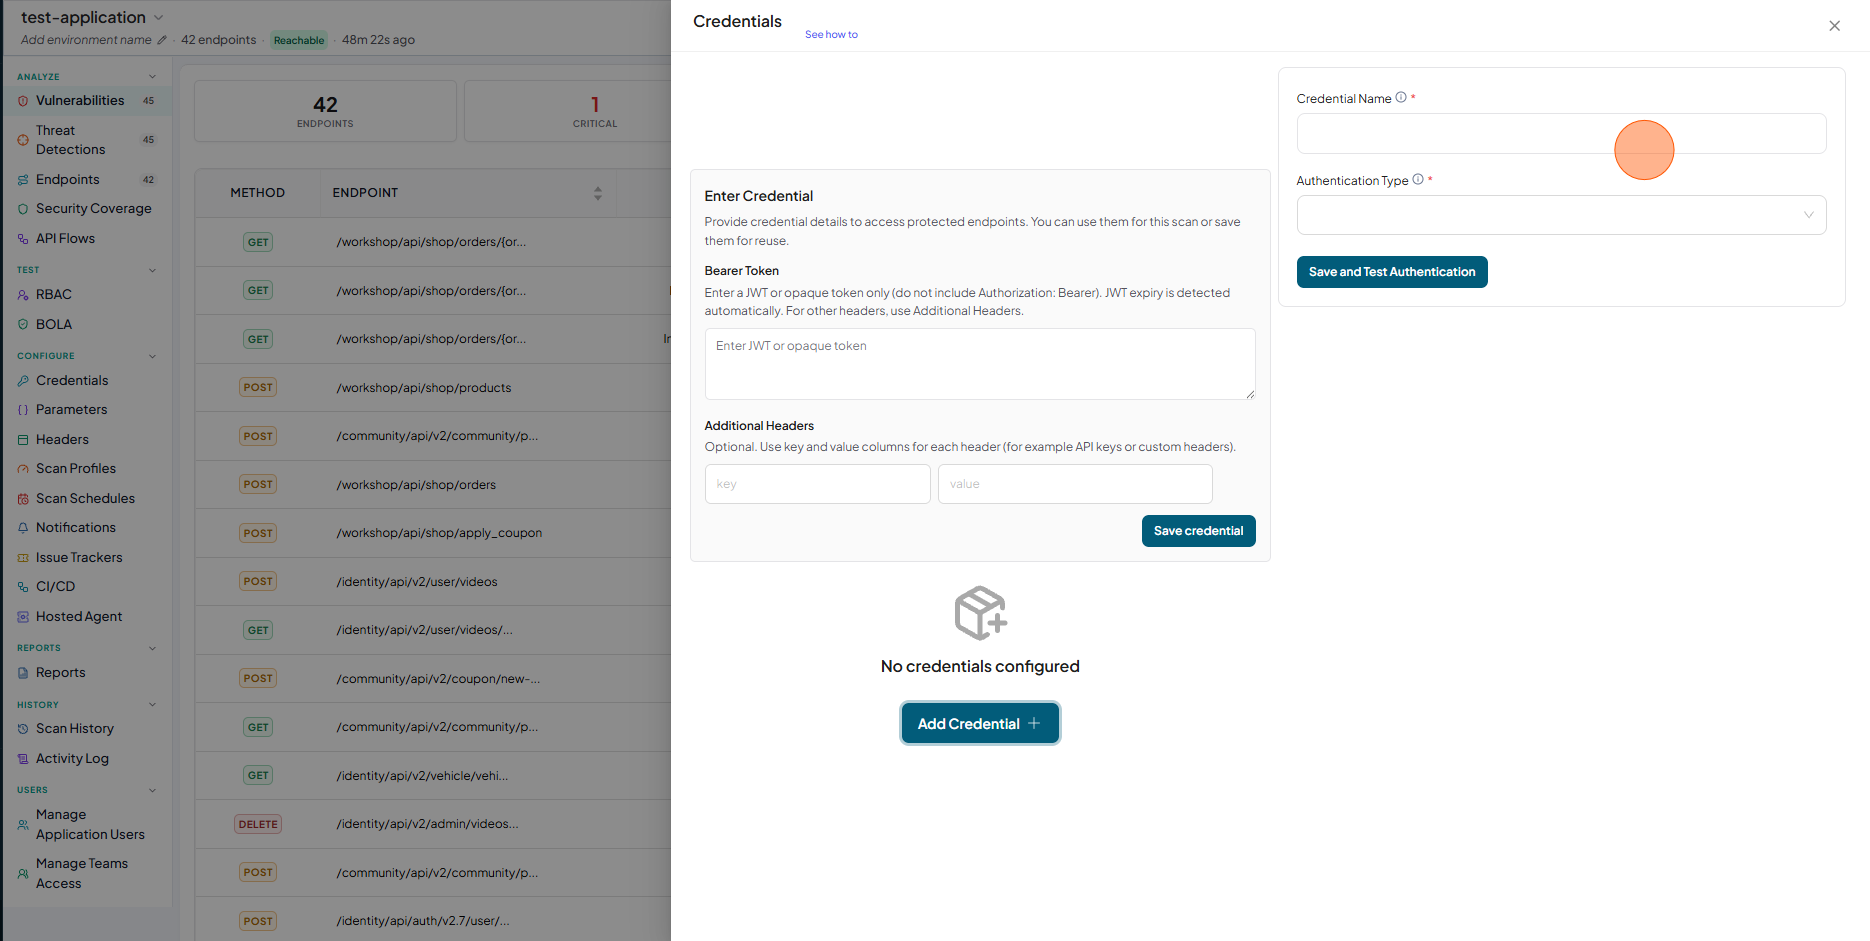
Click on Add Credentials + button
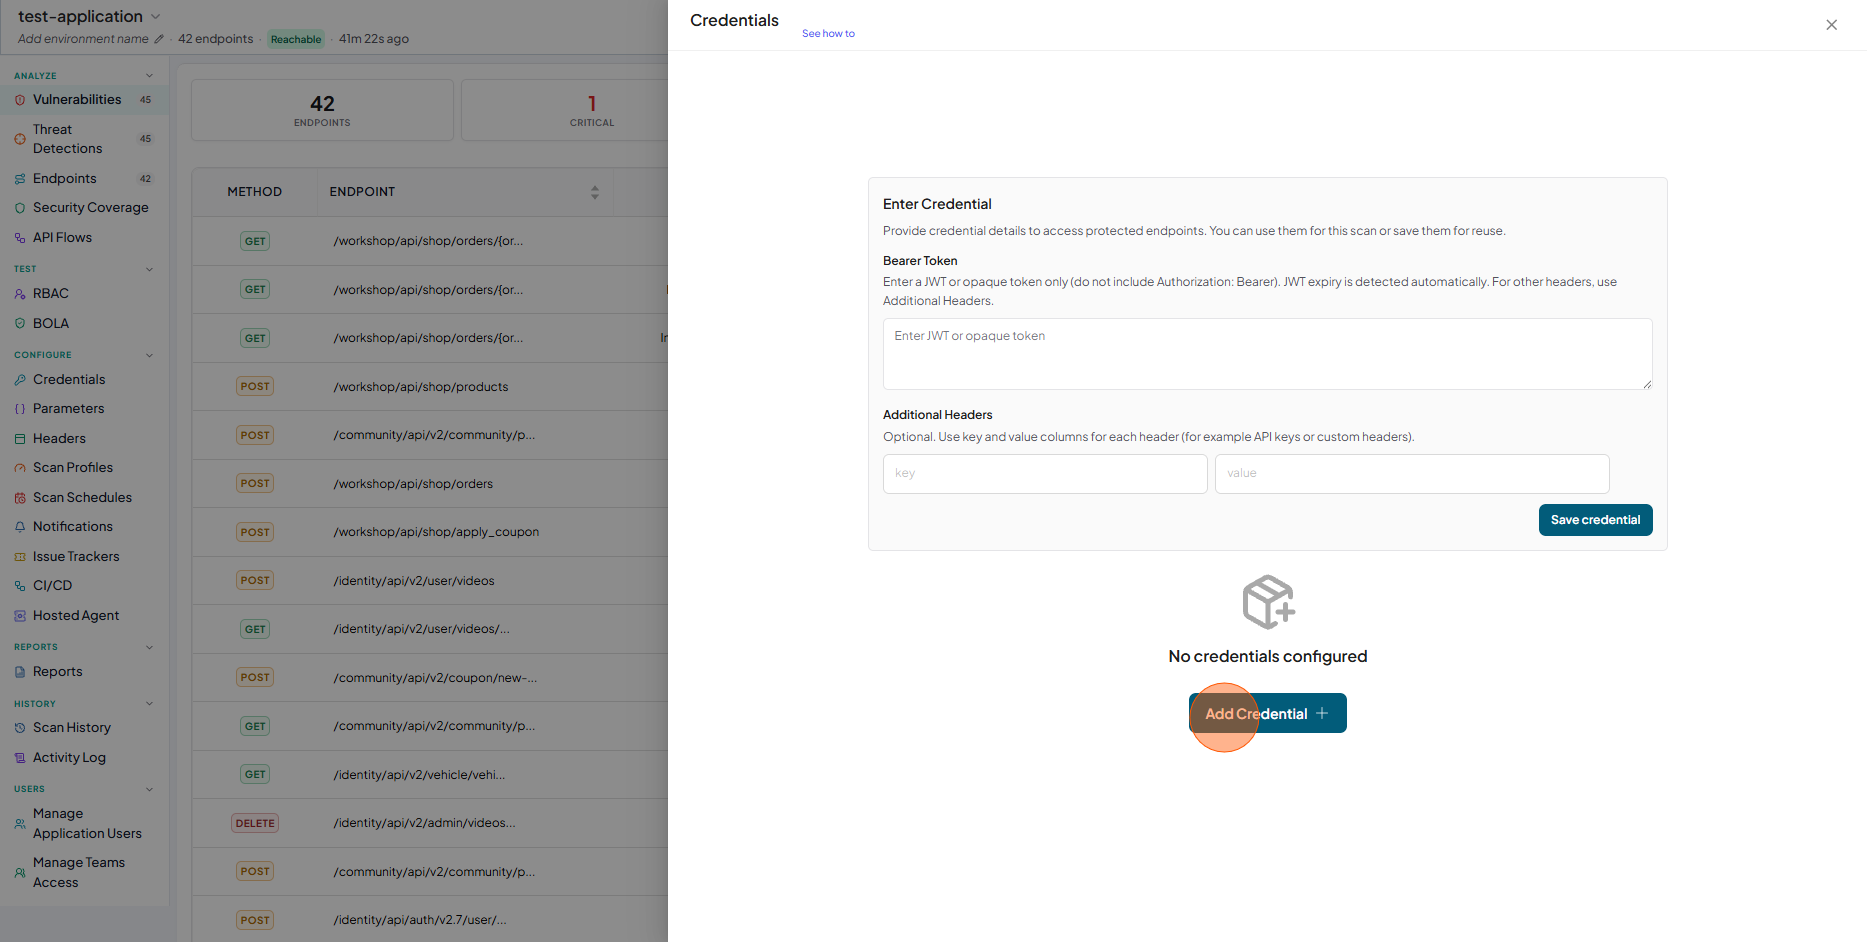
-
The authentication form is displayed
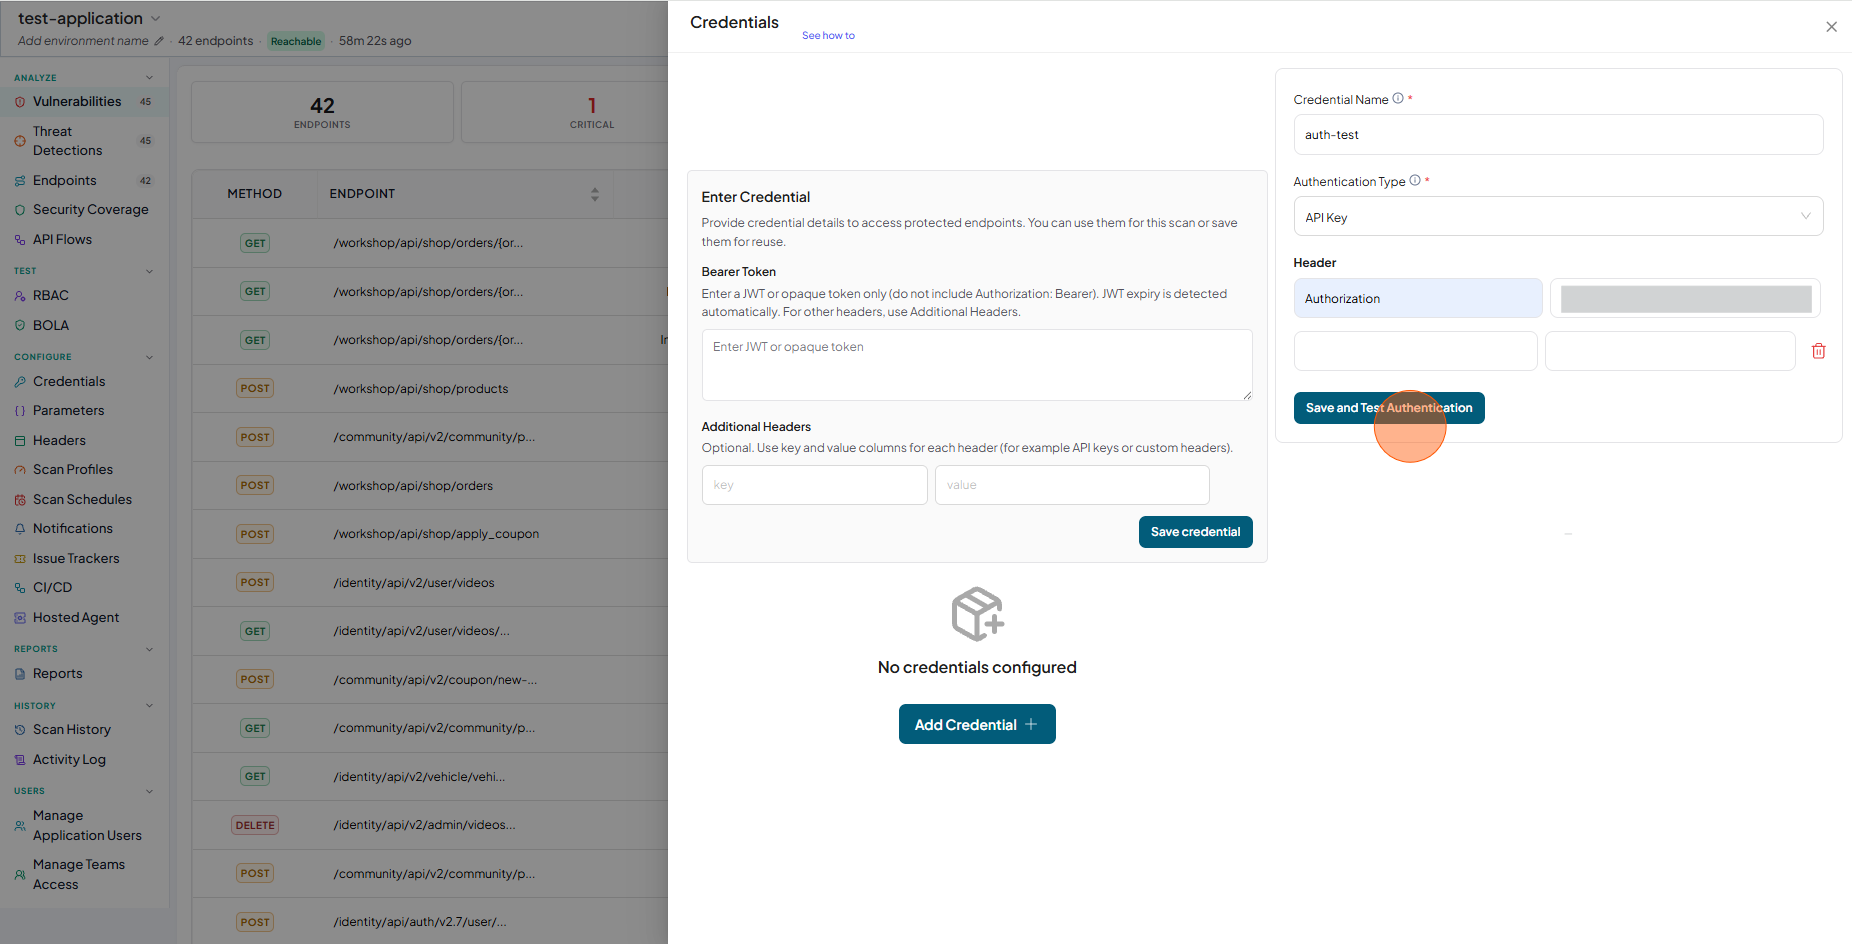
API Key Authentication
-
Type auth name
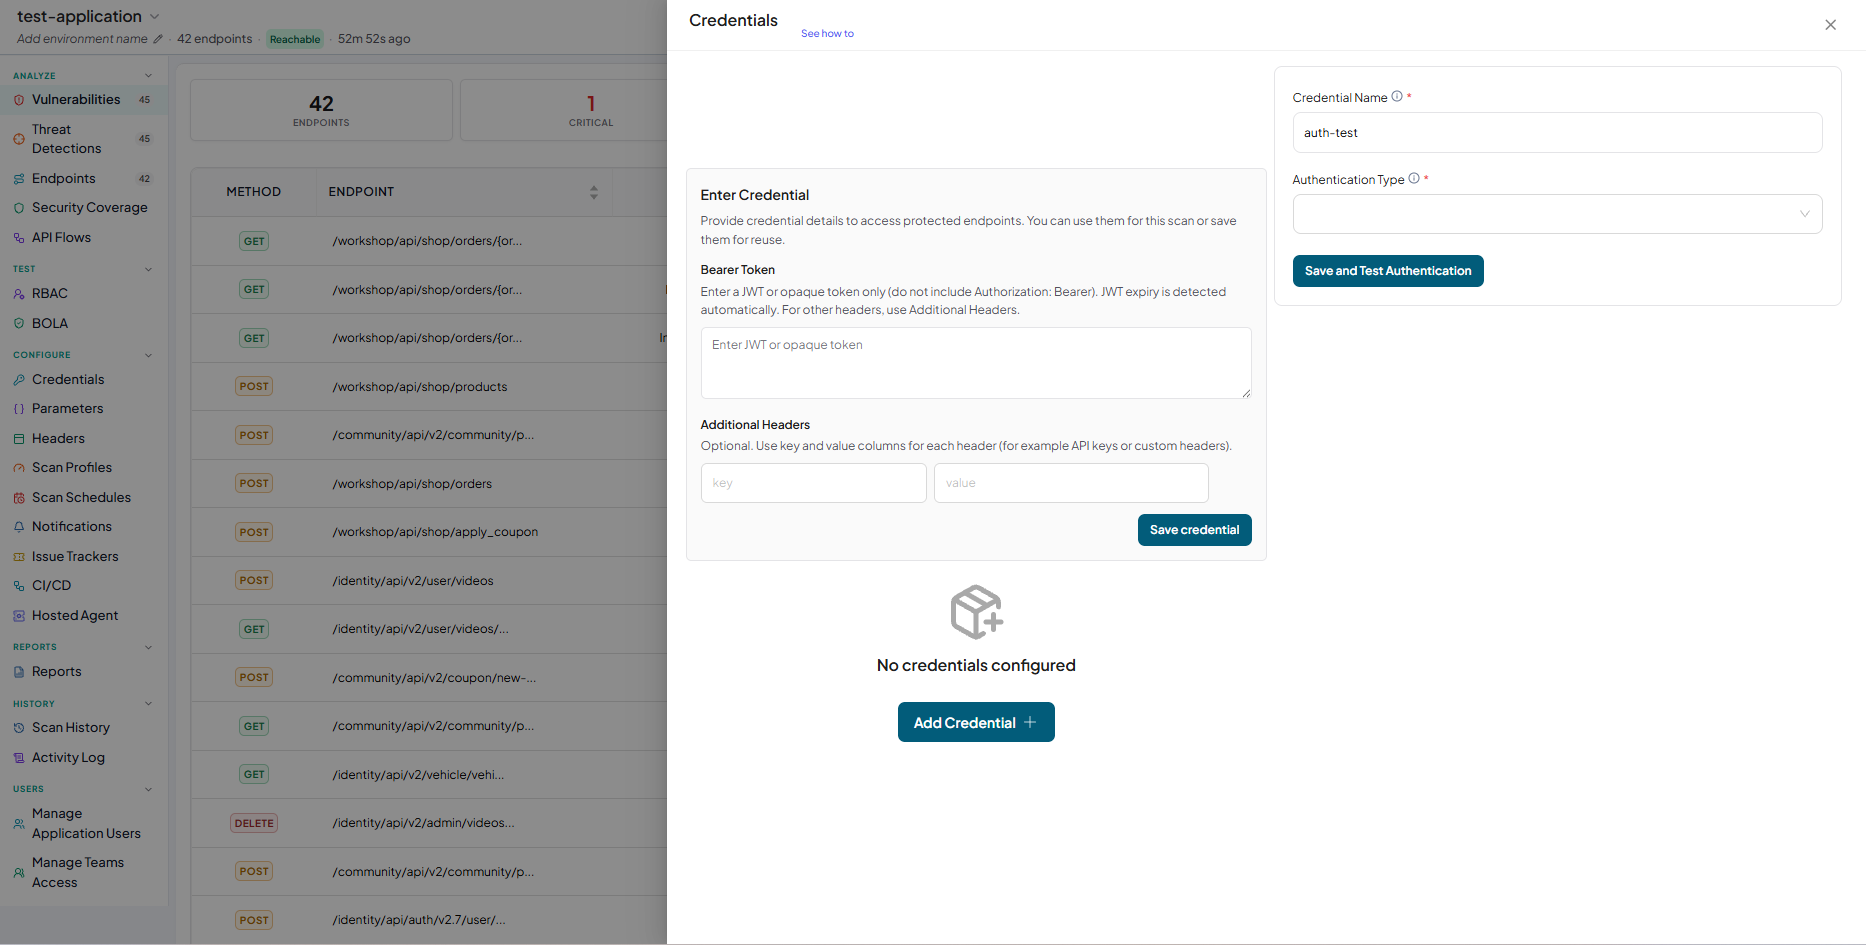
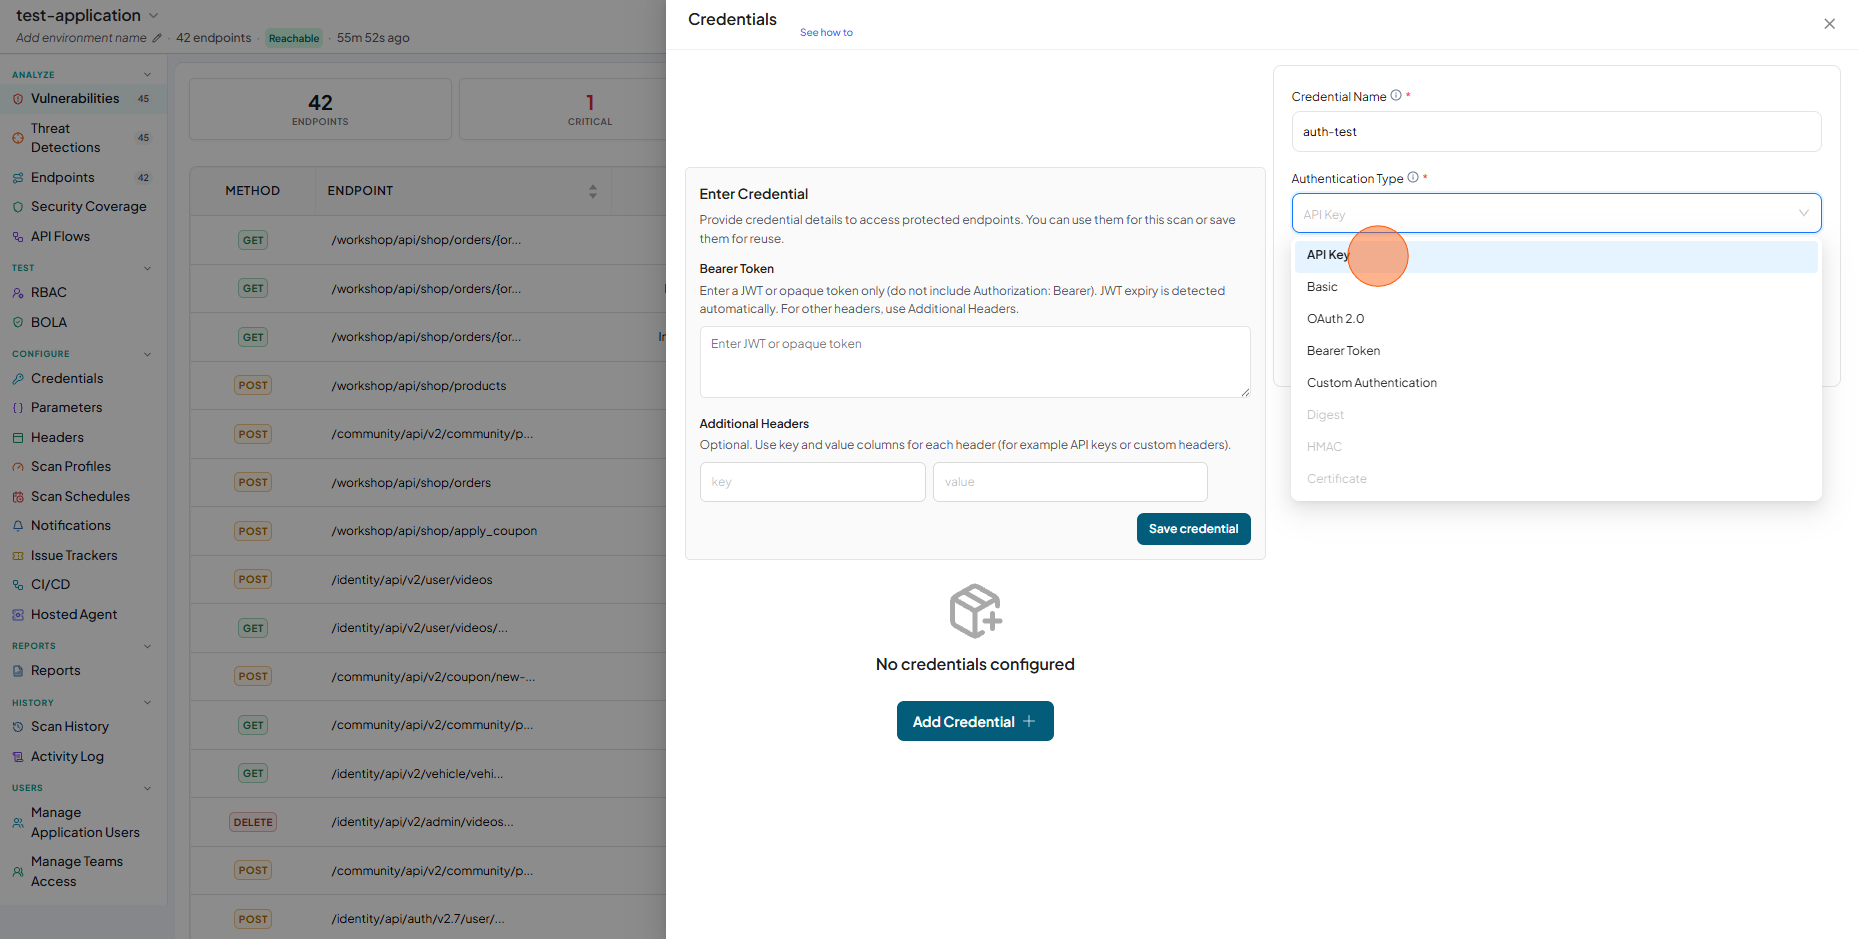
-
From dropdown select API Key
-
Fill the Header Key and Value
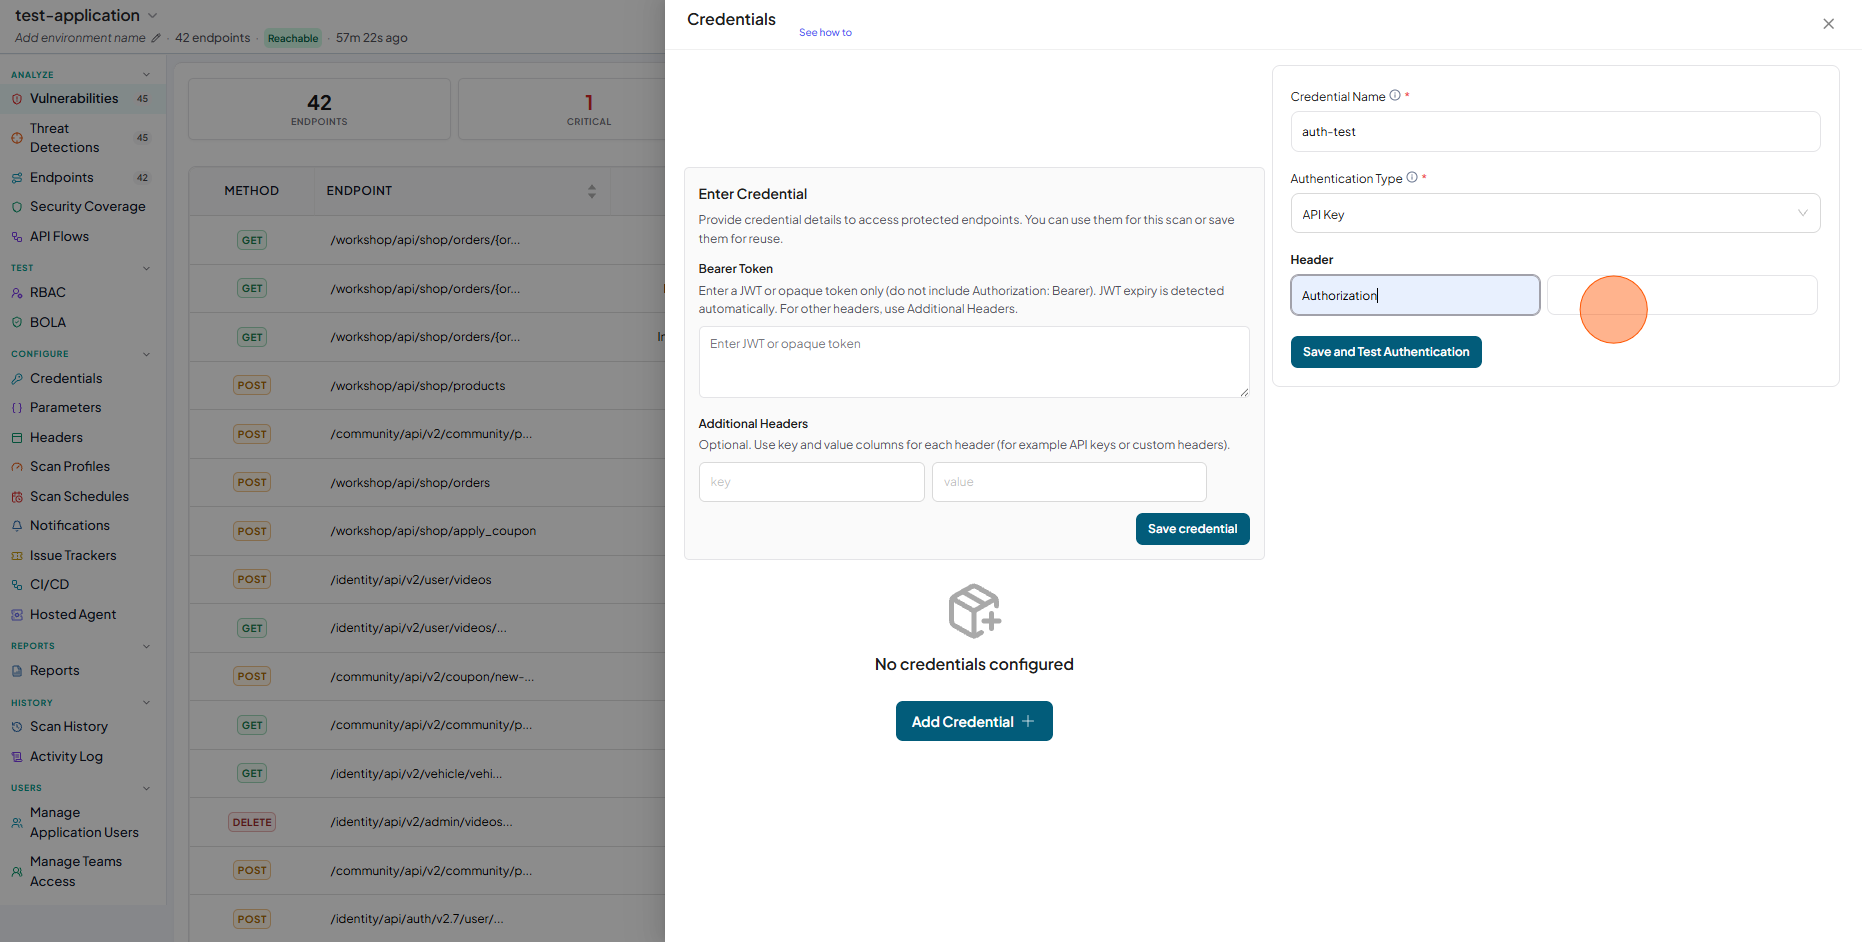
-
Click on Save and Test Authentication
-
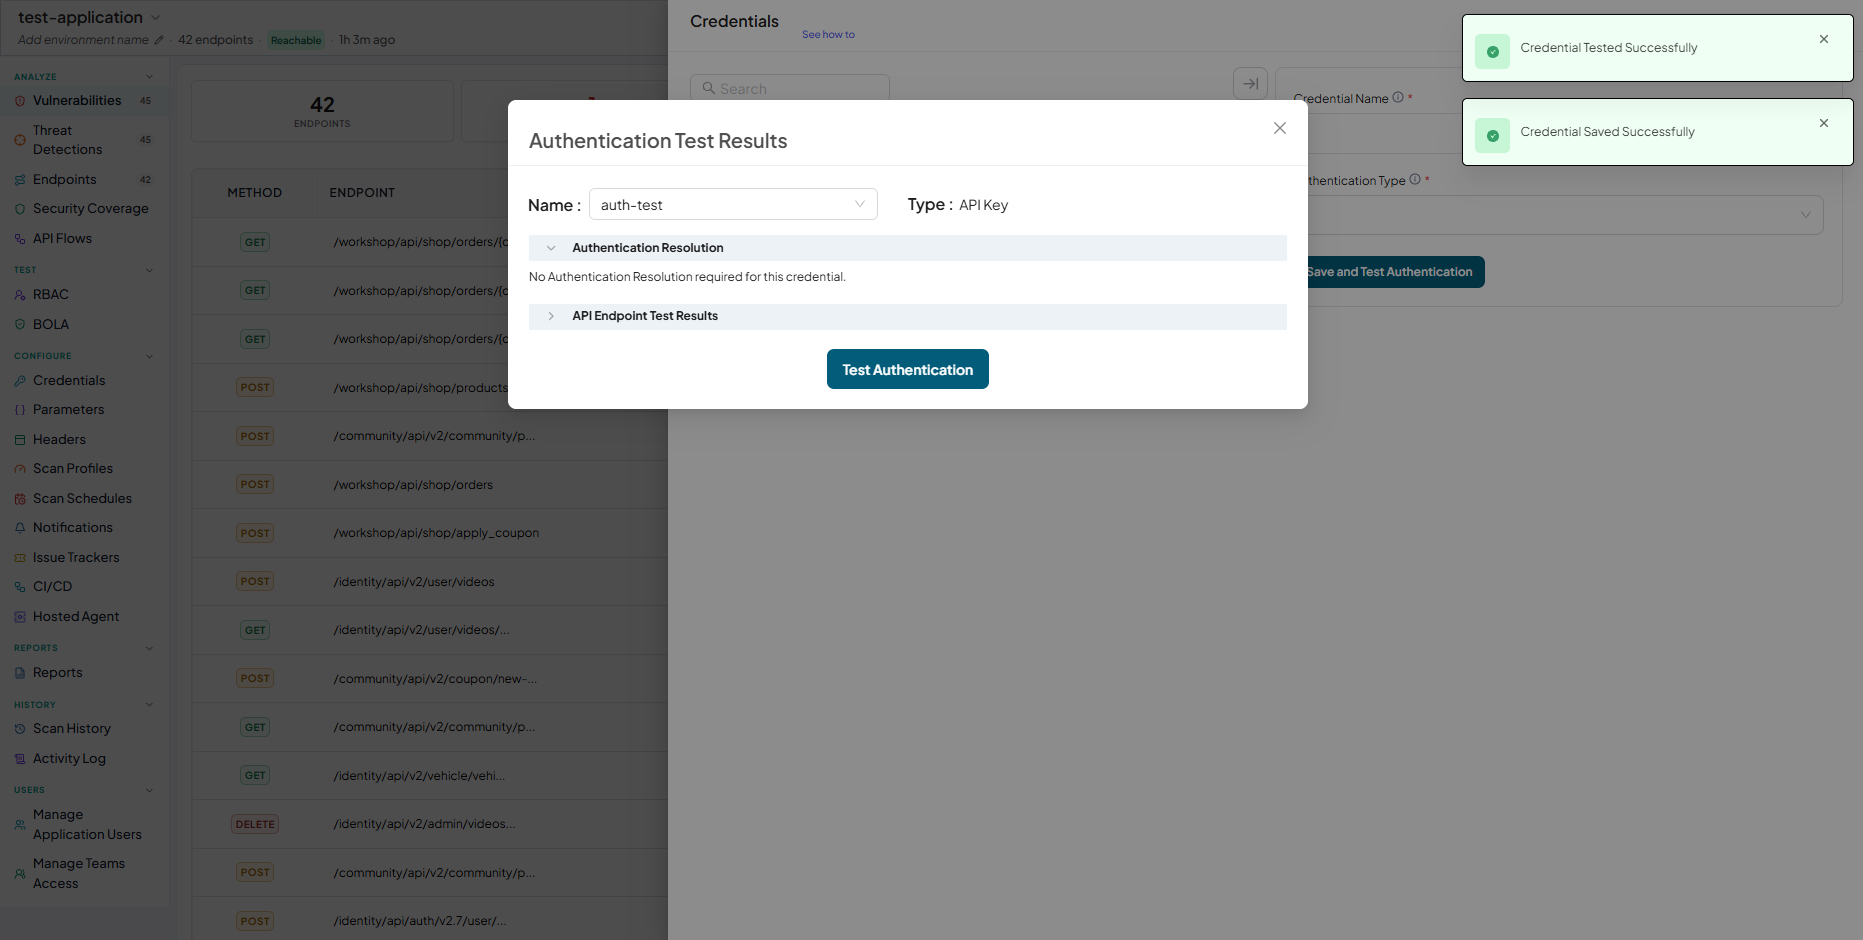
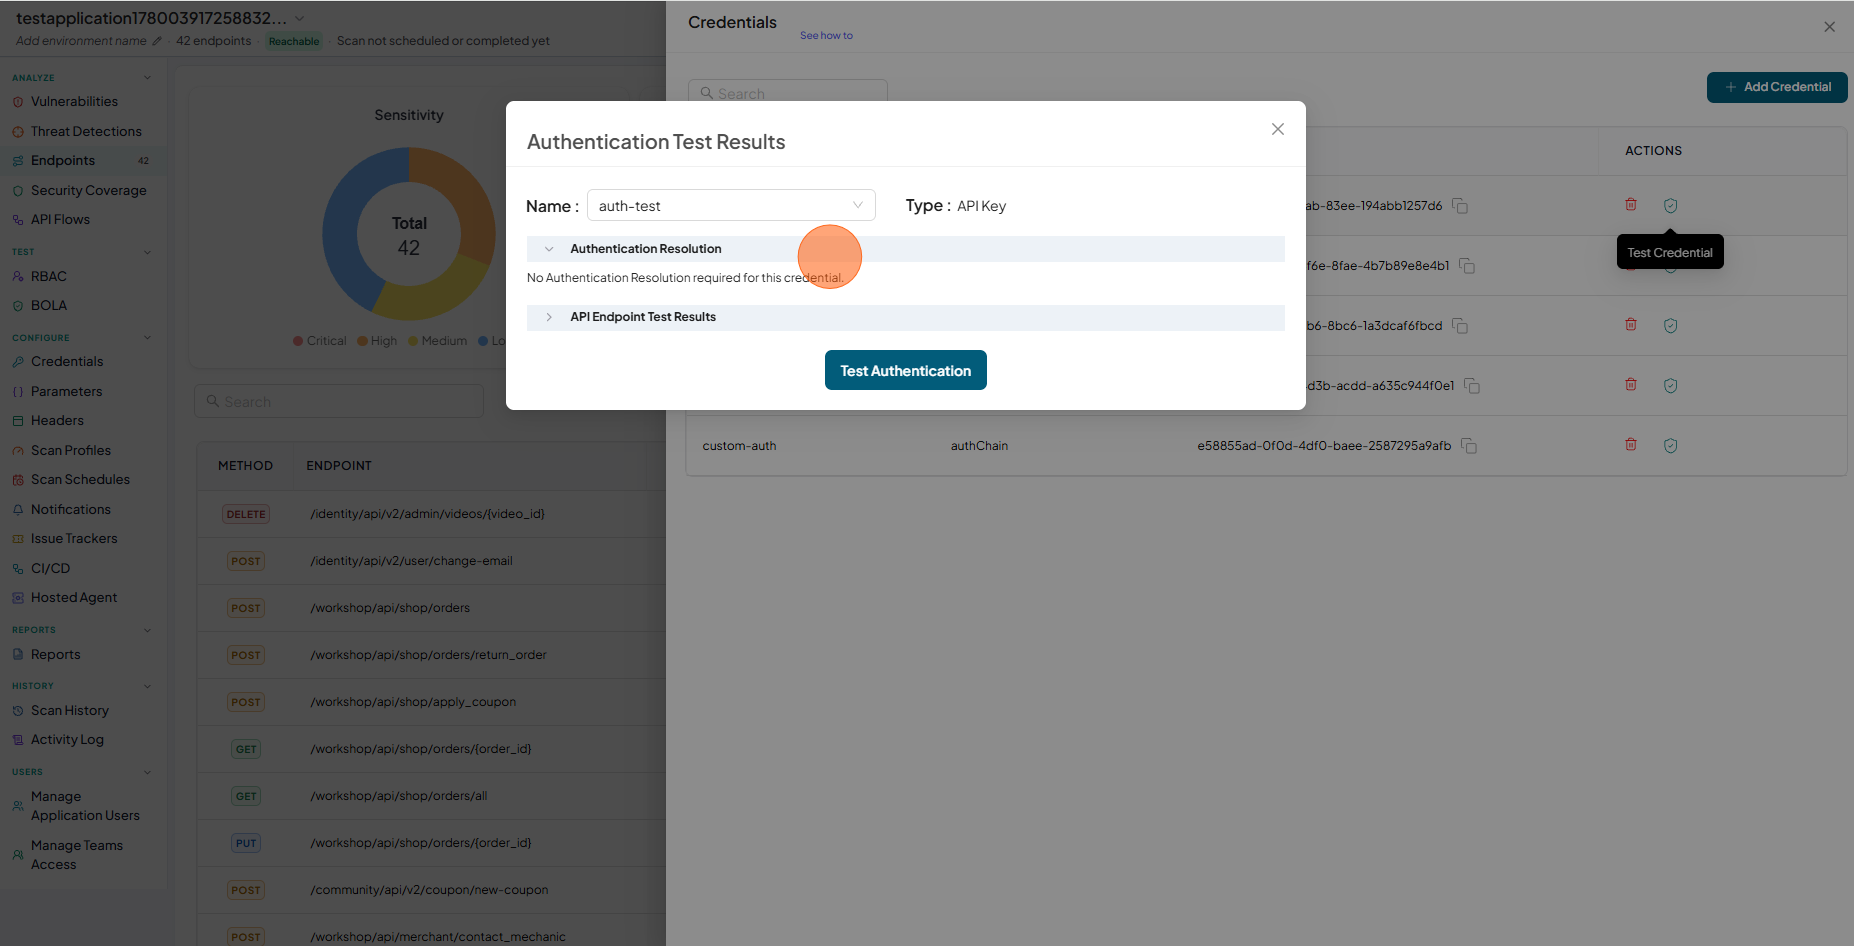
Authentication Tested Successfully
-
Authentication Test Results - Authentication Resolution
-
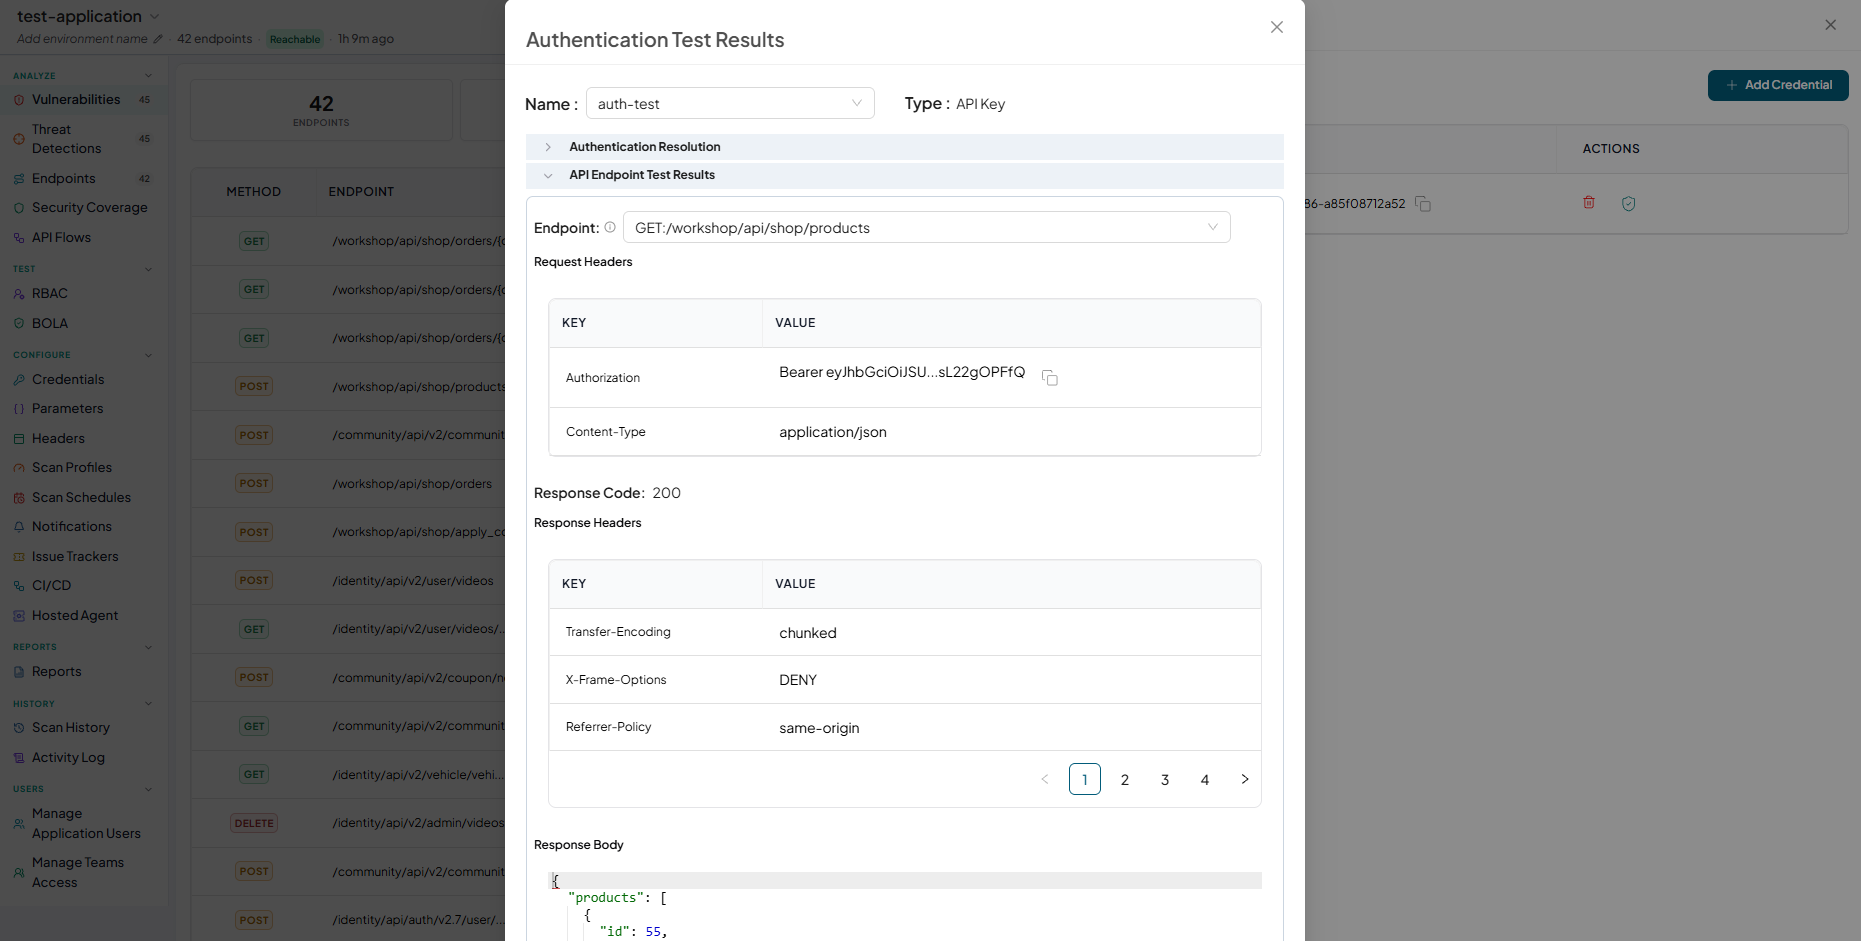
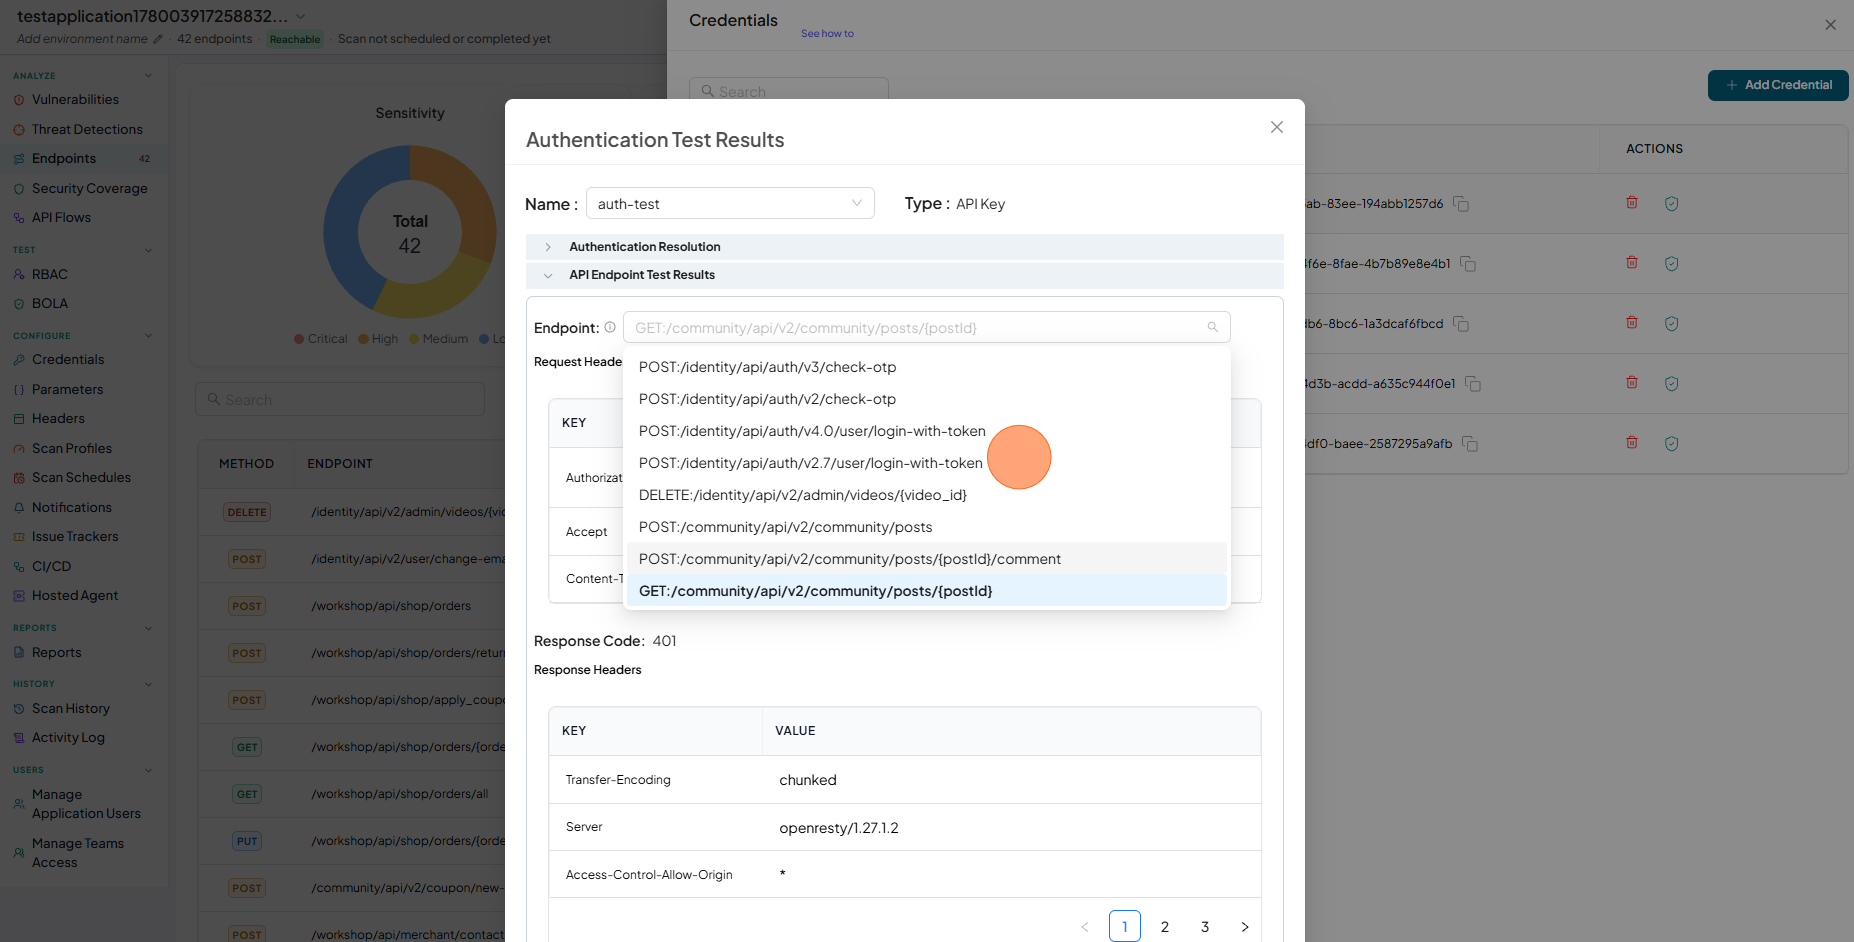
Authentication Test Results - API Endpoint Test Results
-
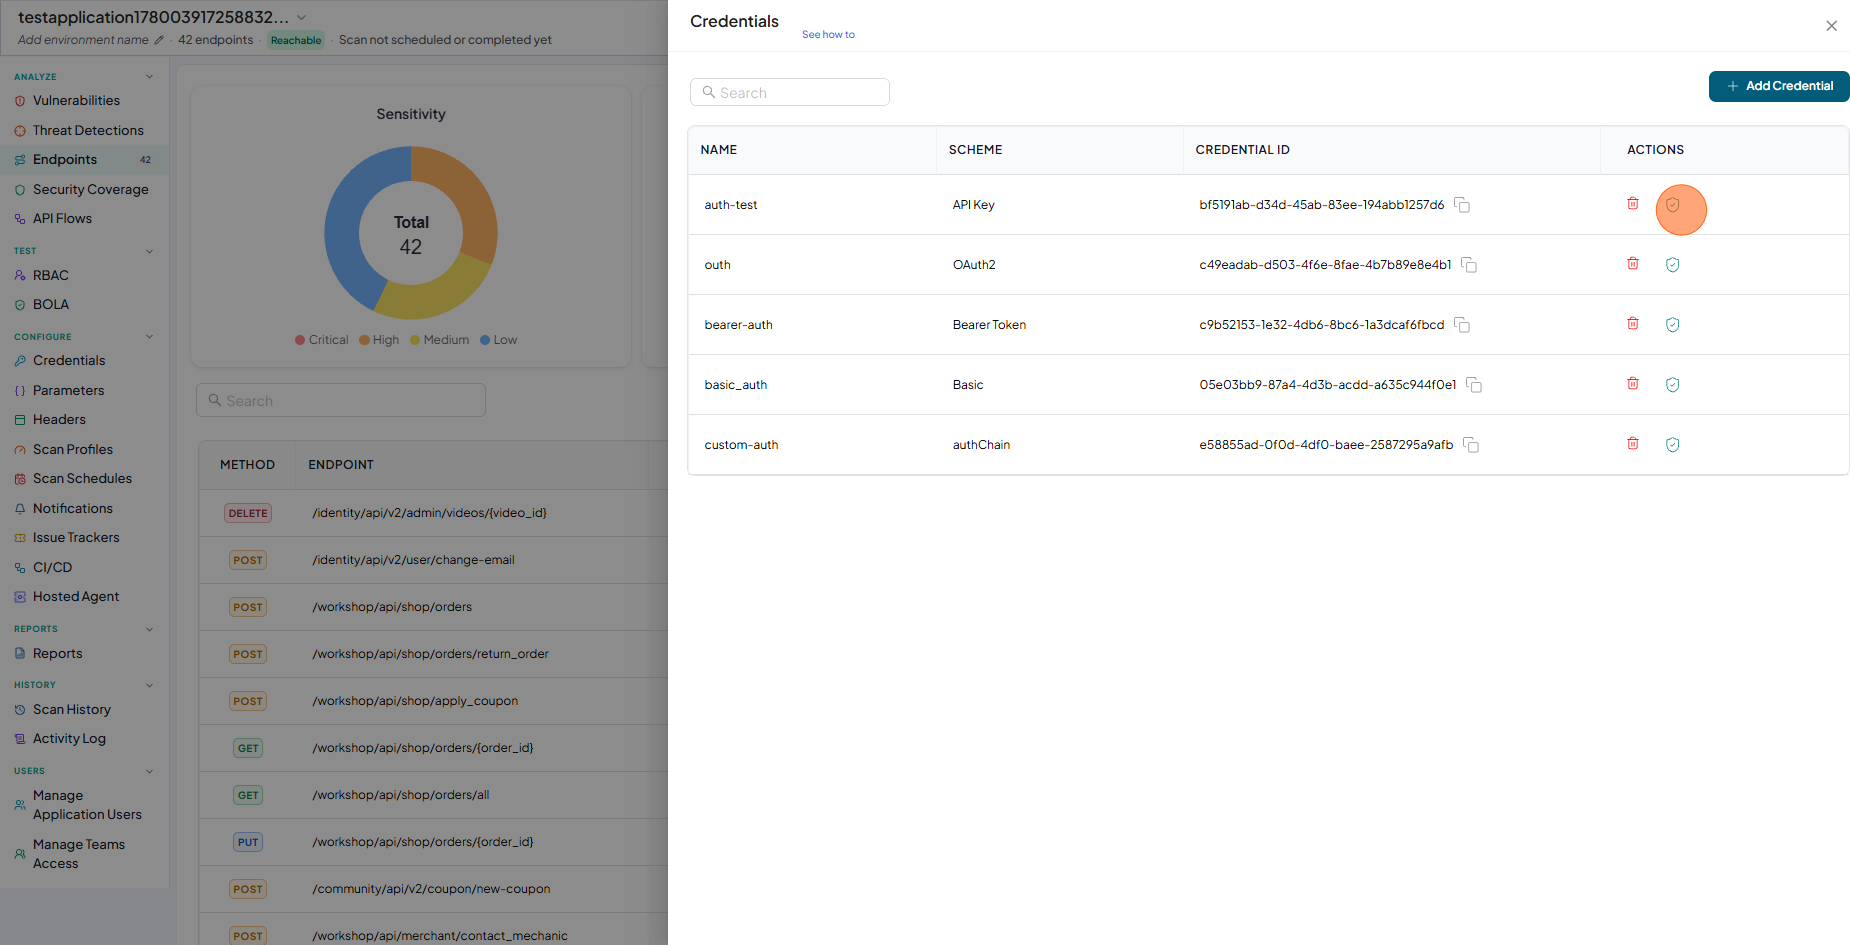
Check the saved credentials are available in the table

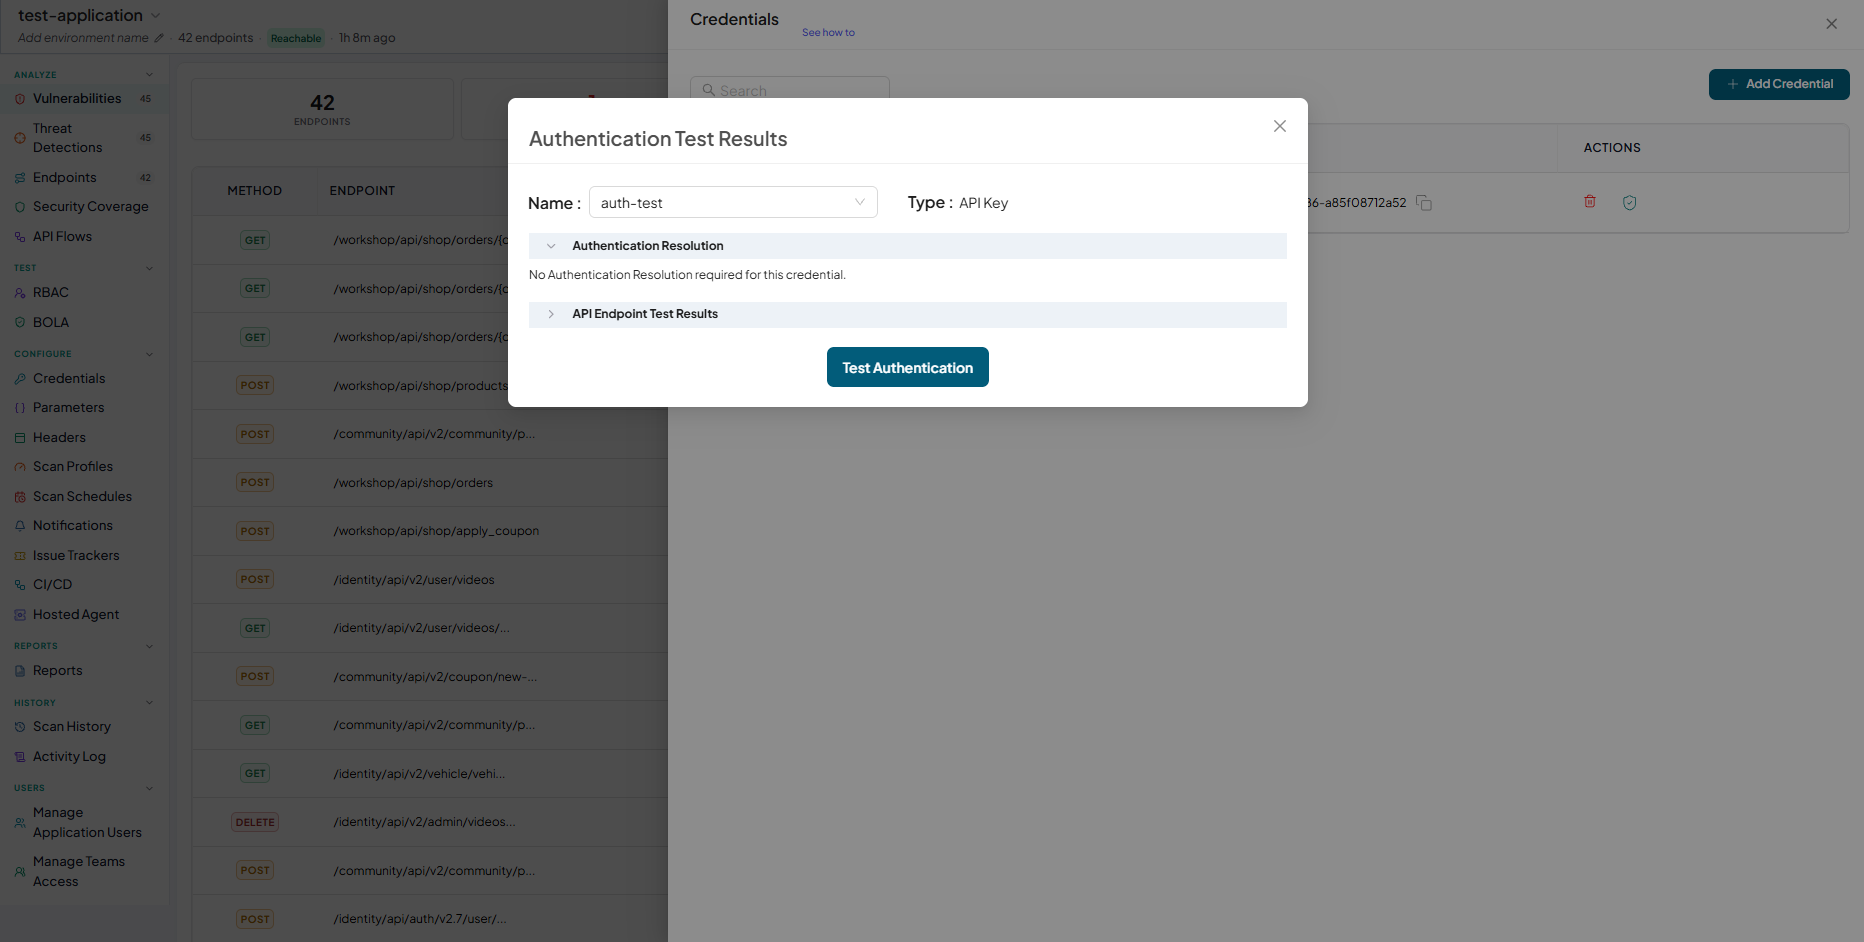
Test Authentication
- Click on Test Authentication
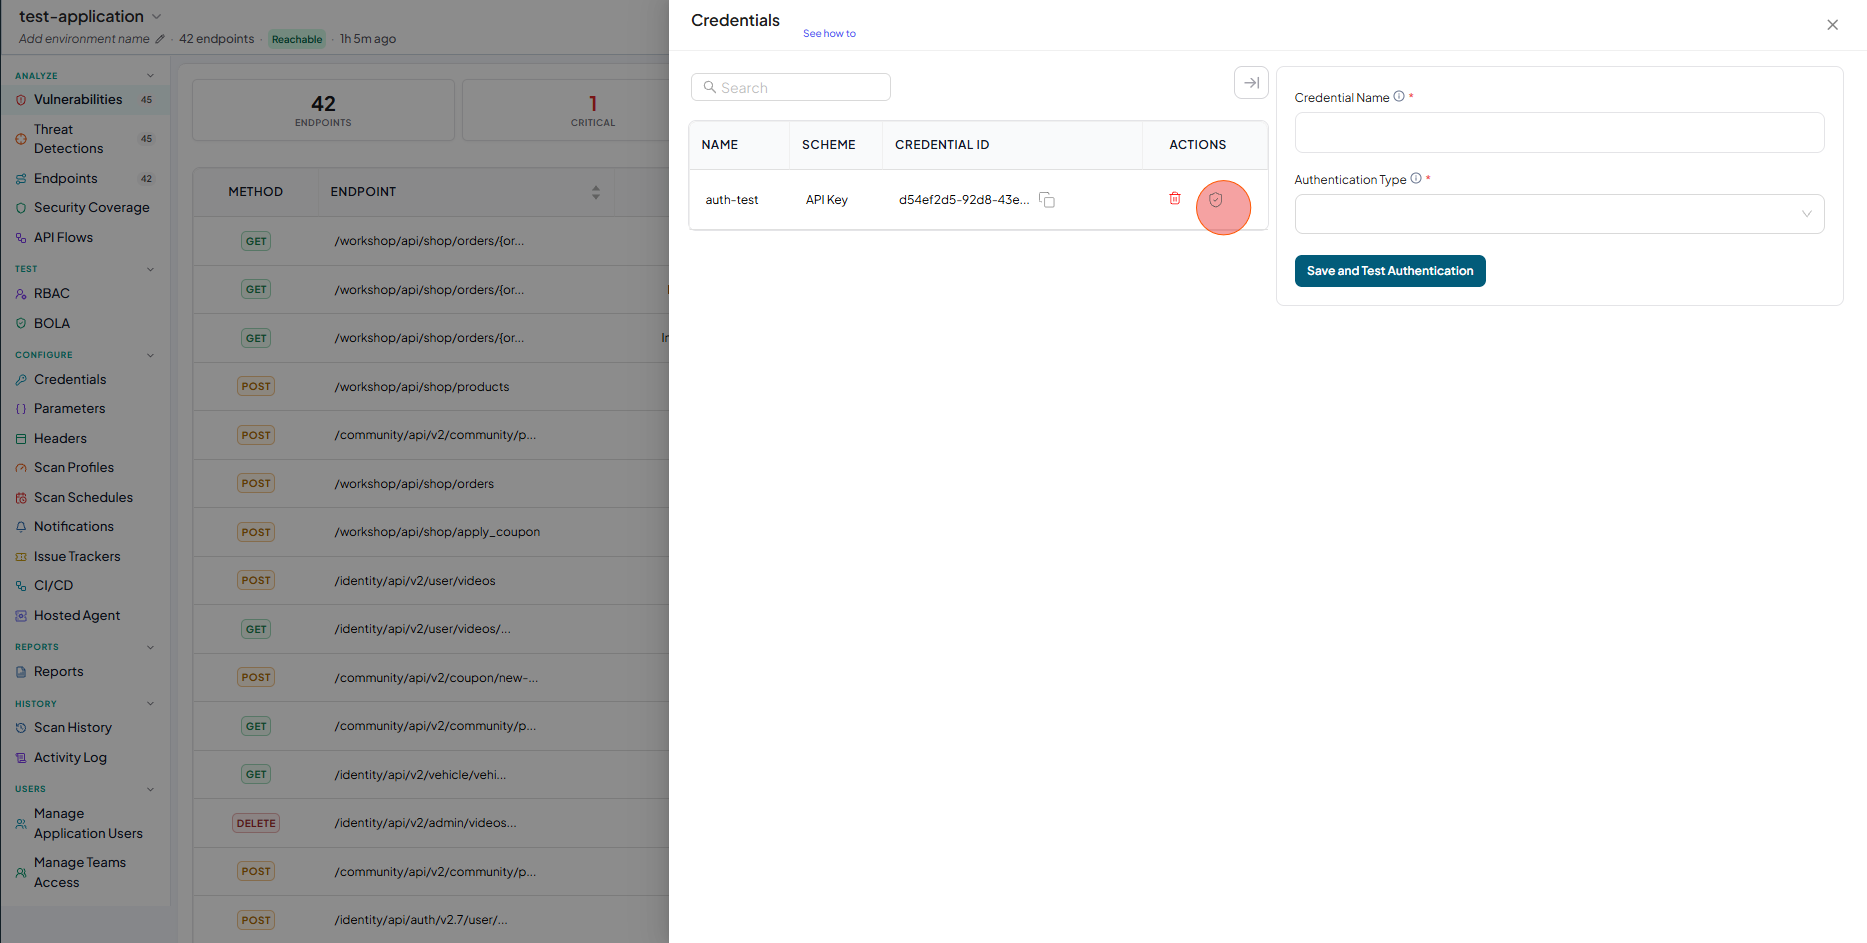
- Authentication Test Results - Authentication Resolution
- Authentication Test Results - API Endpoint Test Results
Basic Authentication
-
Type auth name
-
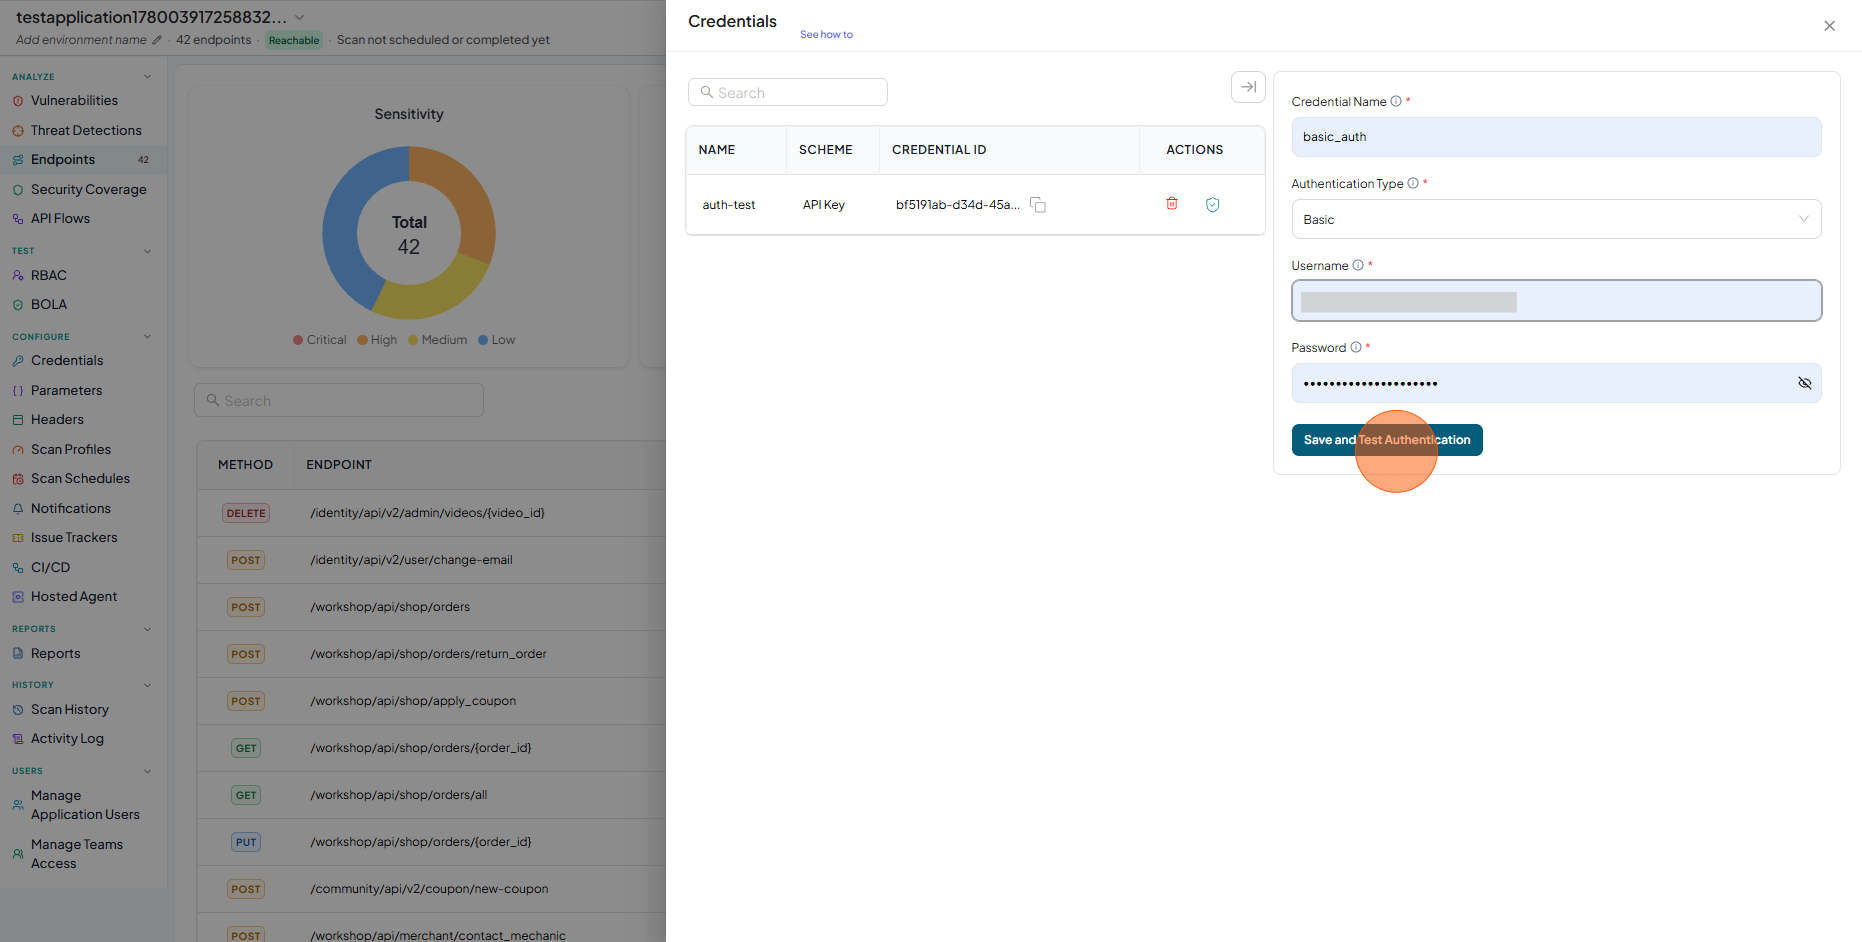
From dropdown select "Basic"
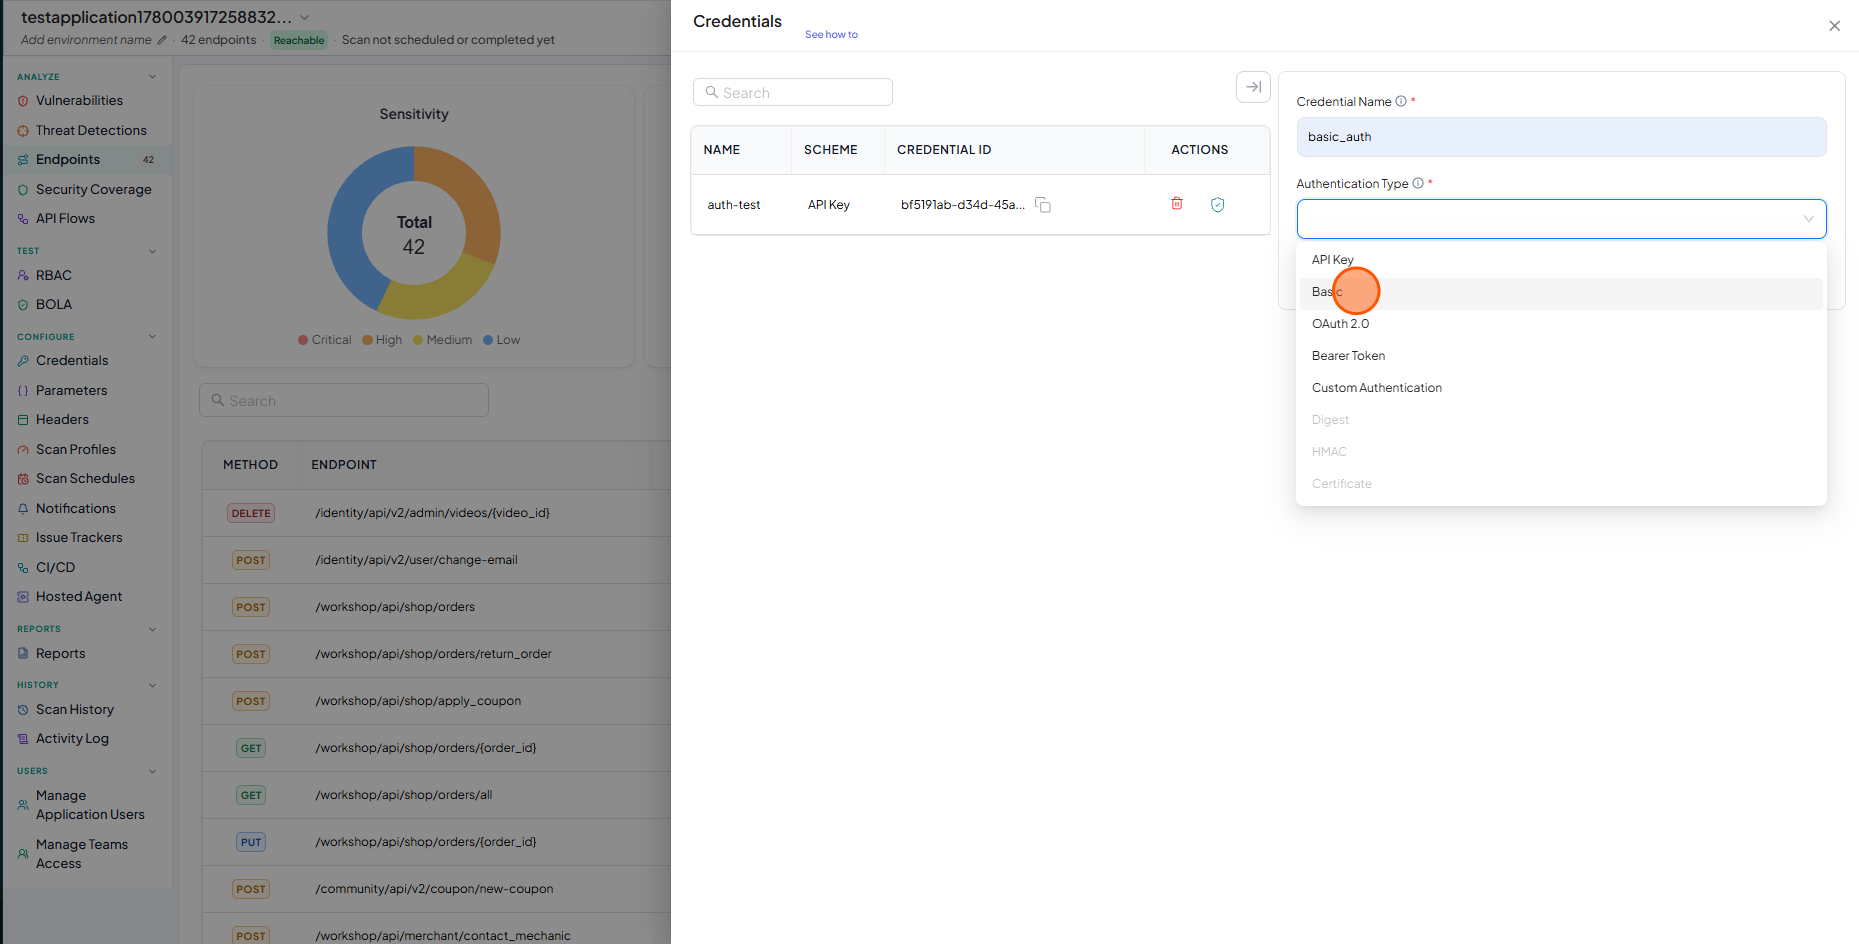
-
Fill Username and Password

-
Click on Save and Test Authentication
-
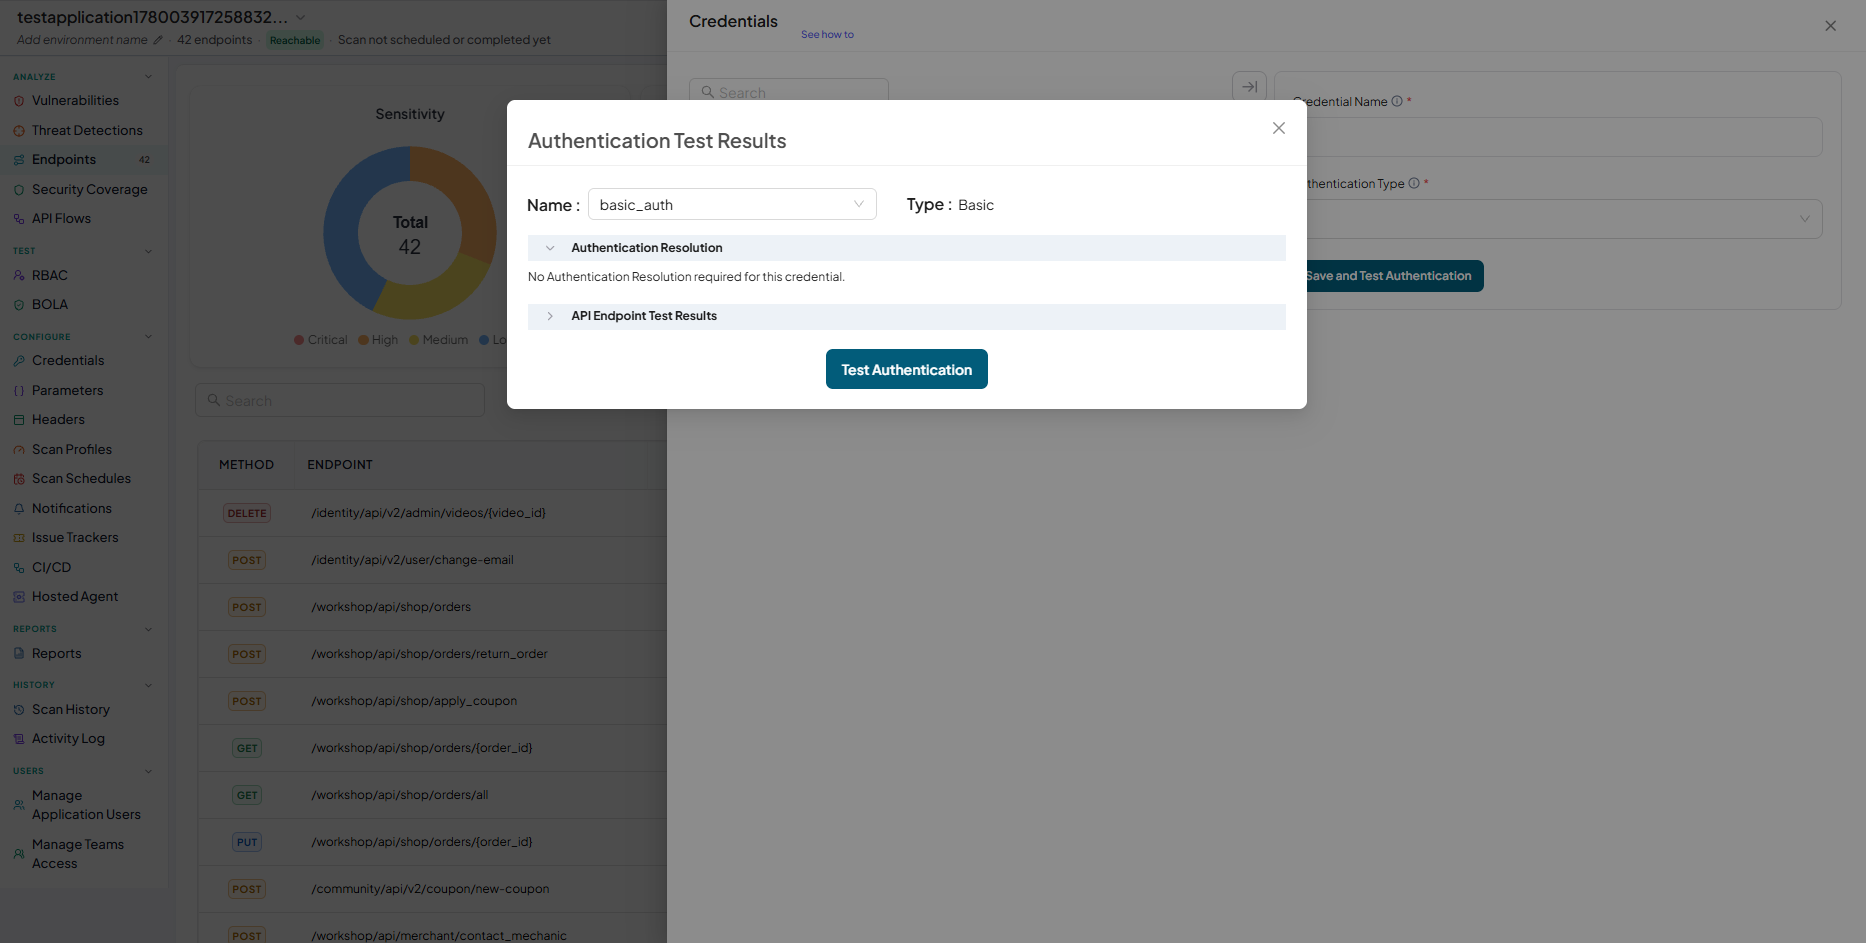
Authentication saved and Tested Successfully
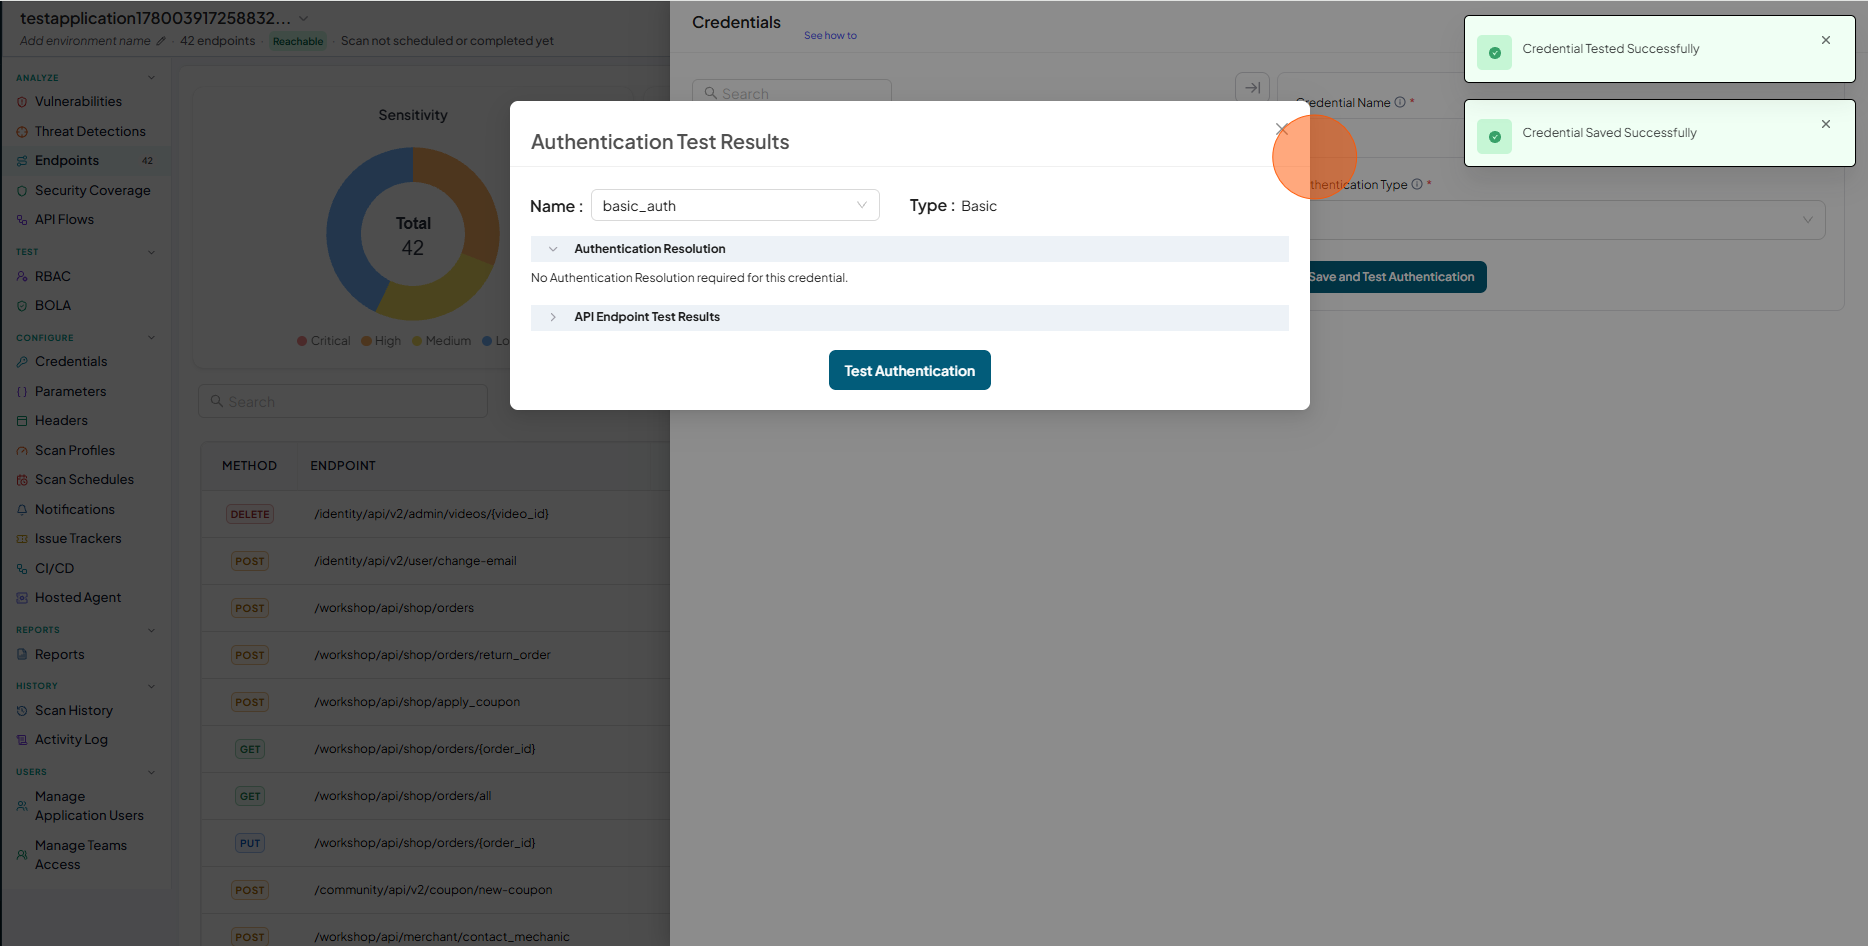
-
Authentication Test Results - Authentication Resolution
-
Authentication Test Results - API Endpoint Test Results
-
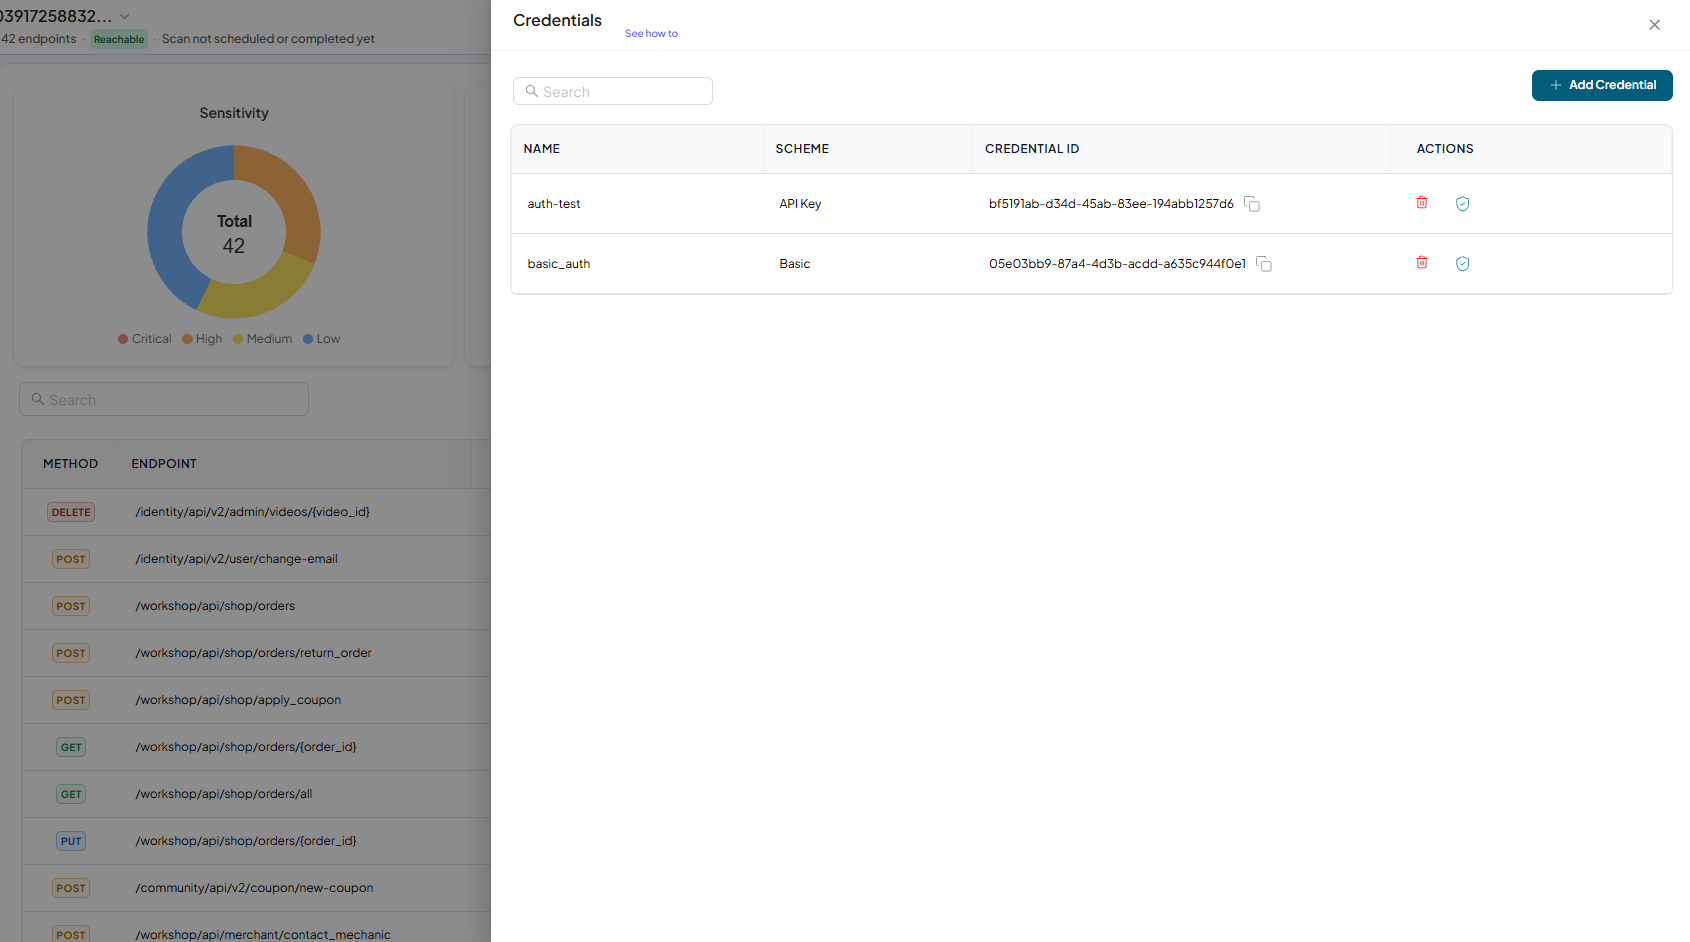
Check the saved credentials are available in the table
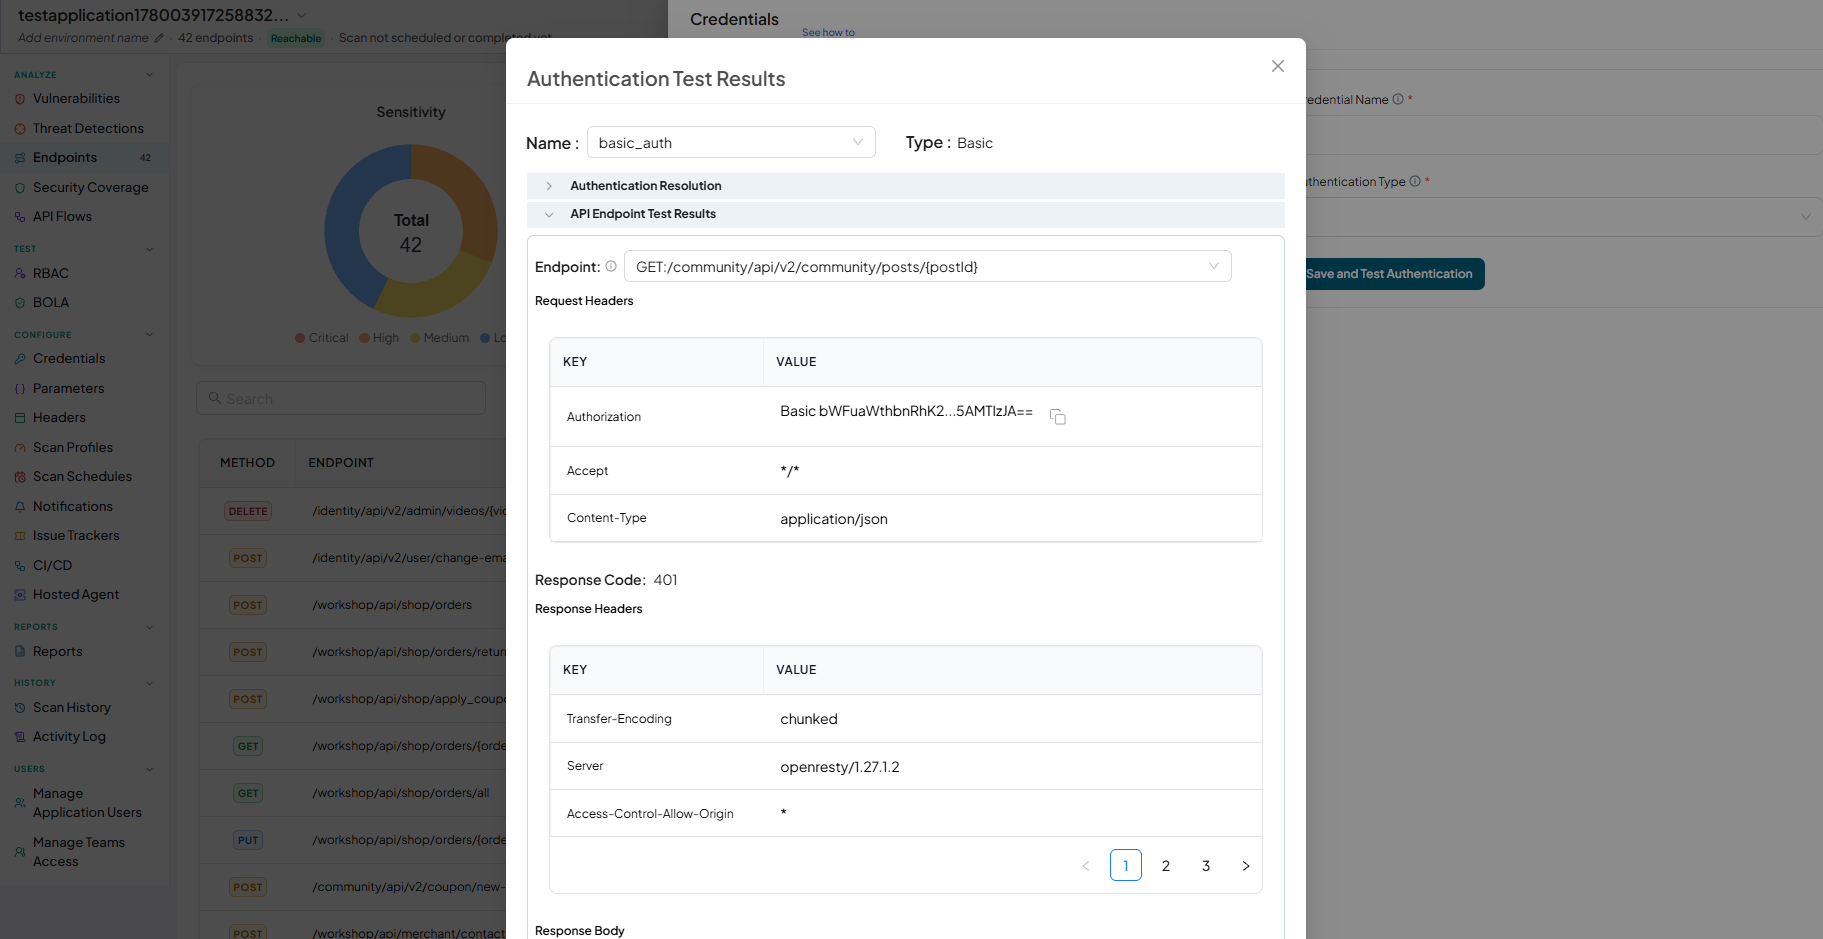
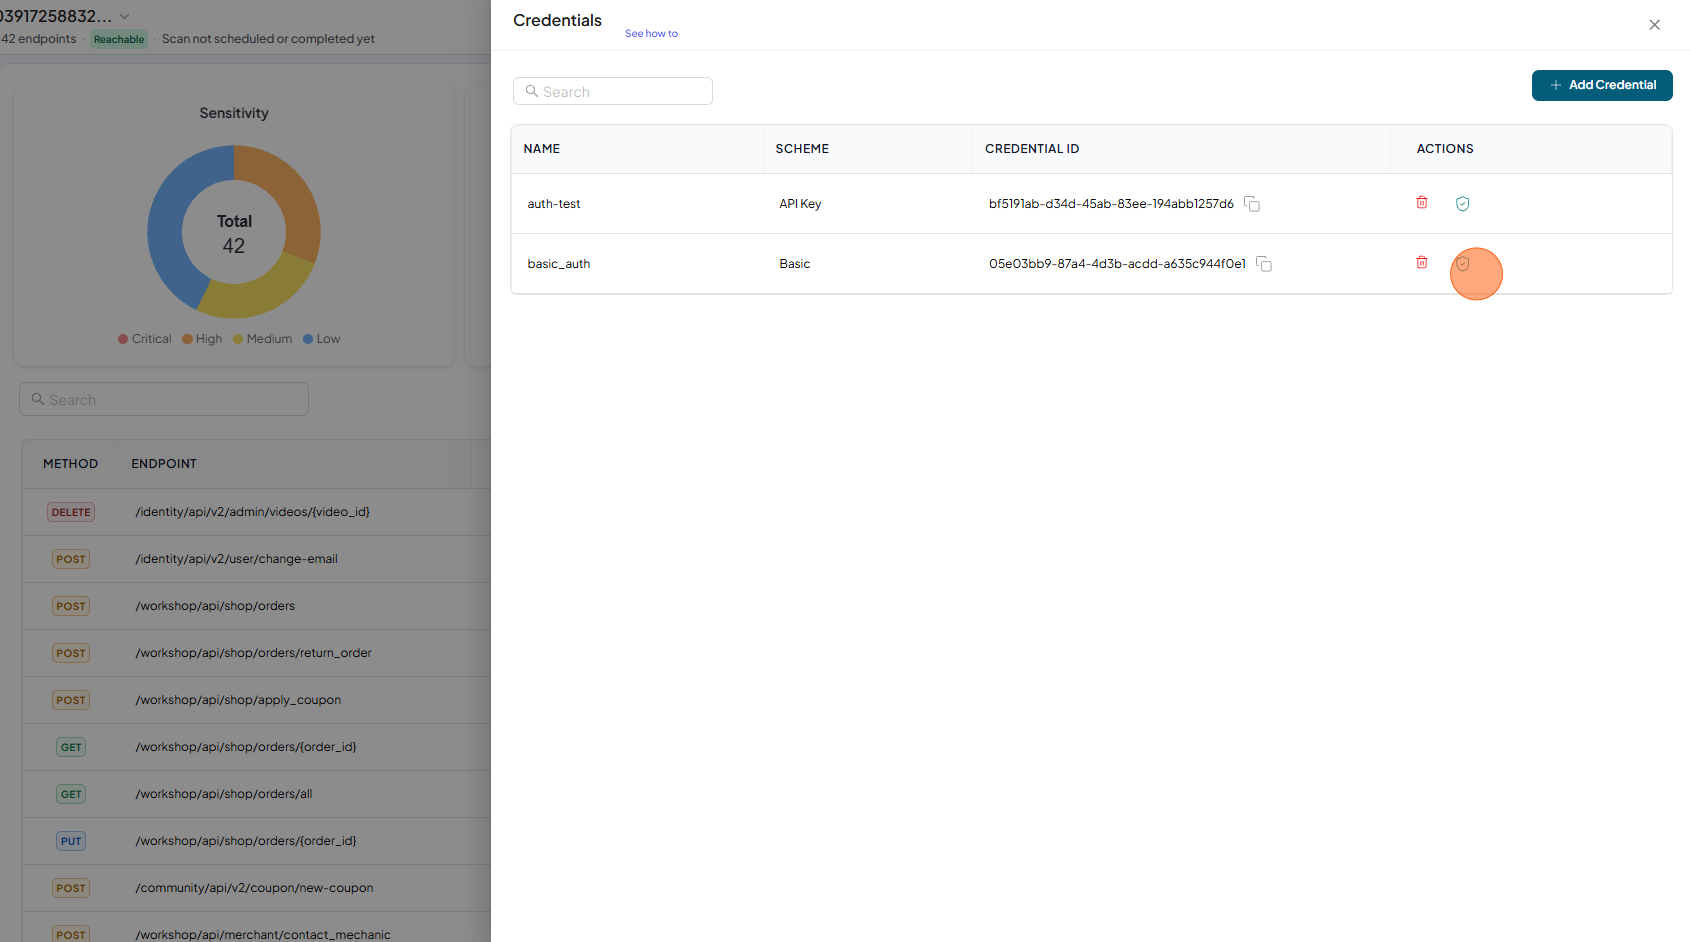
Test Authentication
- Click on Test Authentication
- Authentication Test Results - Authentication Resolution
- Authentication Test Results - API Endpoint Test Results
- Click on Test Authentication
OAuth 2.0 Authentications
-
Type auth name

-
From dropdown select "OAuth 2.0"
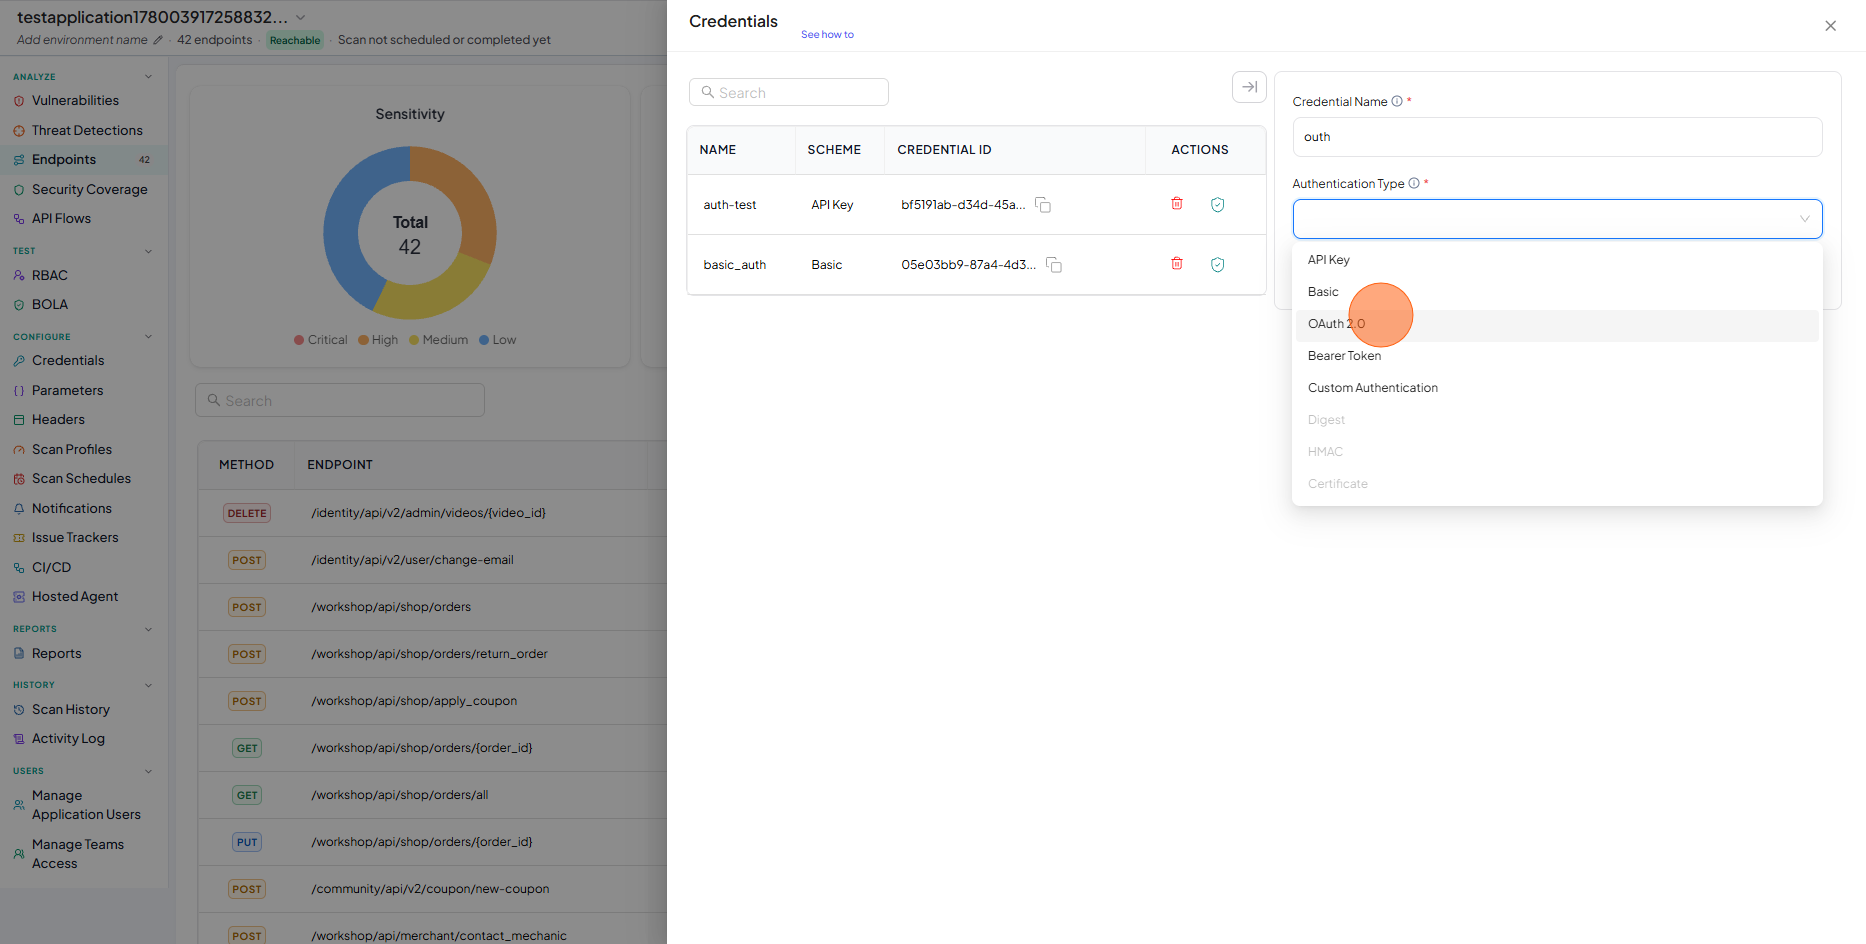
-
Fill the form
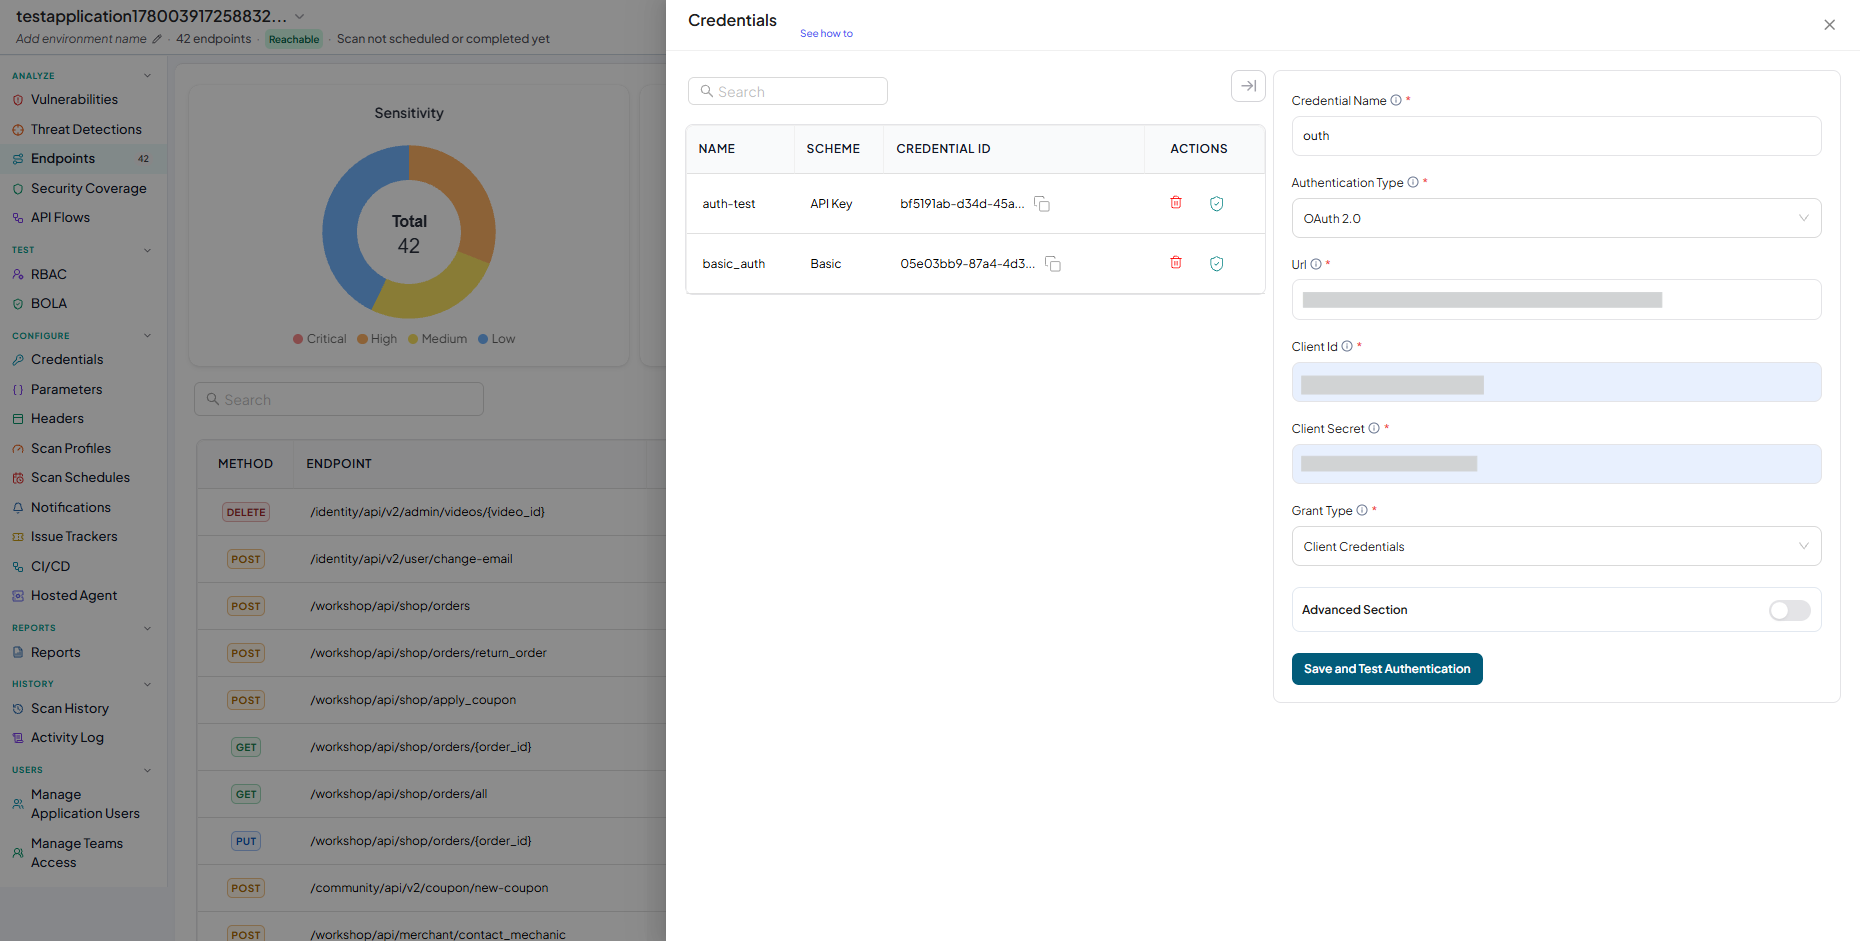
-
Click on Save and Test Authentication
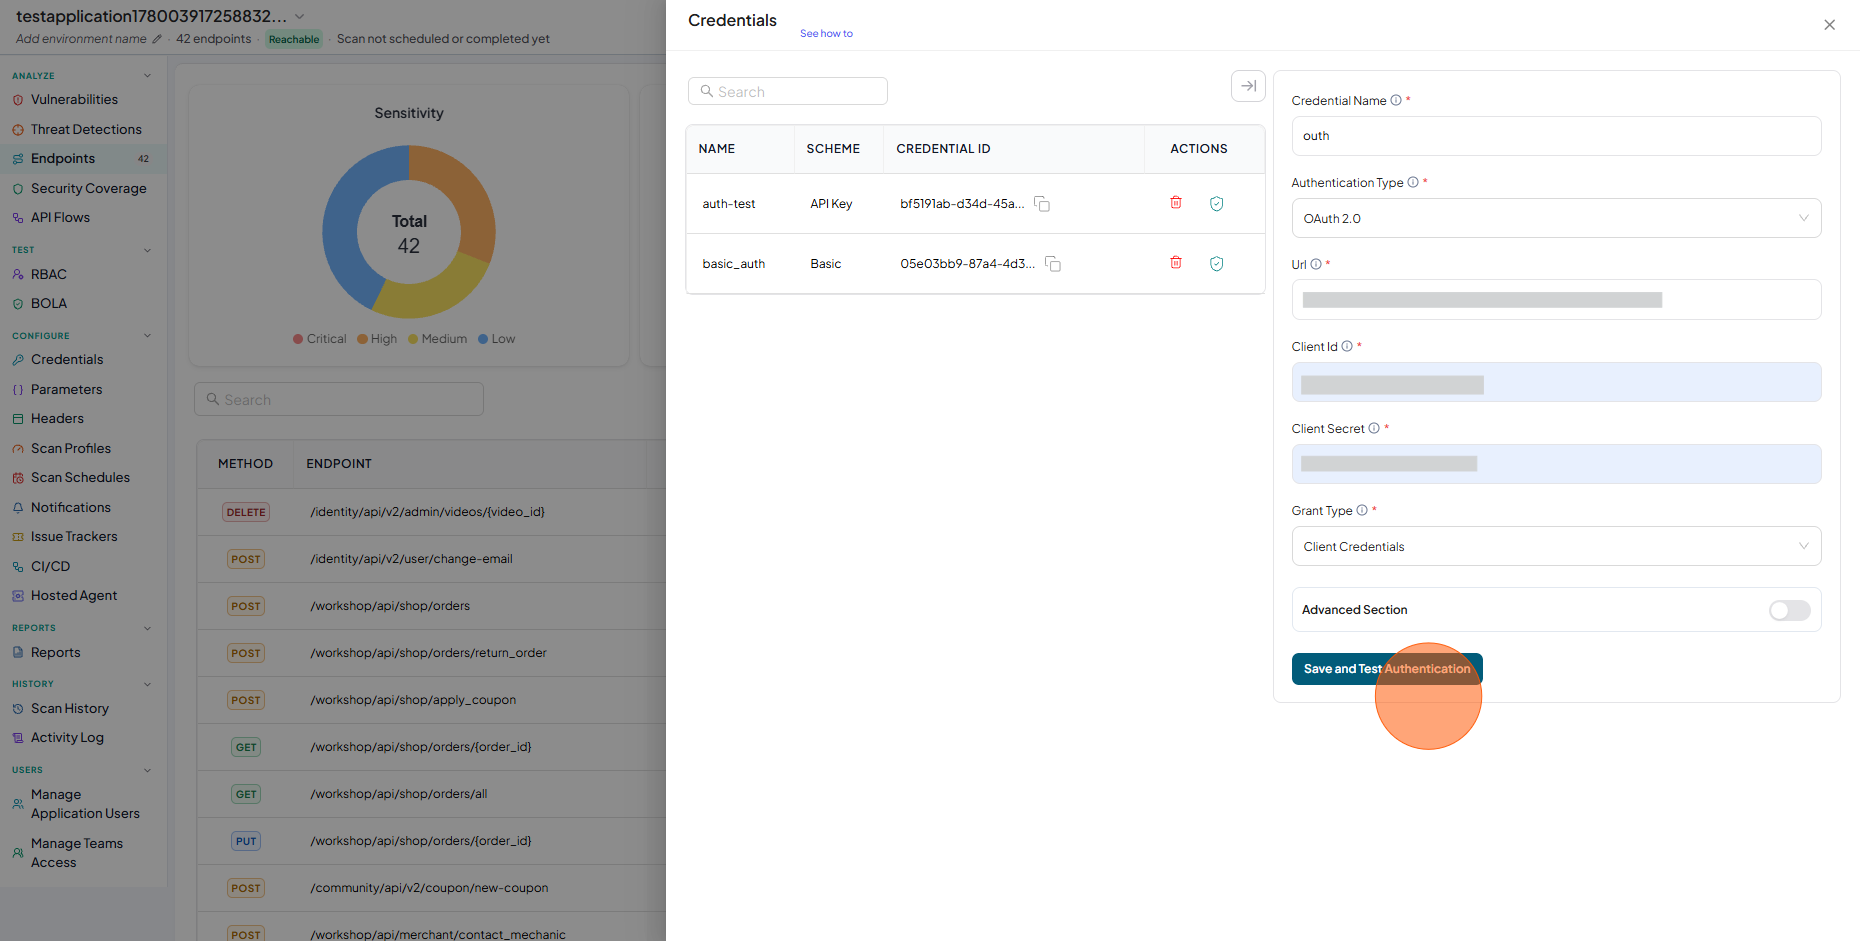
-
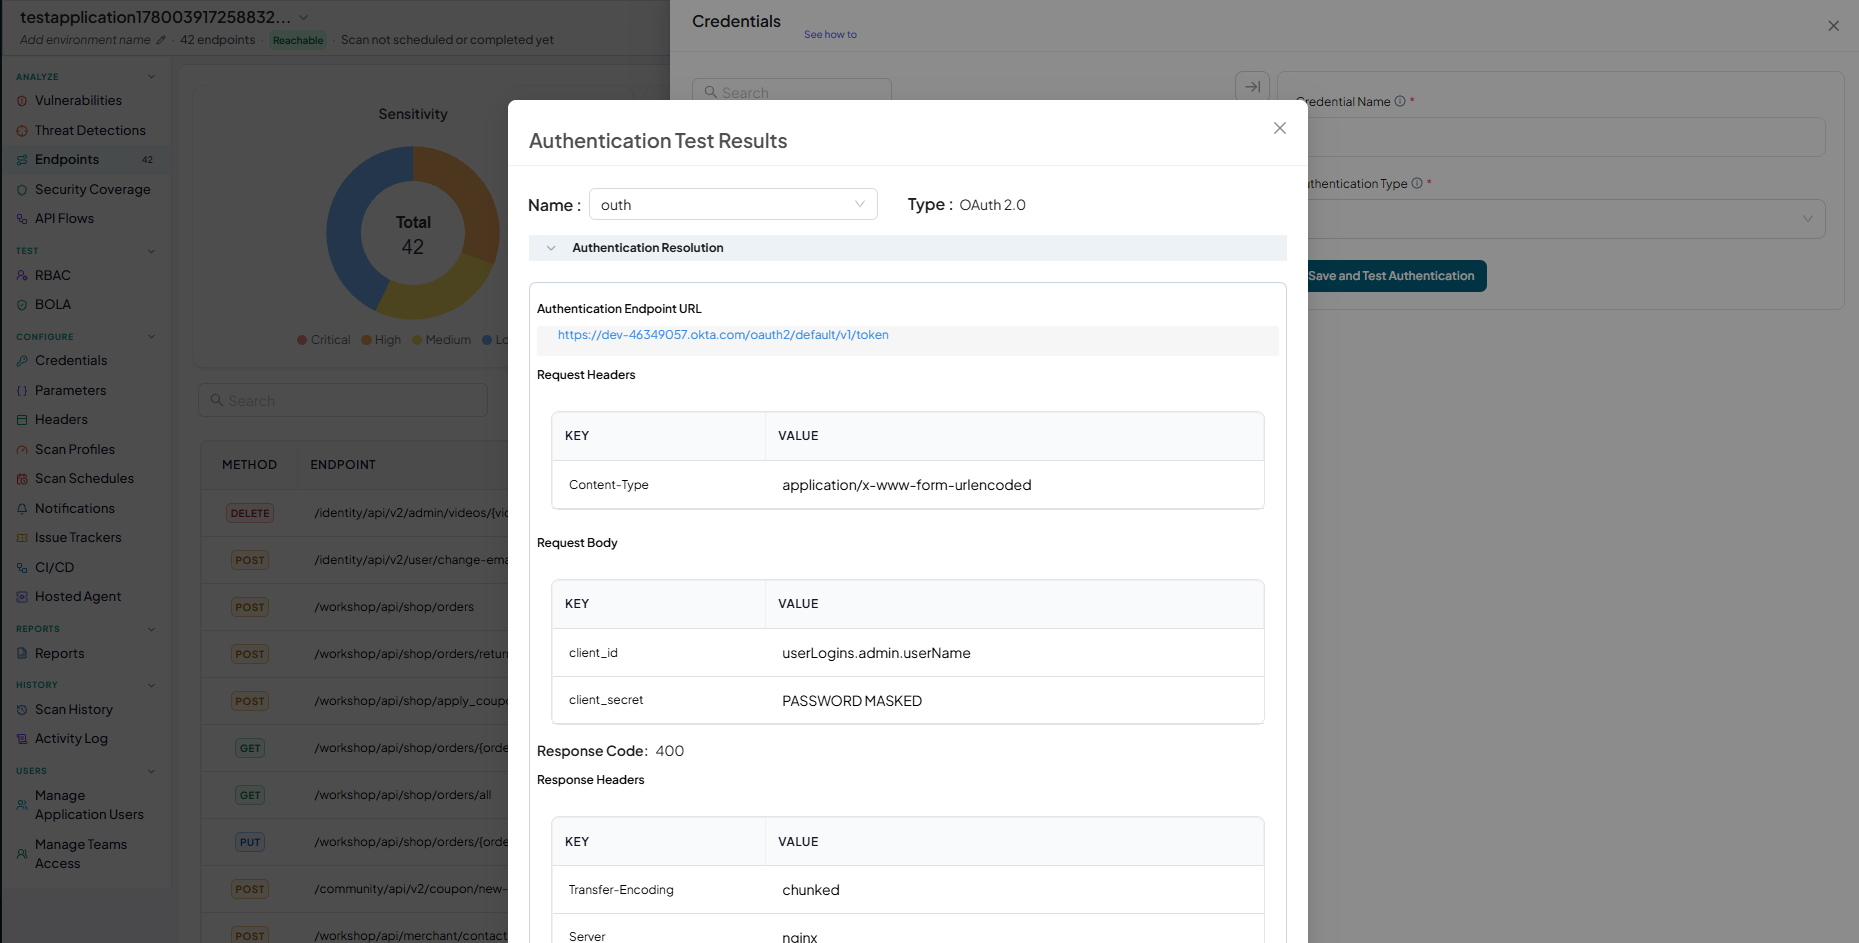
Authentication Test Results - Authentication Resolution
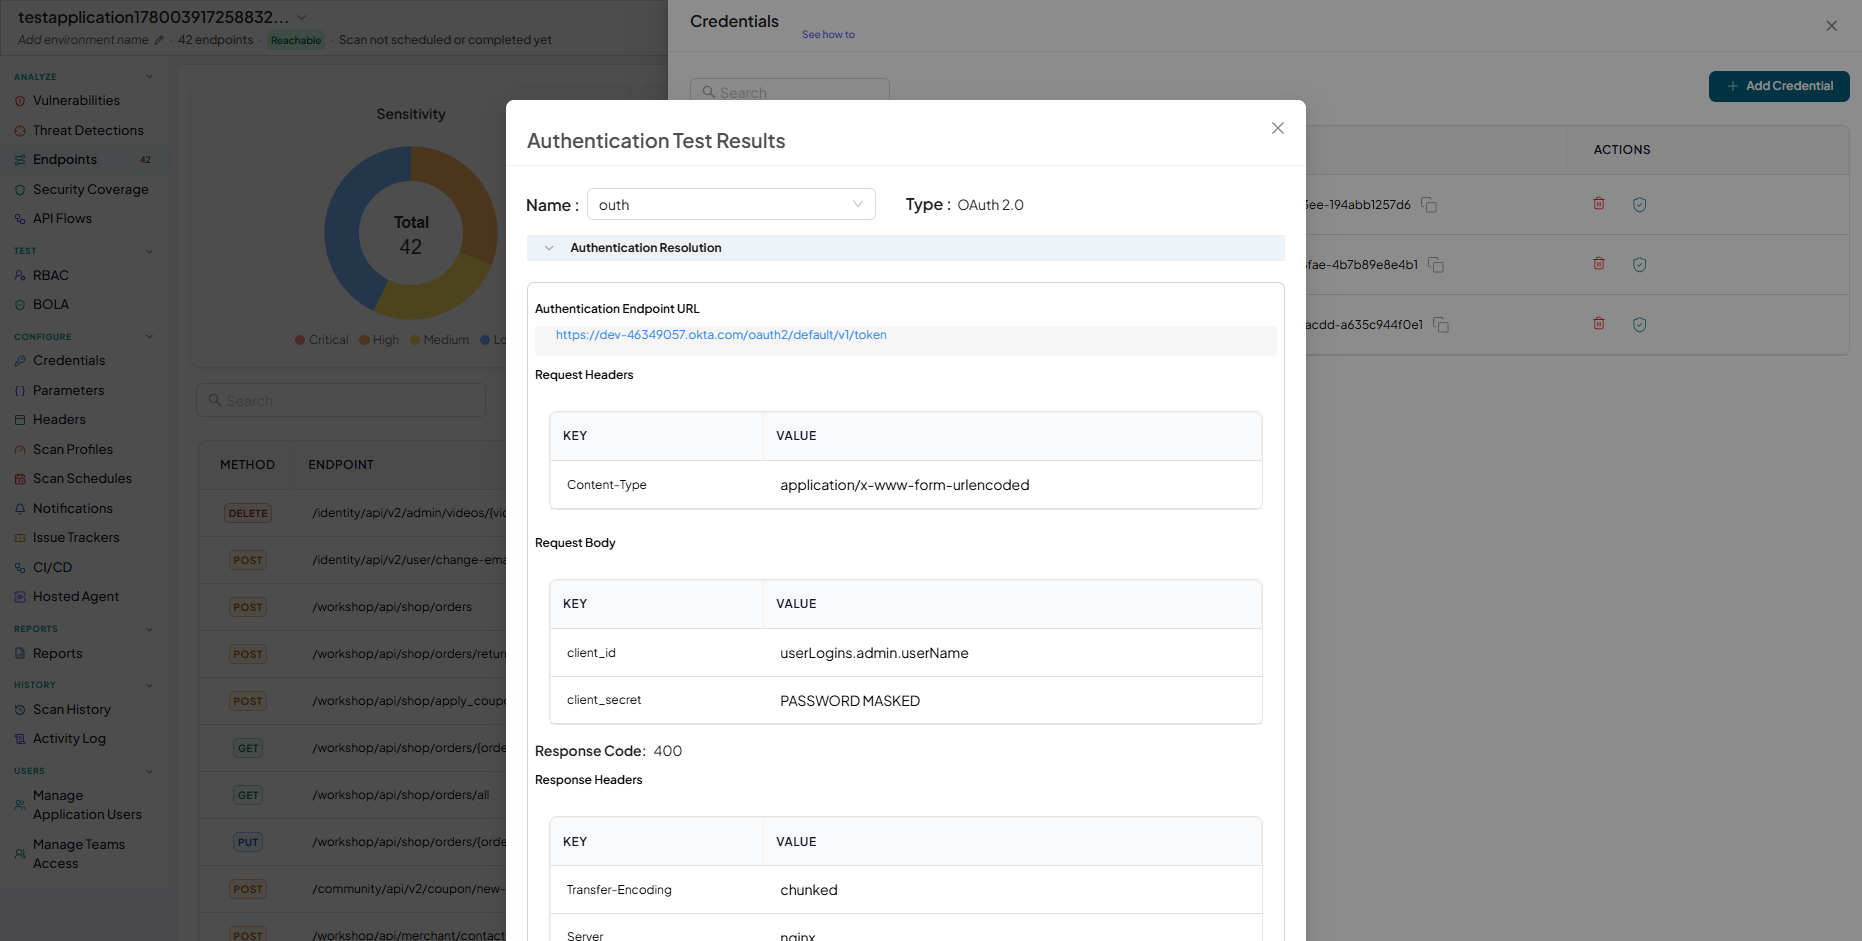
-
Authentication saved and Tested Successfully
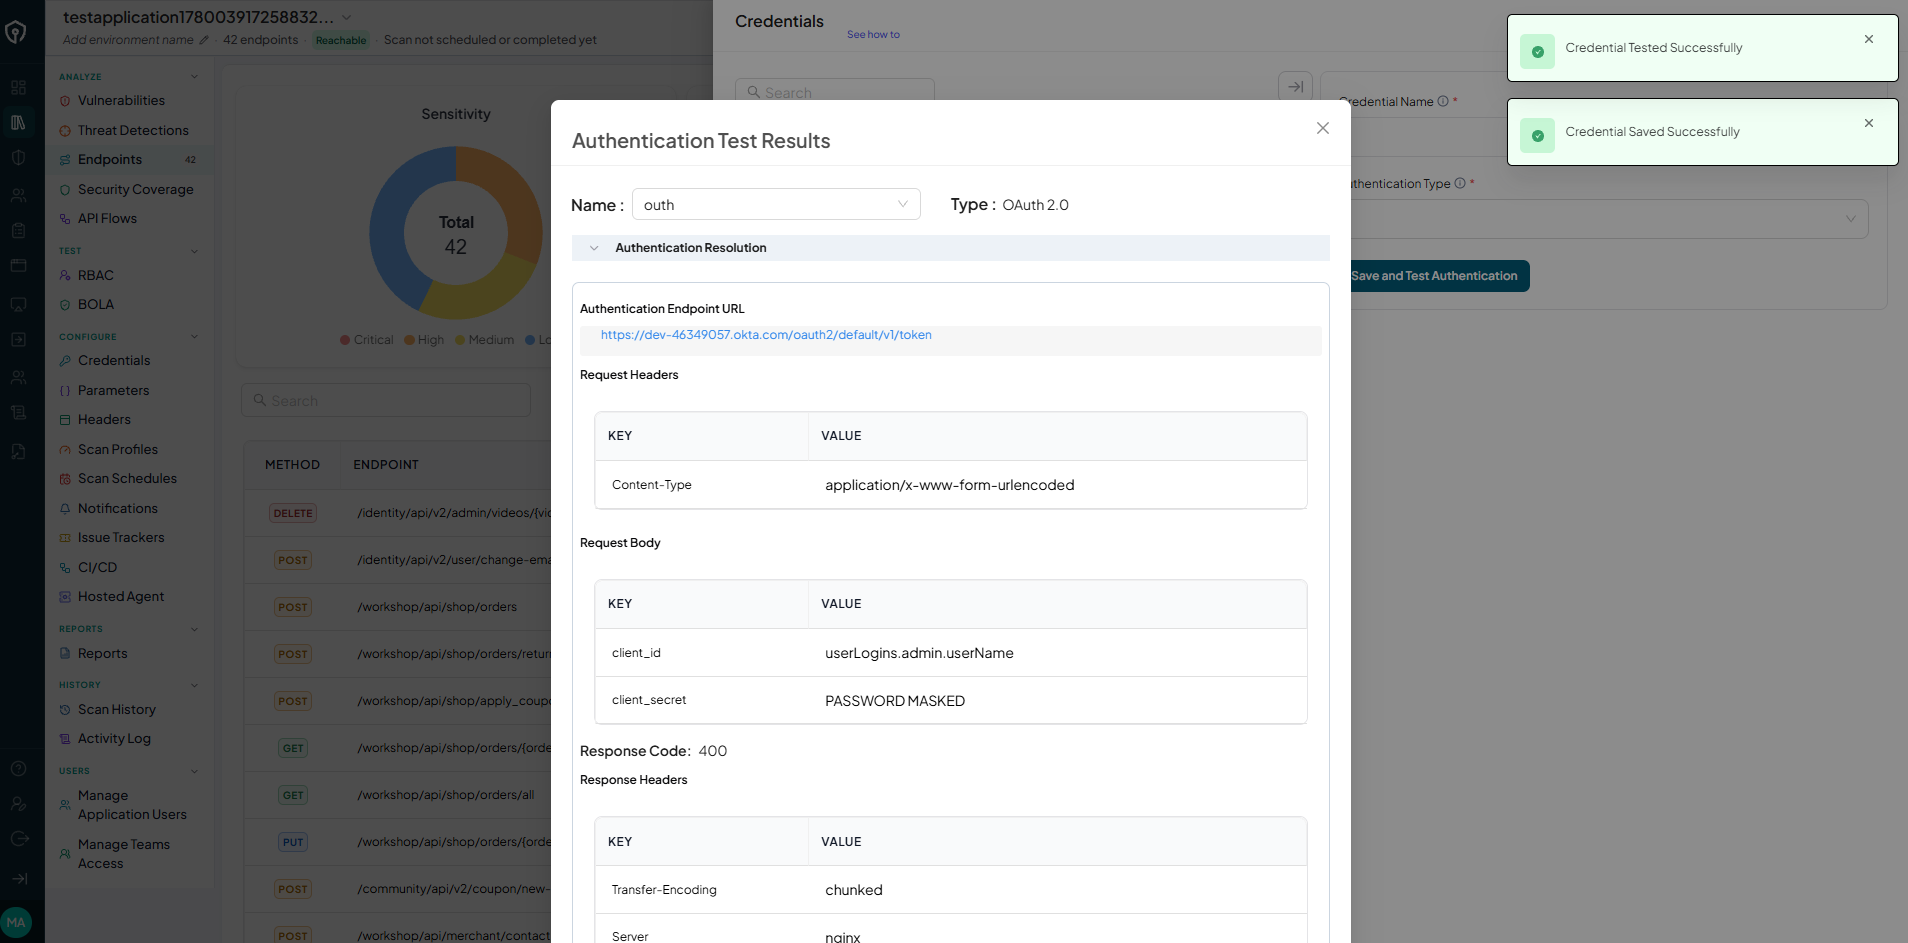
-
Authentication Test Results - API Test Results
-
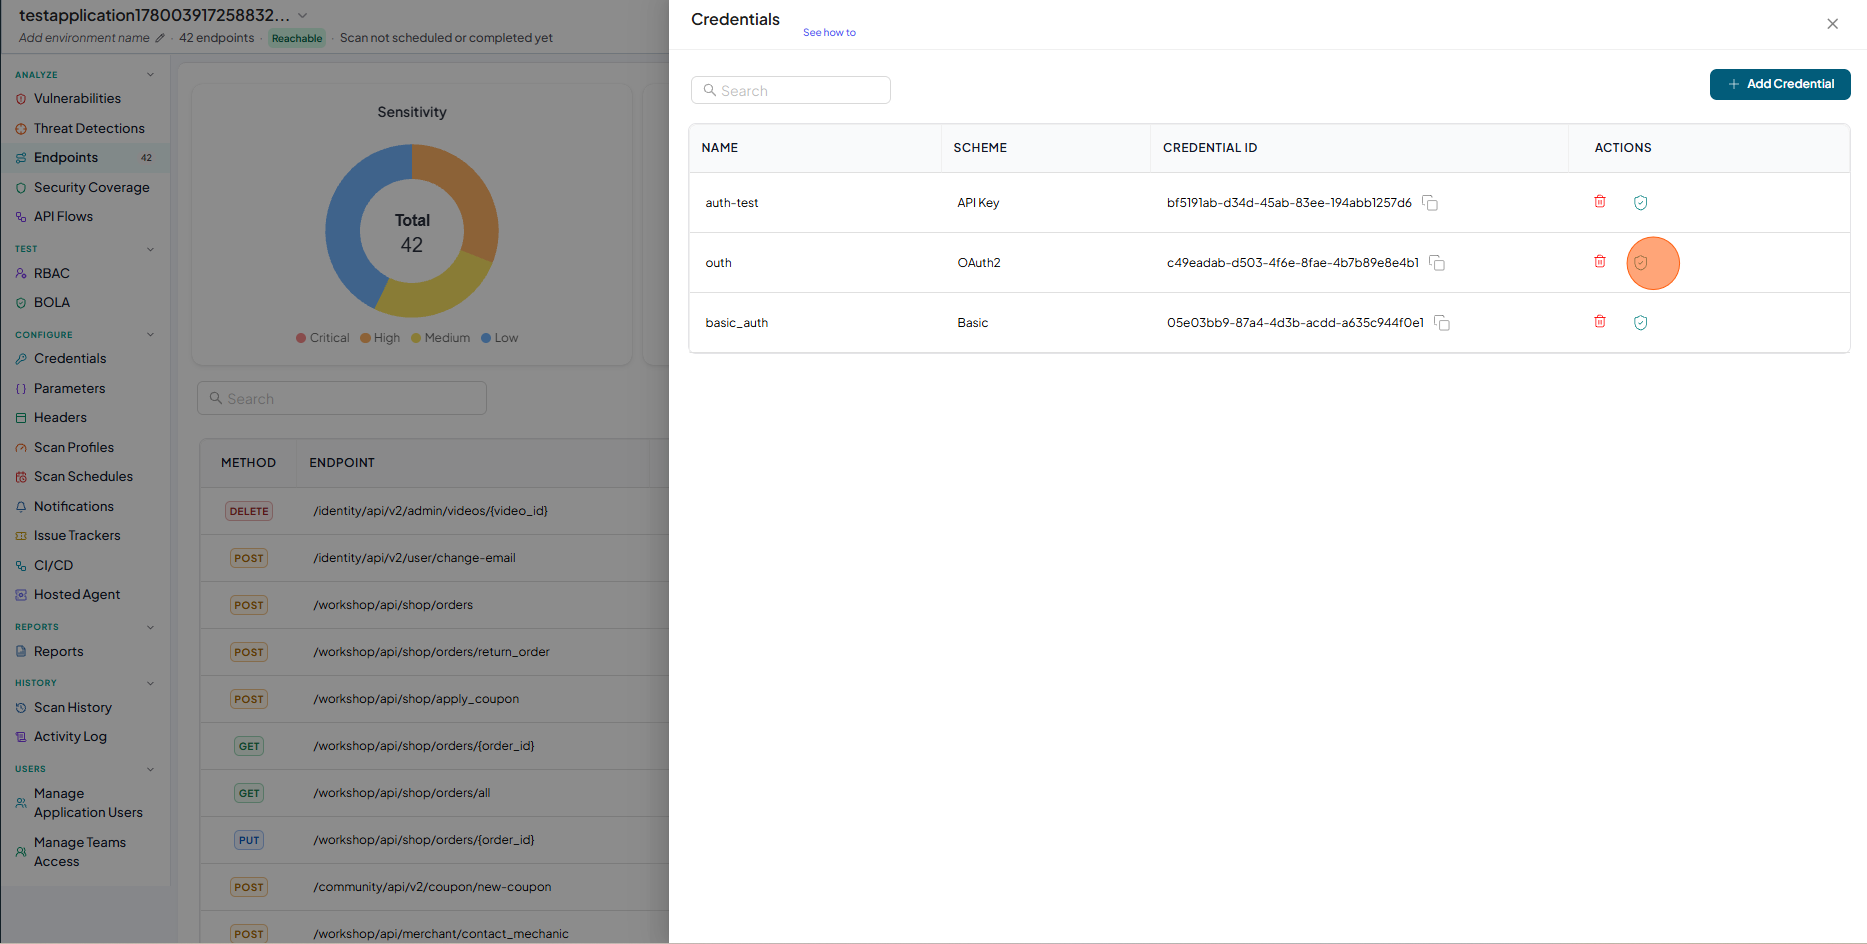
Check the saved credentials are available in the table
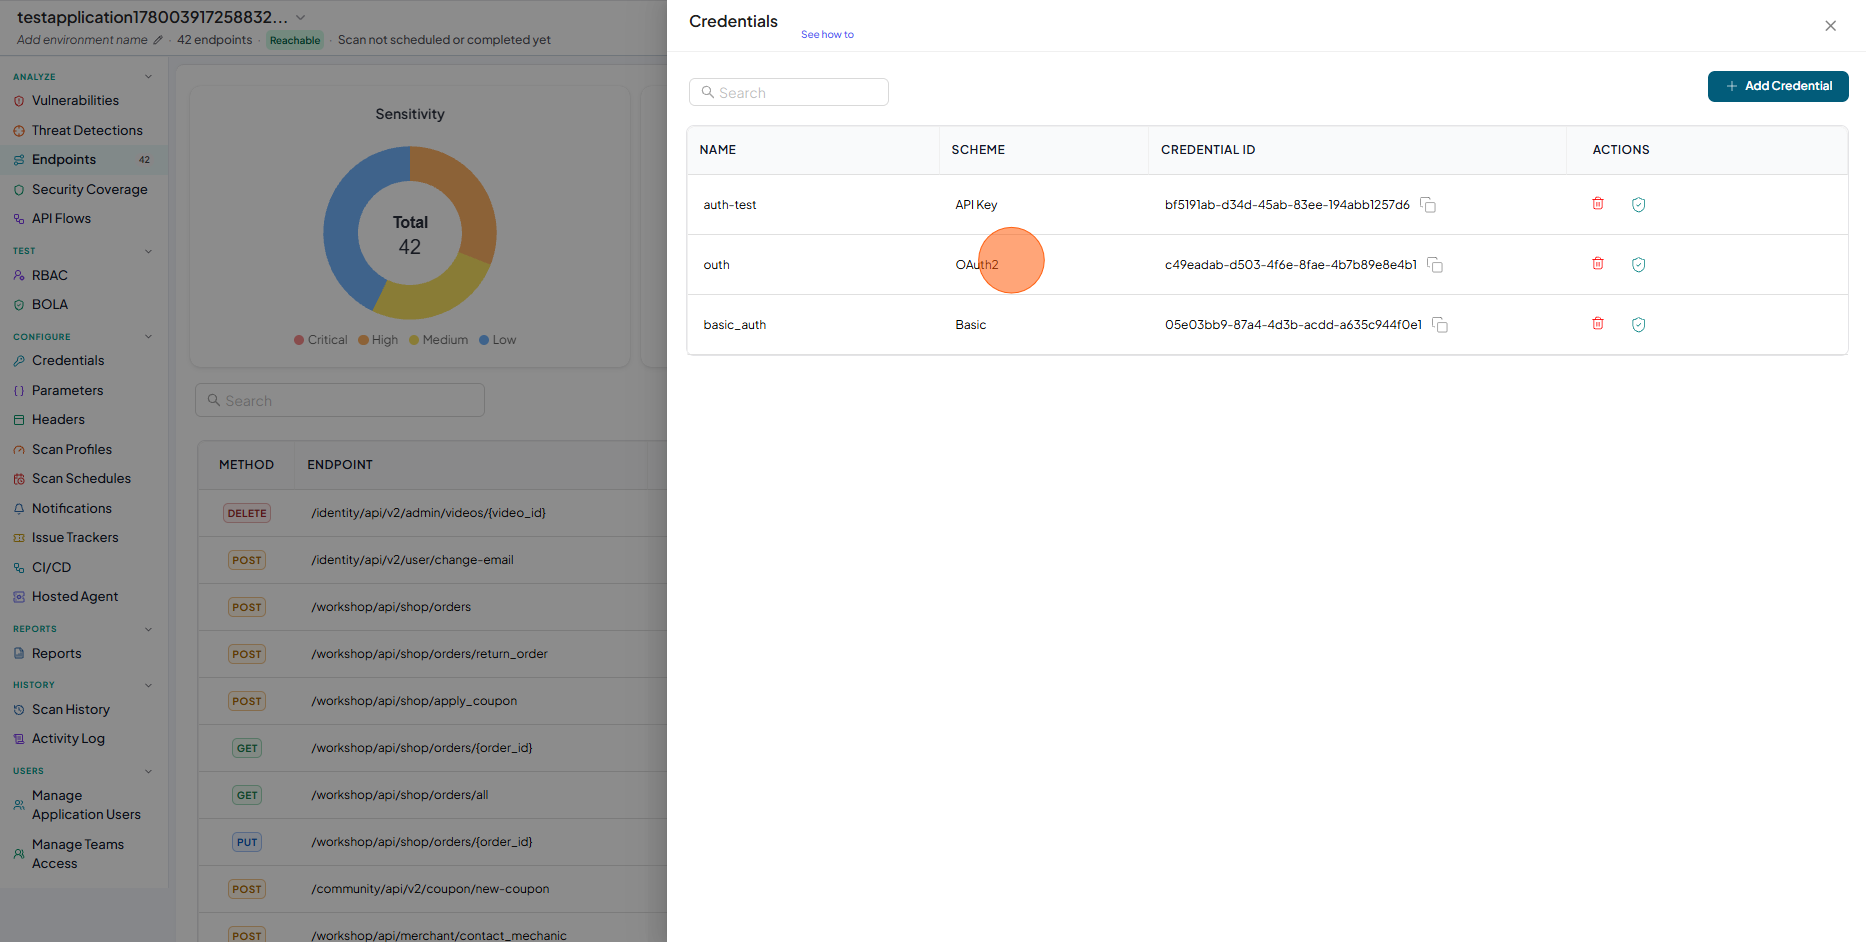
Test Authentication
- Click on Test Authentication
- Authentication Test Results - Authentication Resolution
- Click on Test Authentication
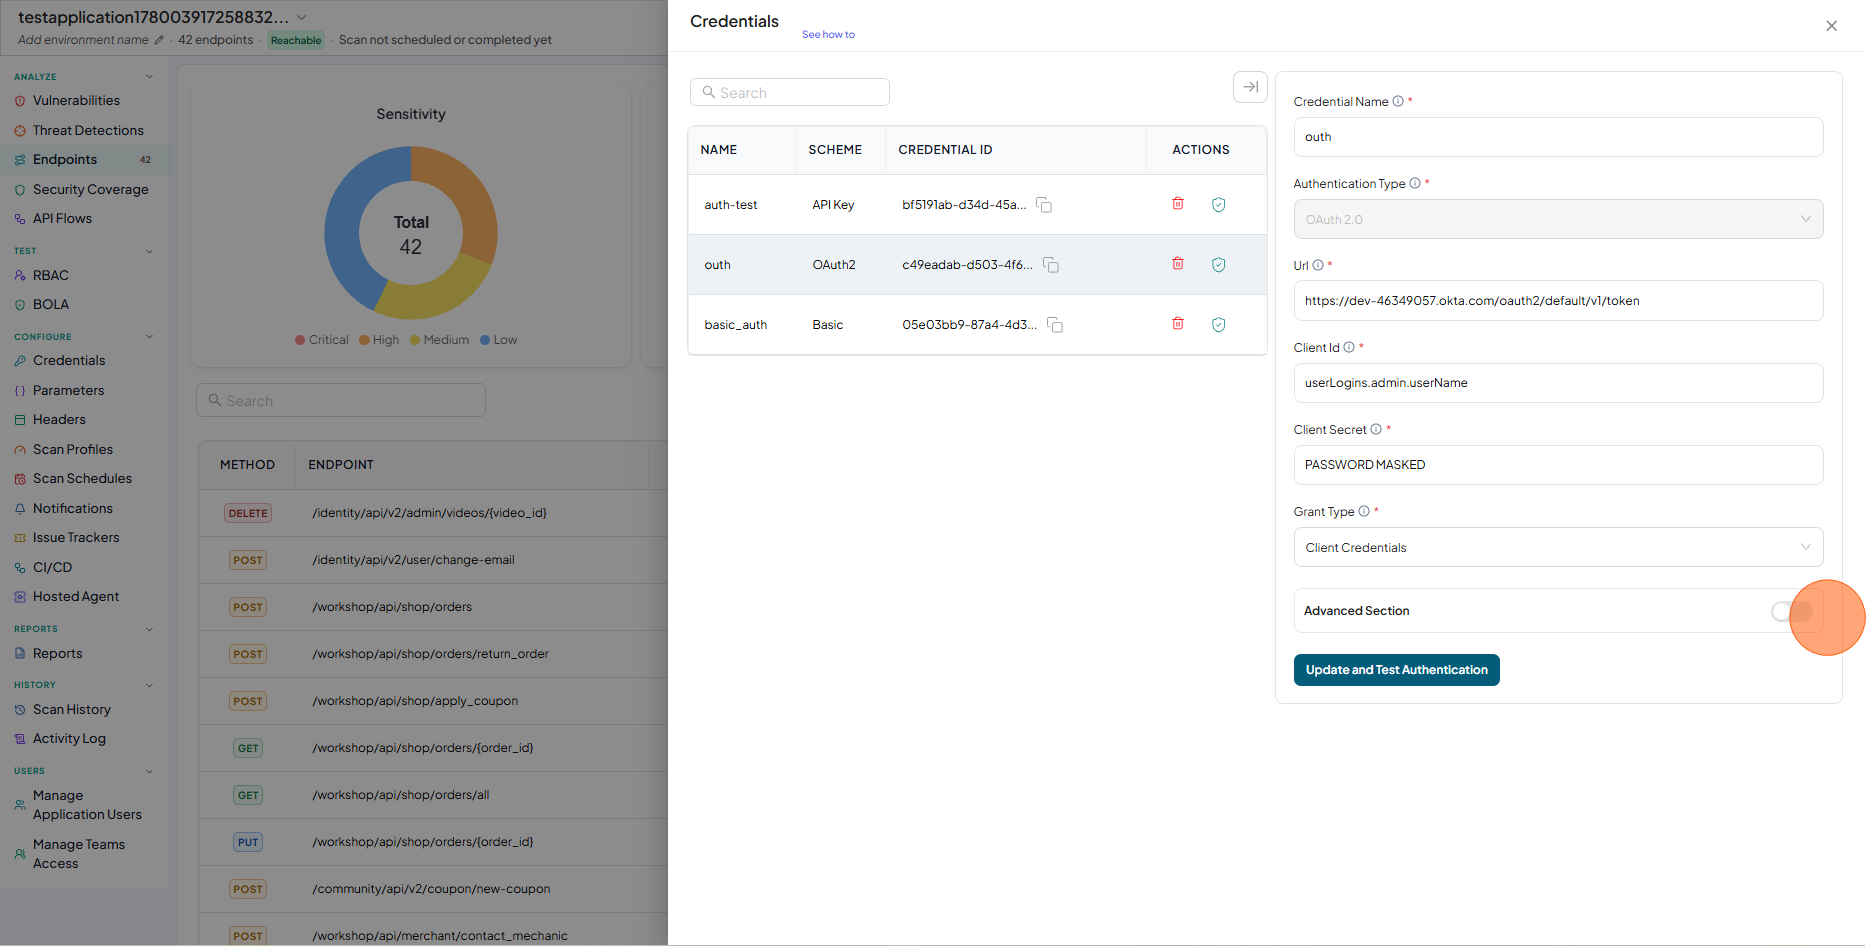
OAuth 2.0 Authentications Advance Option
- Click on the row where OAuth 2.0 available in the table, it will open the OAuth 2.0 in edit mode.
- Click on Advance Section toggle button.
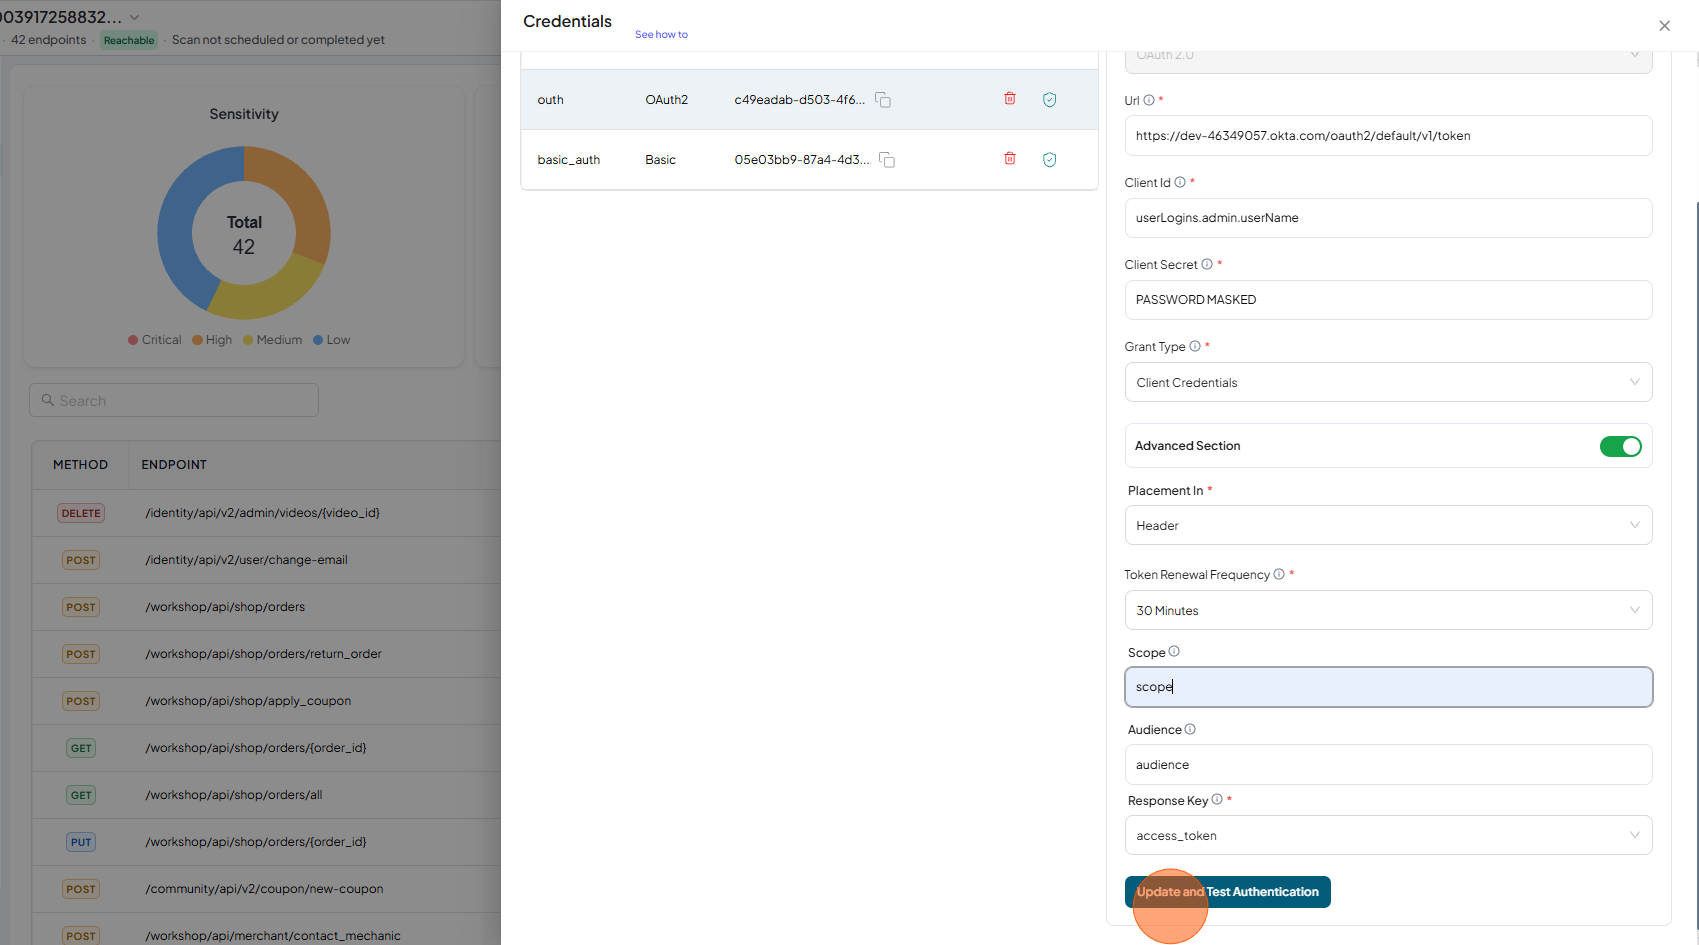
- Select Header from the Placement In dropdown, and fill in the Scope and Audience fields in the form.
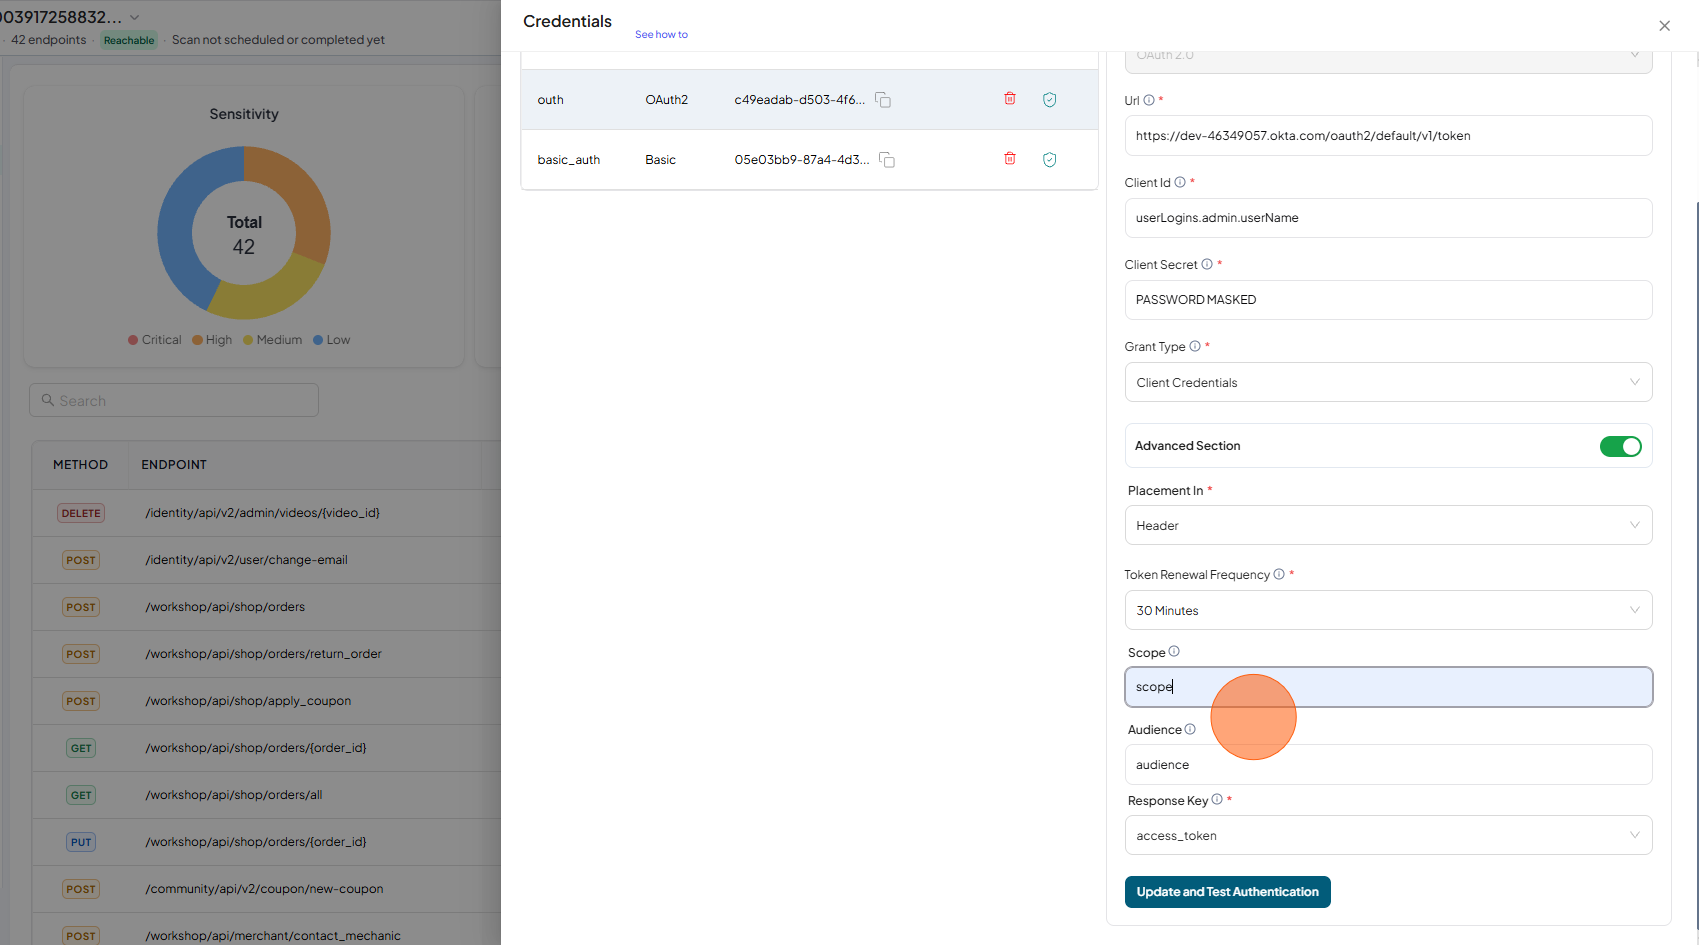
- Click on "Update and Test Authentication"
Bearer Token Authentications
-
Type Auth Name
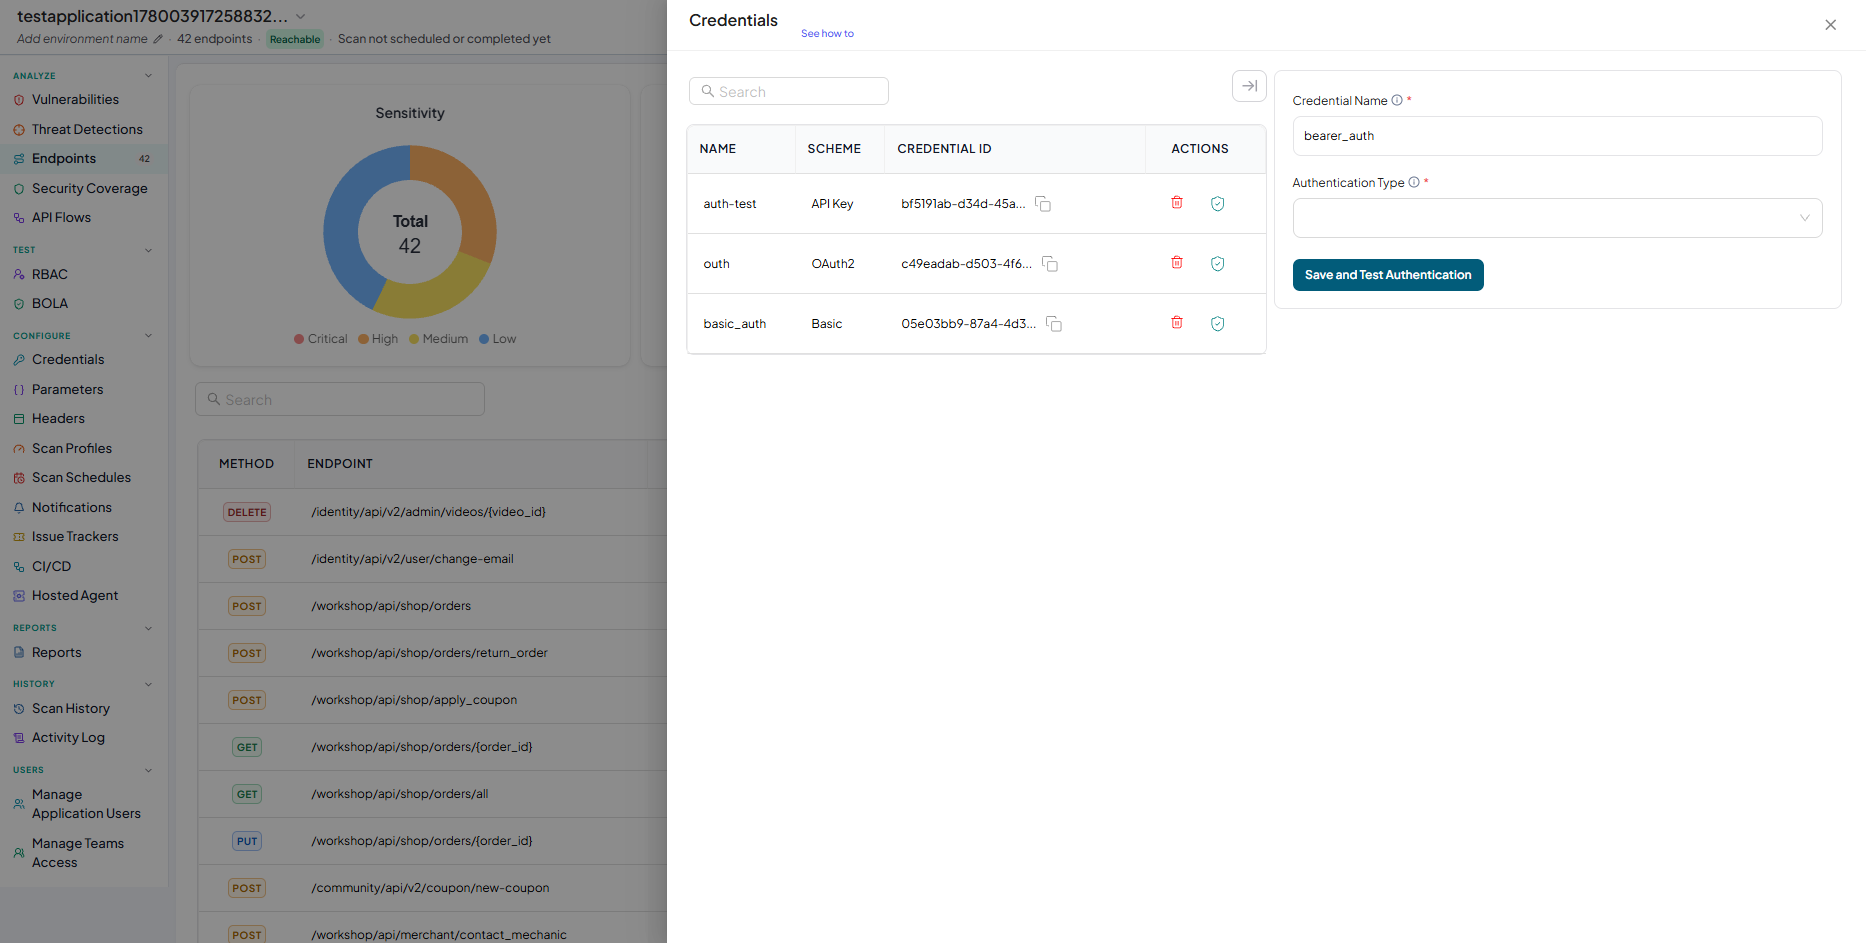
-
From dropdown select "Bearer Token"
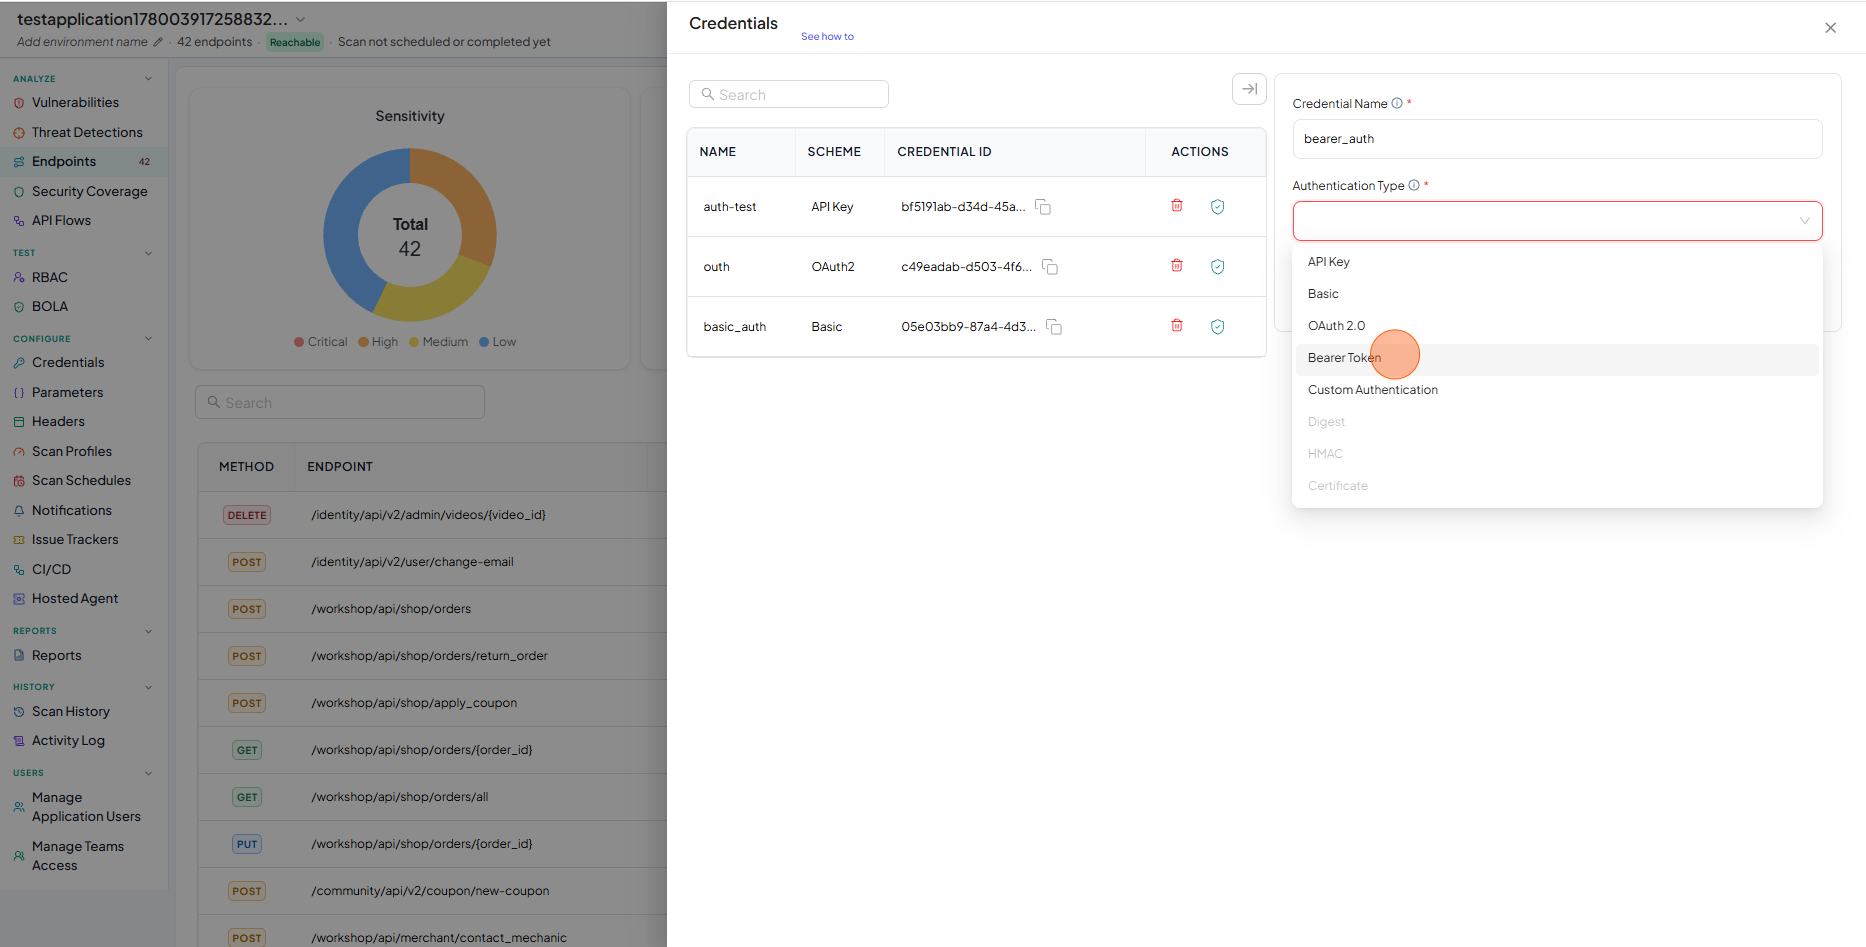
-
Fill the form
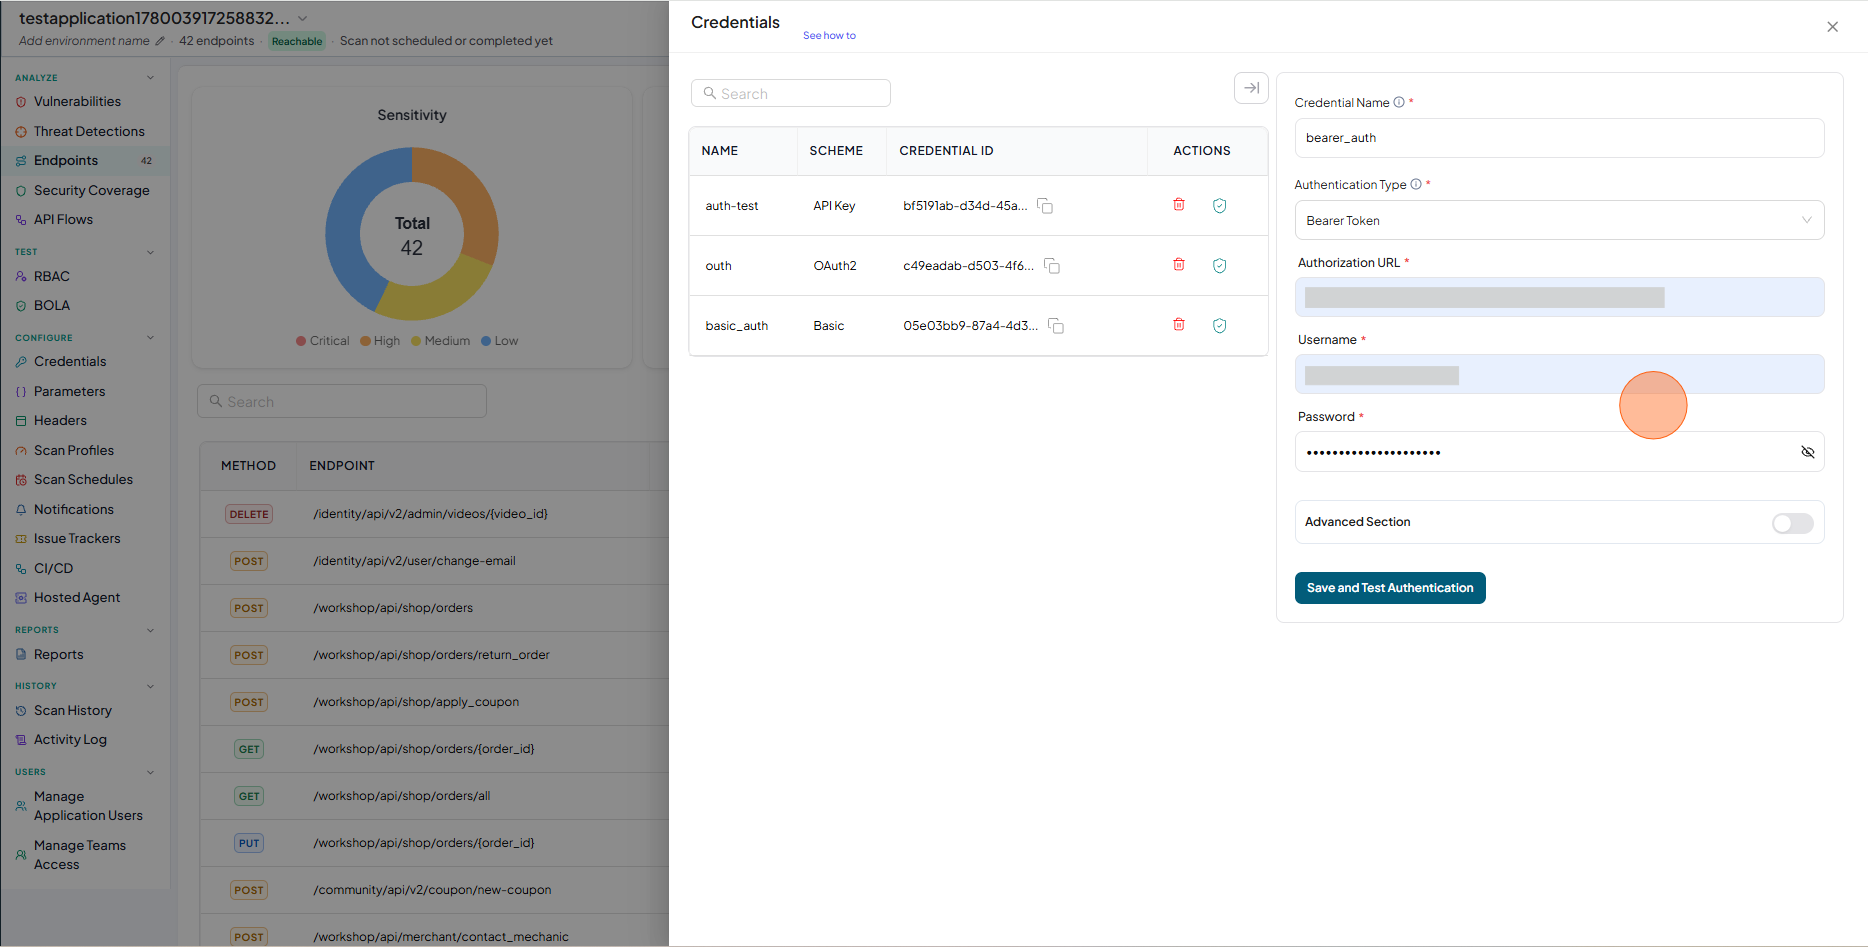
-
Click on Save and Test Authentication
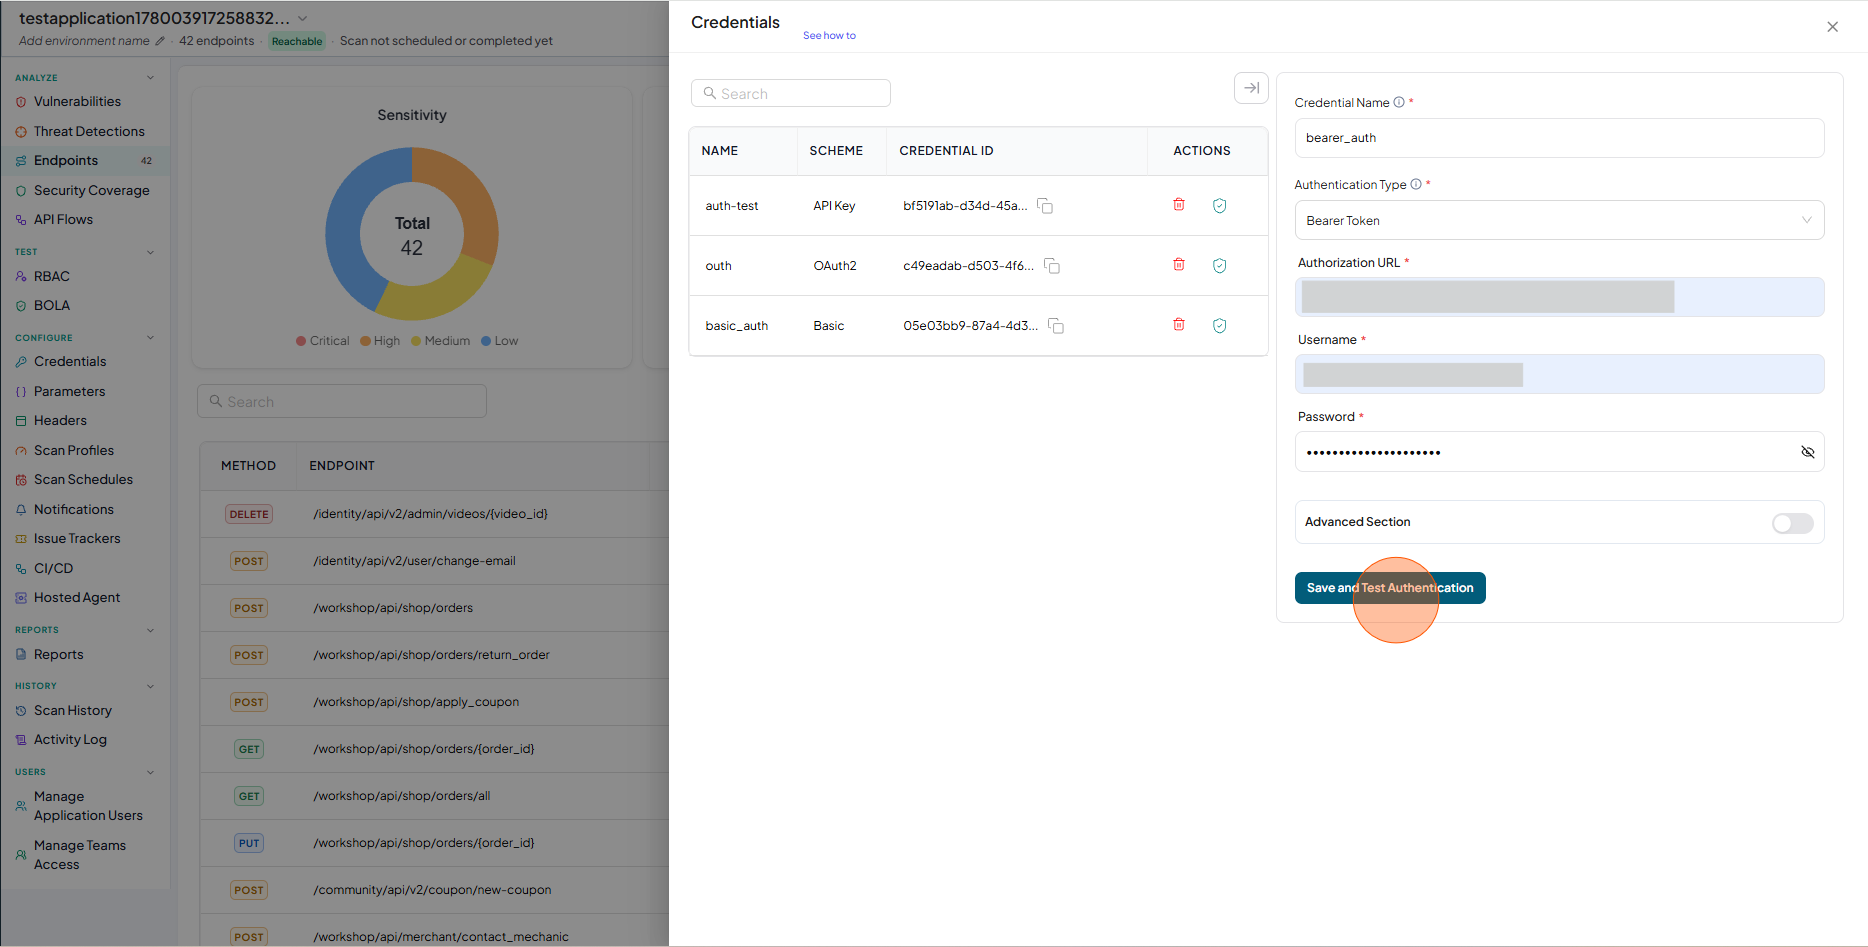
-
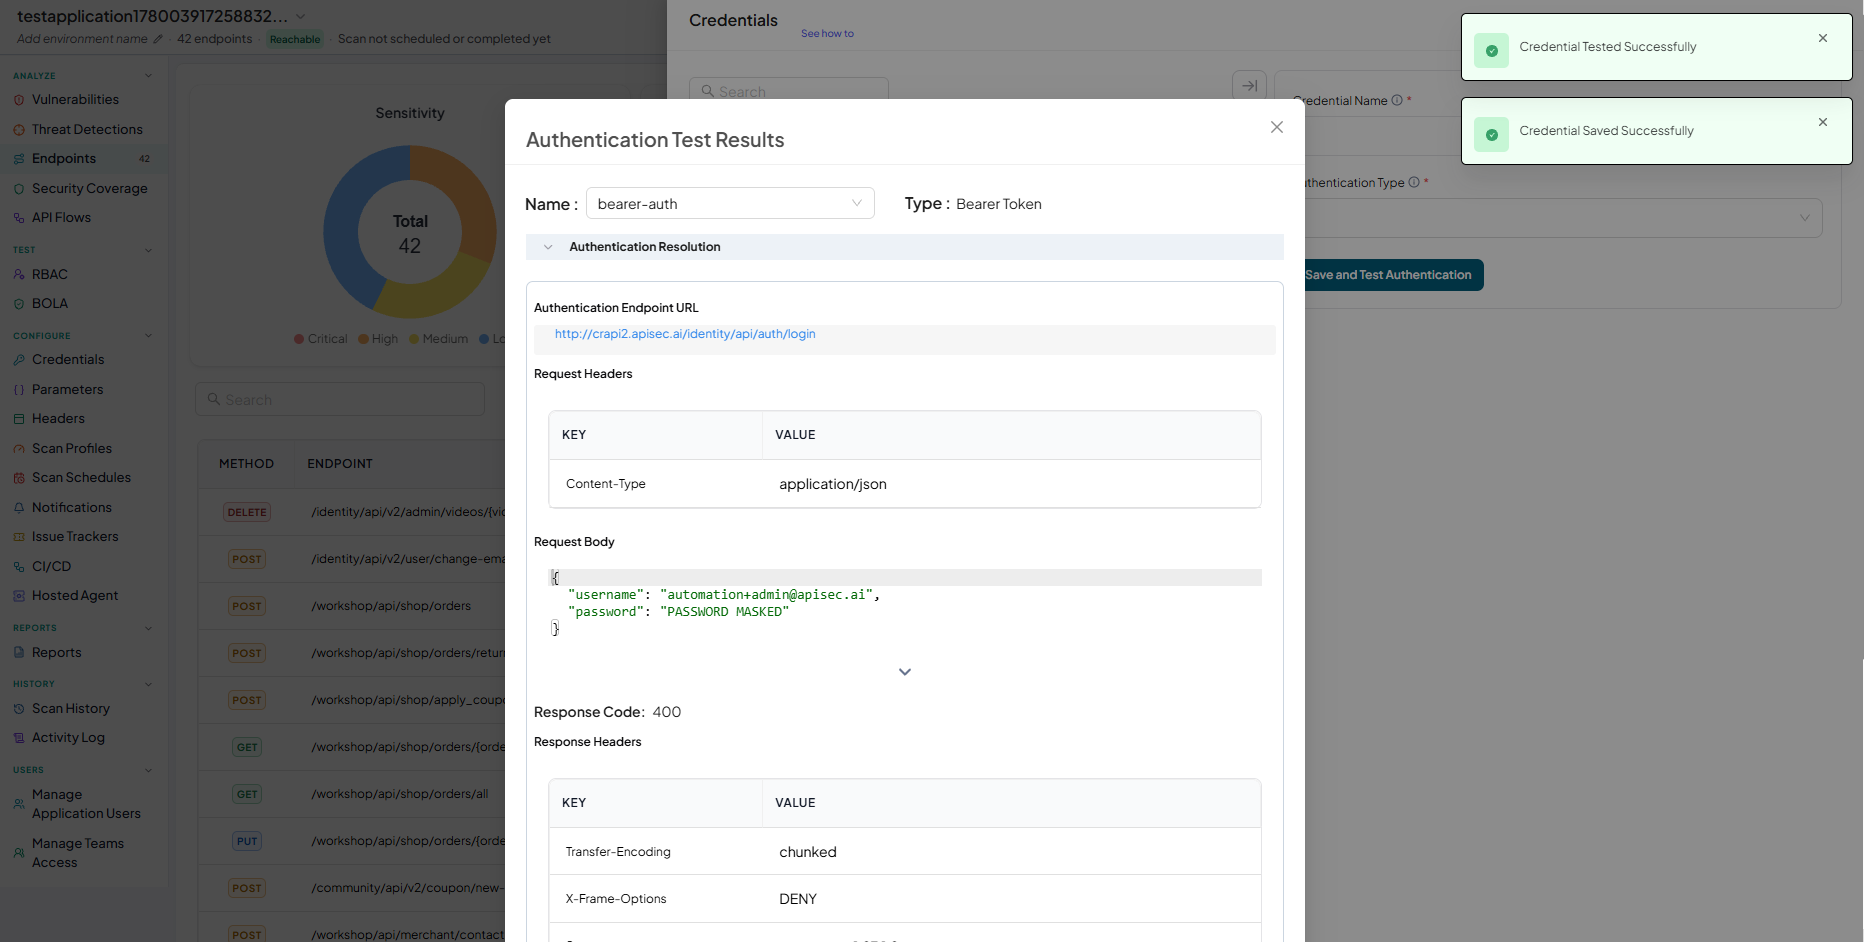
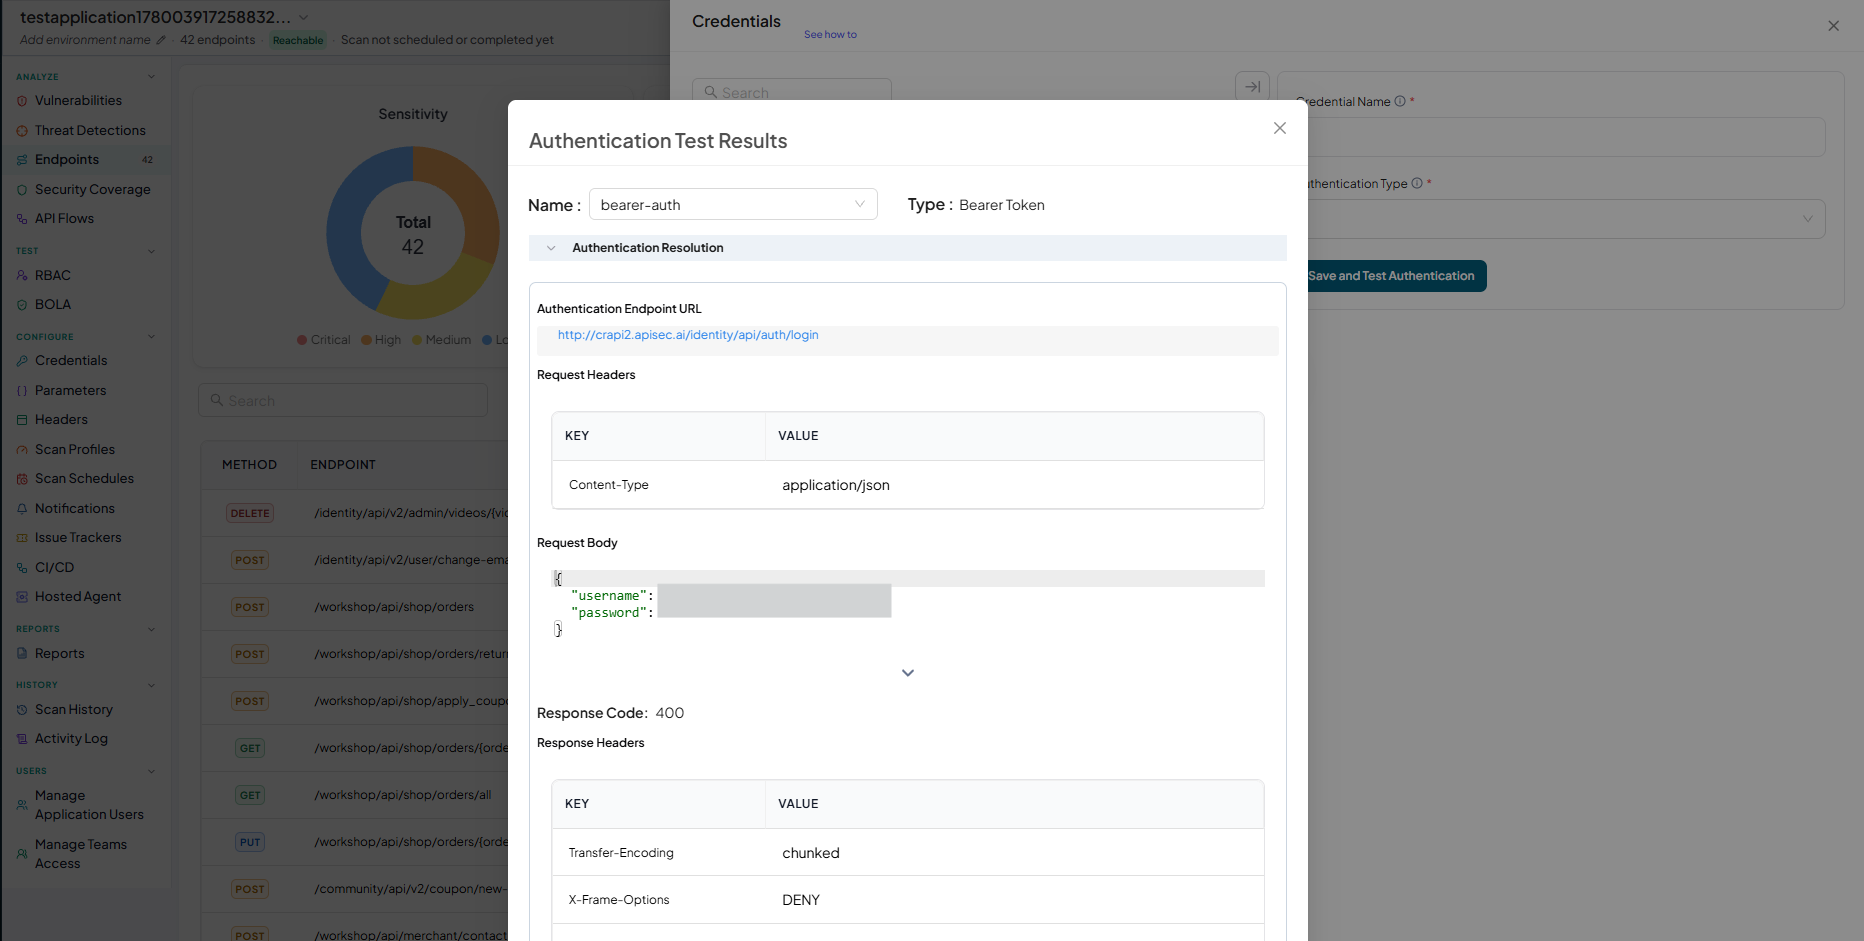
Authentication Test Results - Authentication Resolution
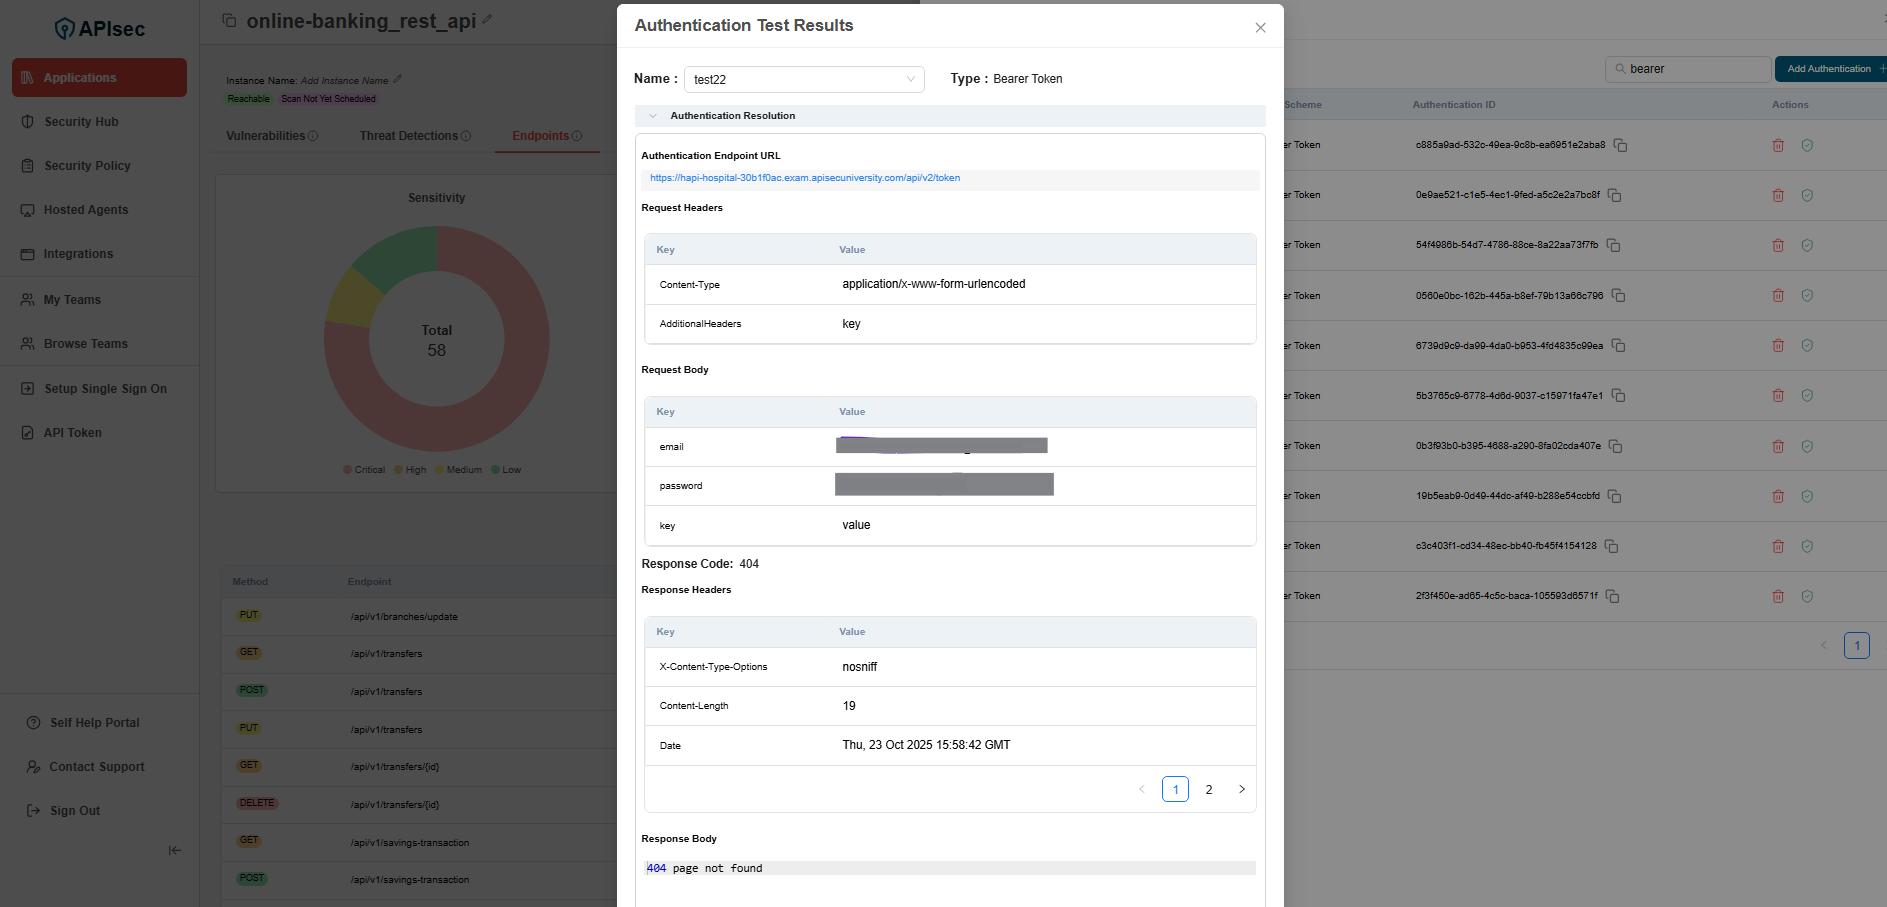
-
Authentication saved and Tested Successfully
-
Authentication Test Results - Authentication Resolution
-
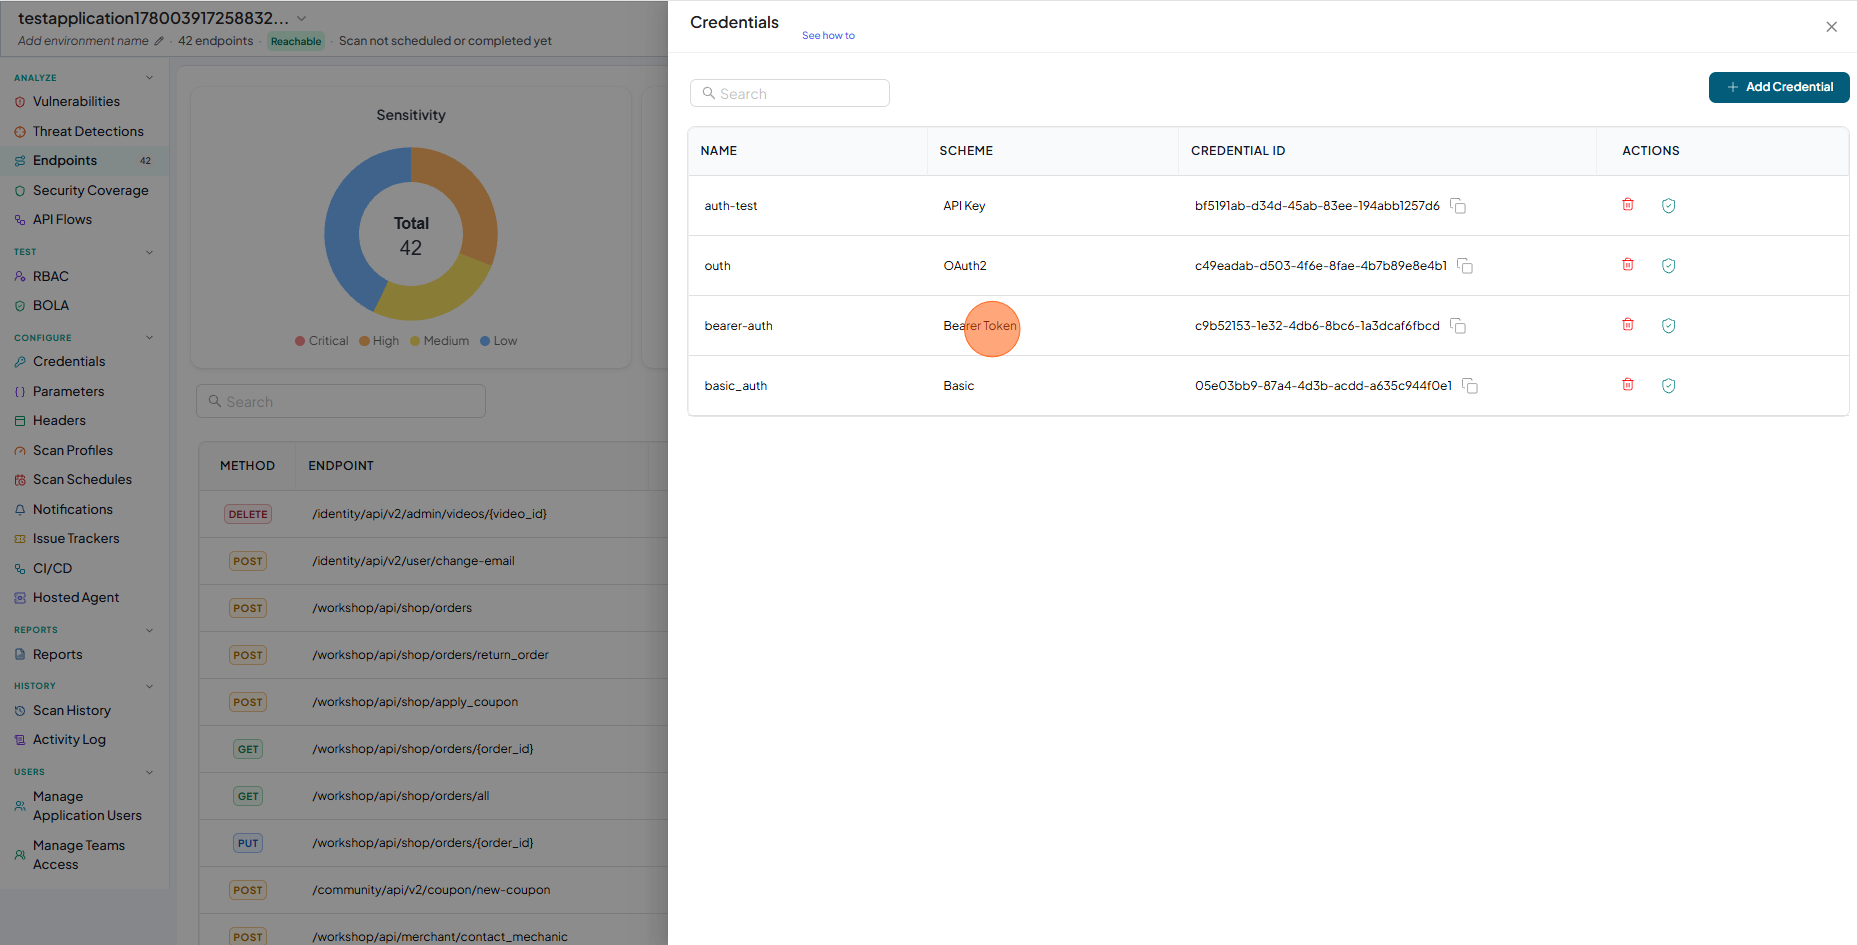
Check the saved credentials are available in the table
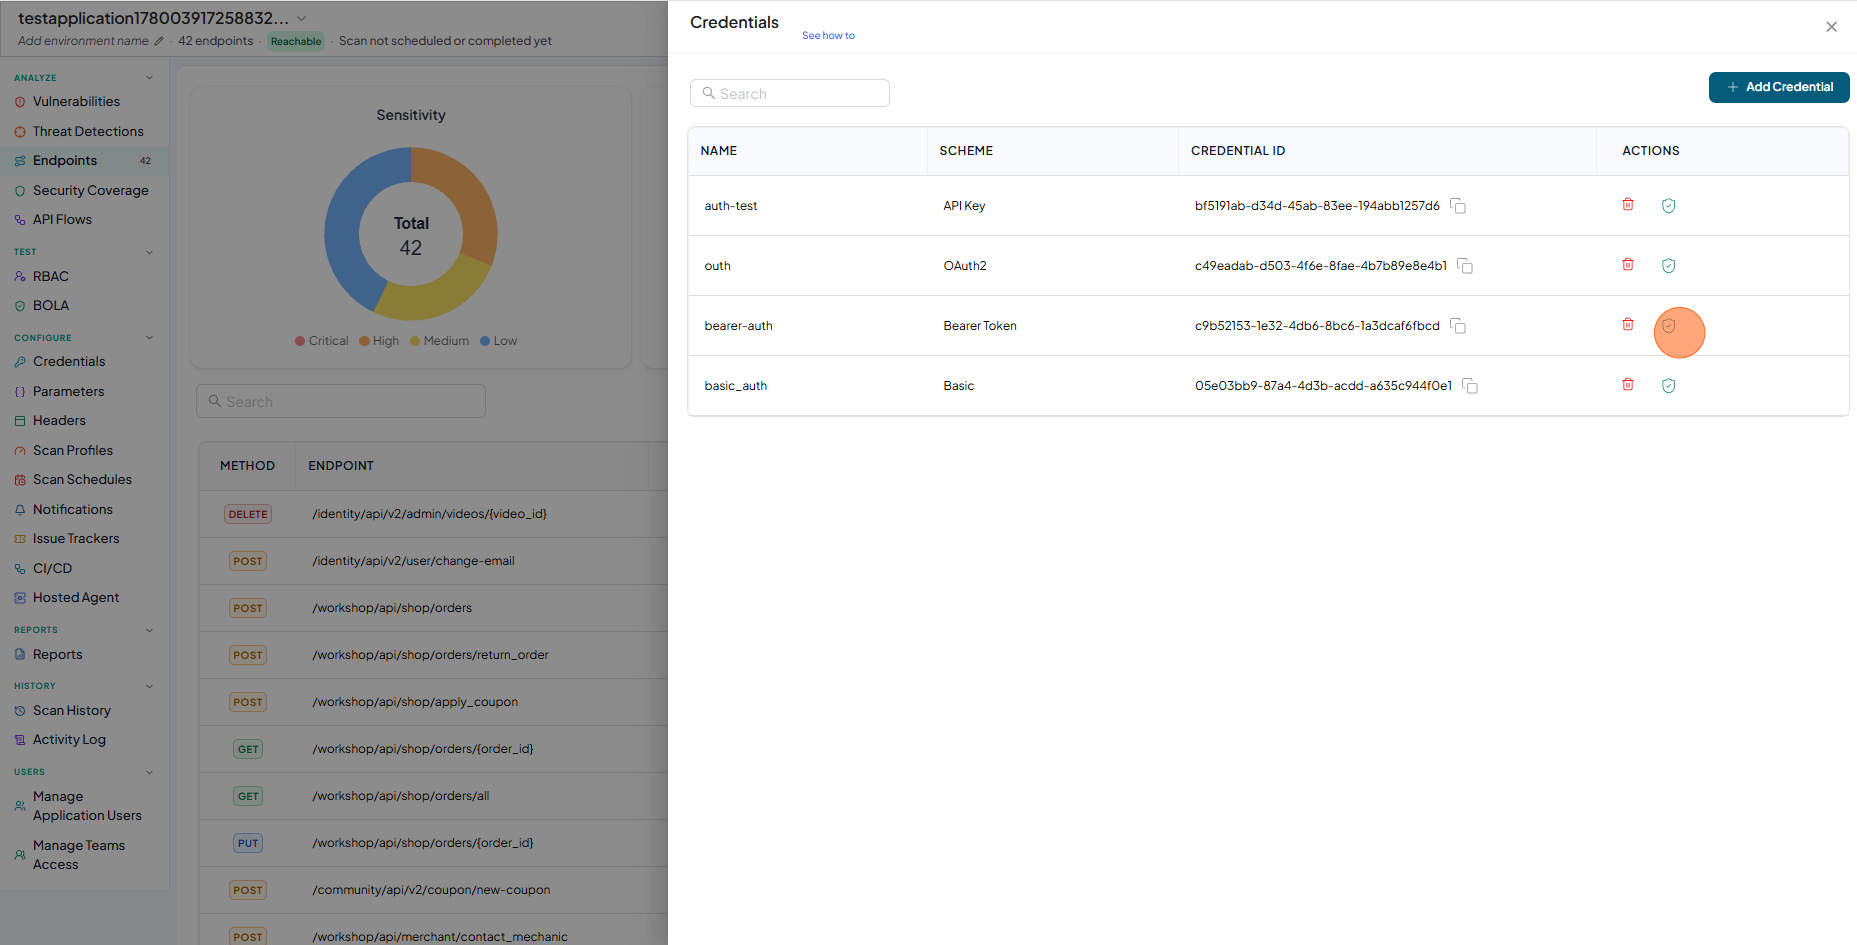
Test Authentication
- Click on Test Authentication
- Authentication Test Results - Authentication Resolution
- Click on Test Authentication
Bearer Token Authentications Advance Option
- Click on the row where Bearer Token available in the table, it will open the Bearer Token in edit mode.
- Click on Advance Section toggle .
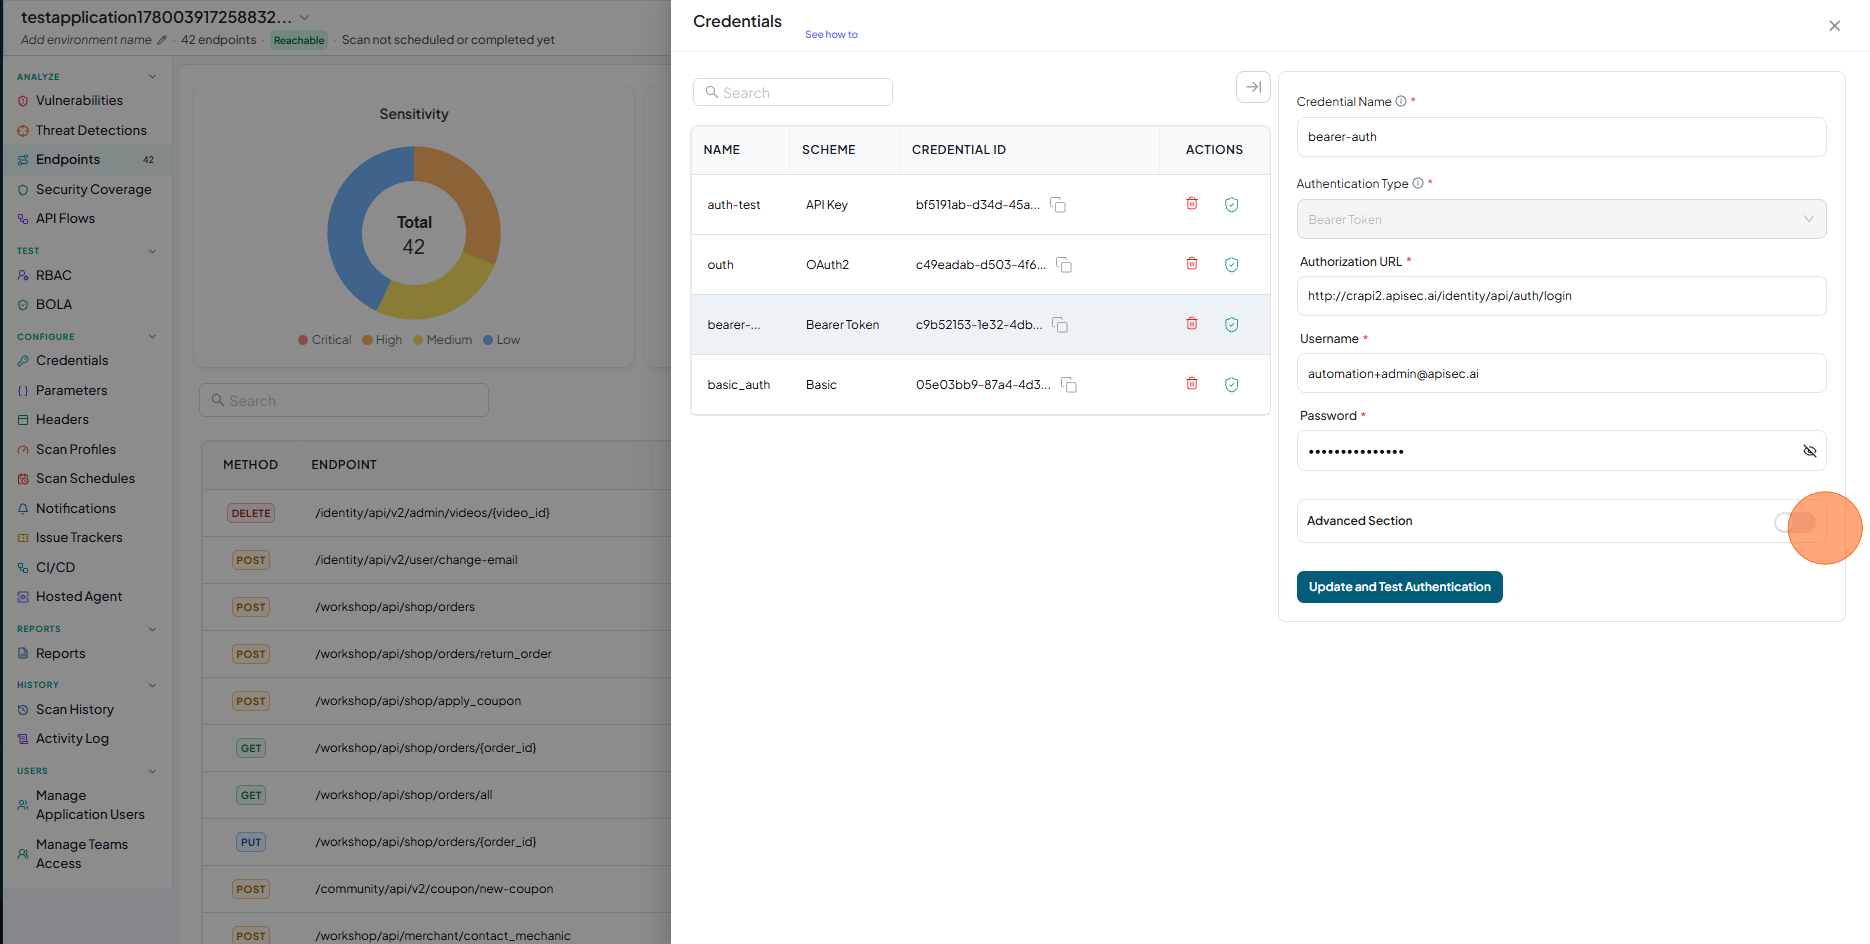
- Select the Query Parameter from Placement In dropdown.
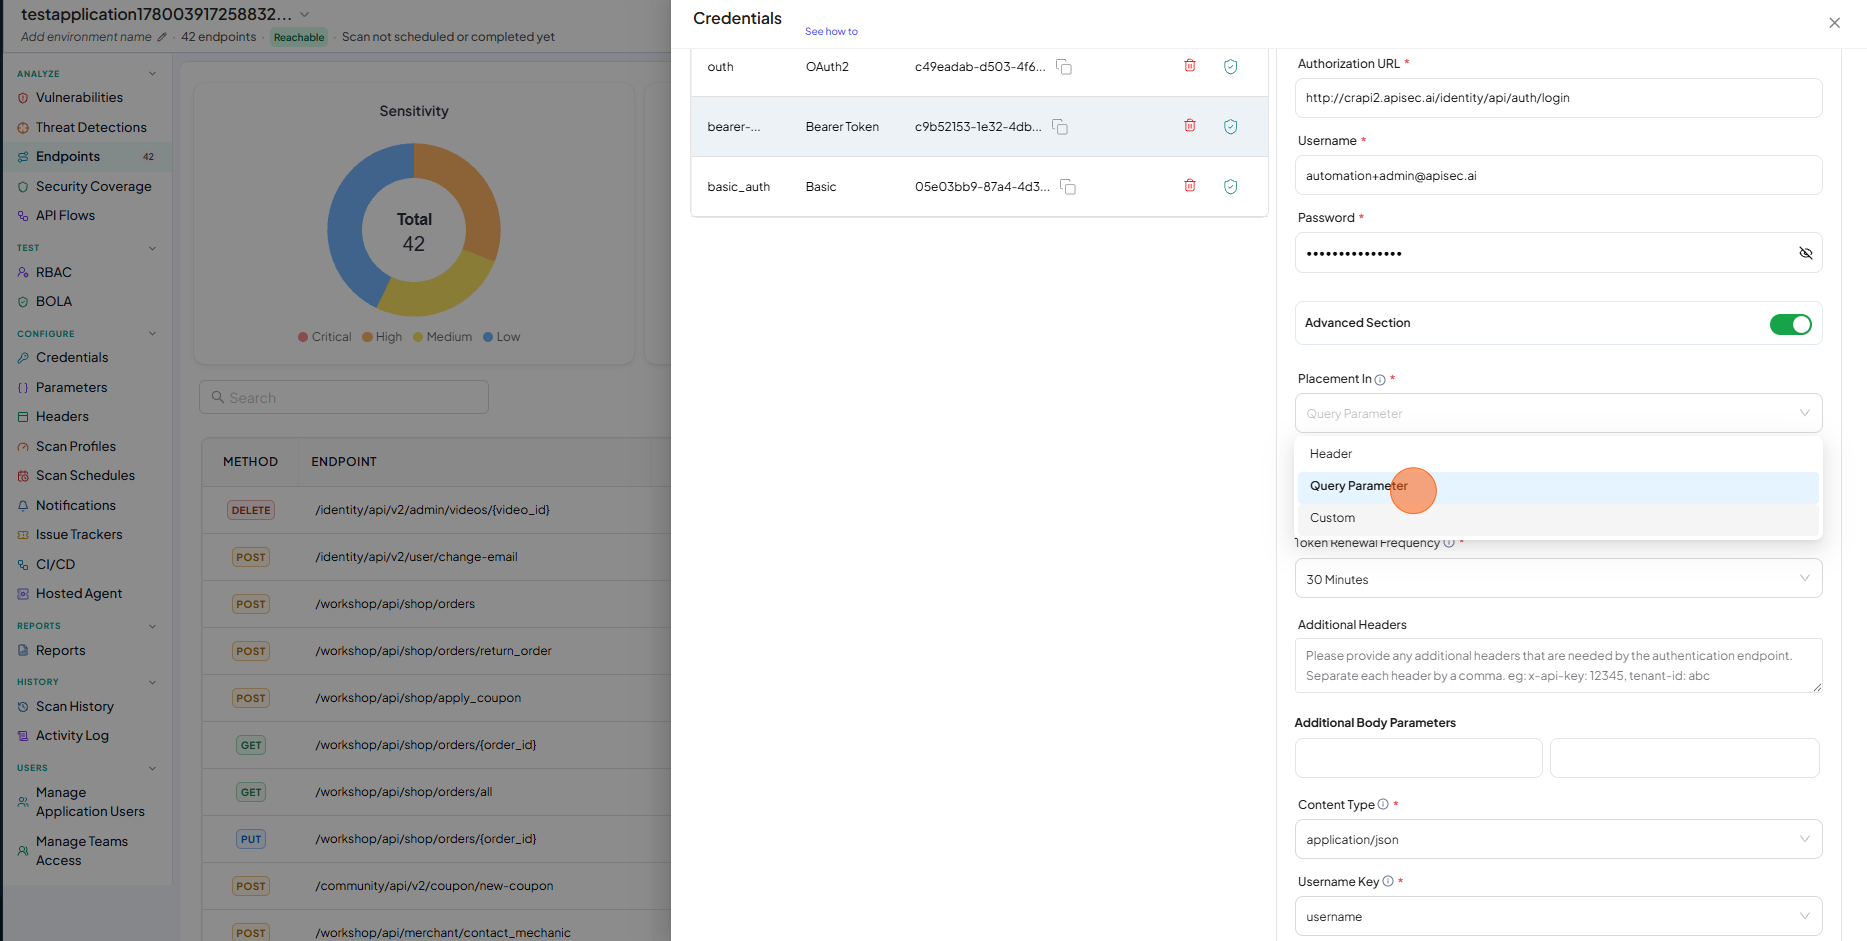
- Select the Authorization from Placement Key dropdown.

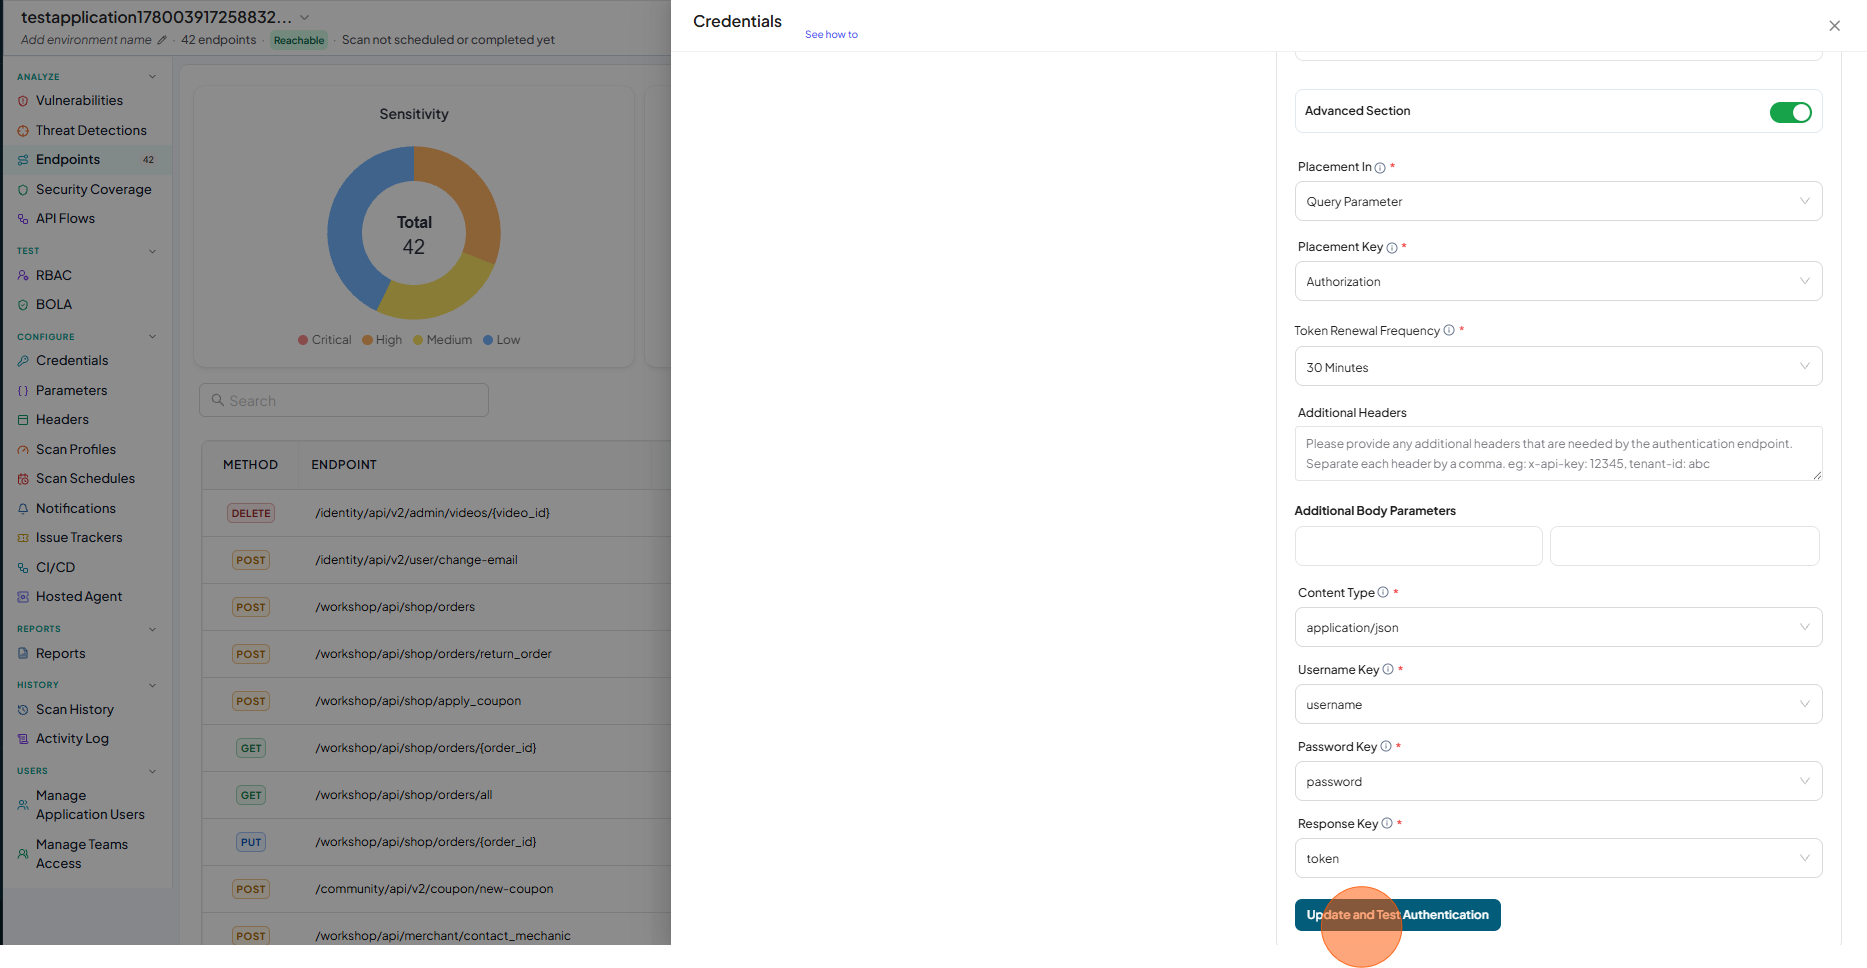
- Fill the required additional columns.
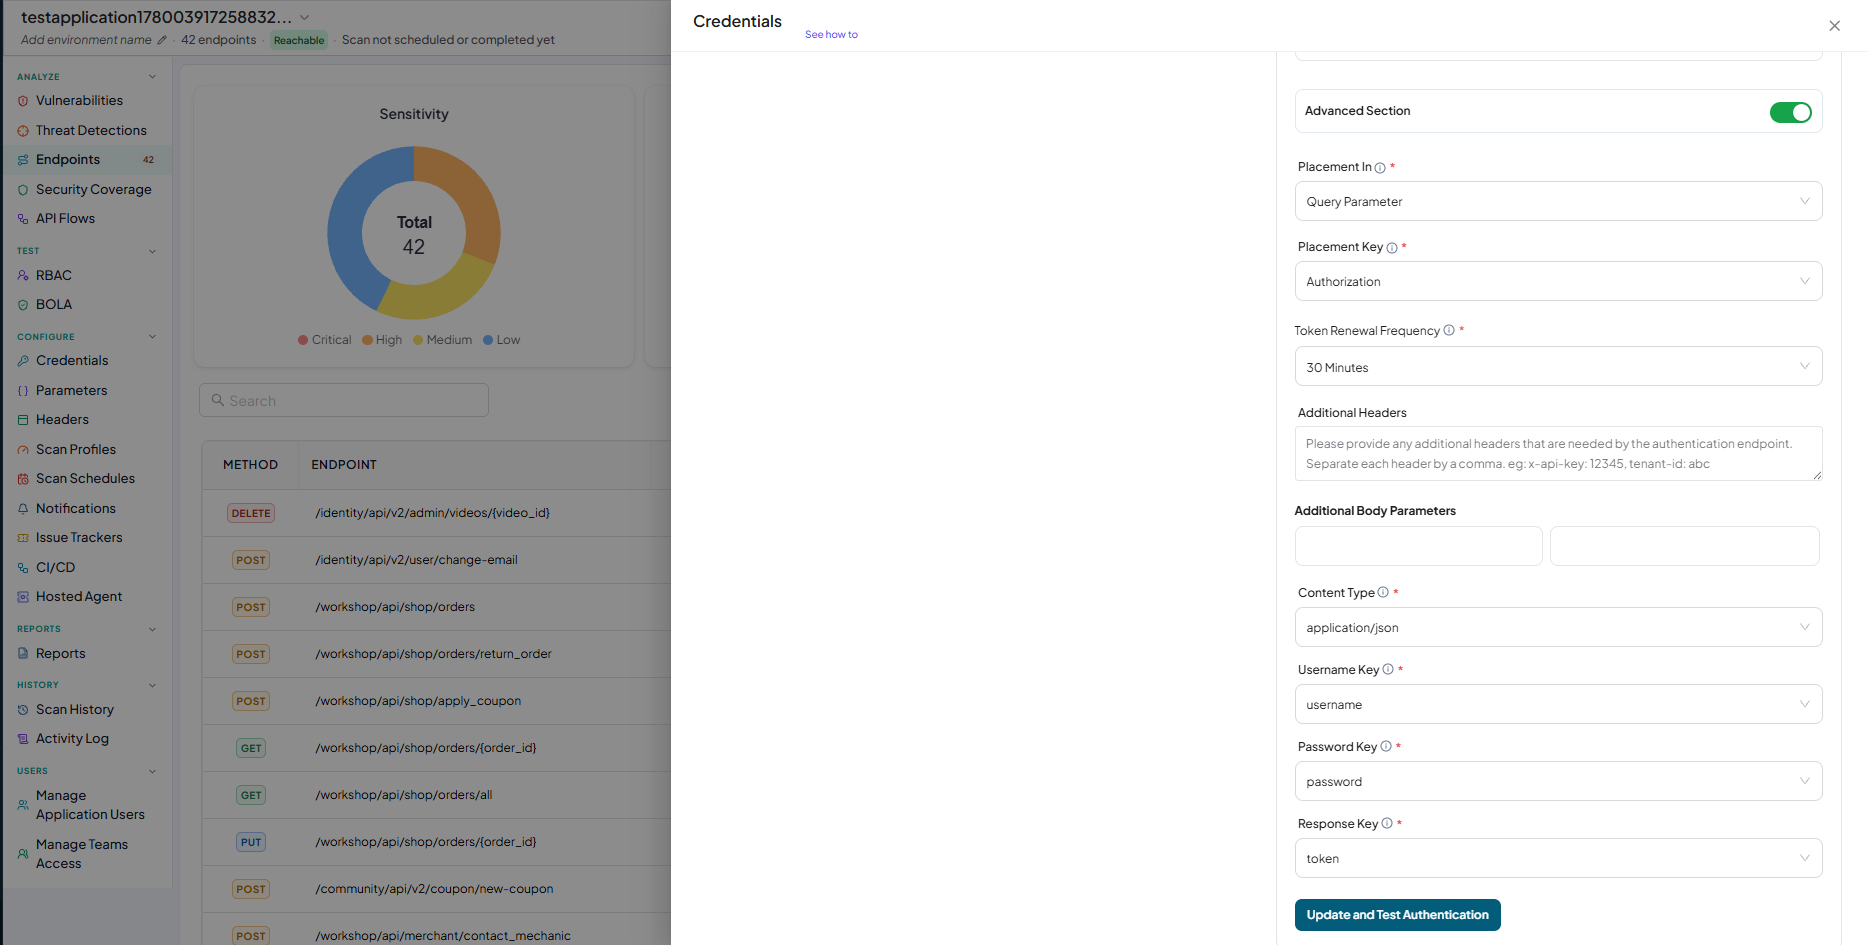
- Click on "Update and Test Authentication"
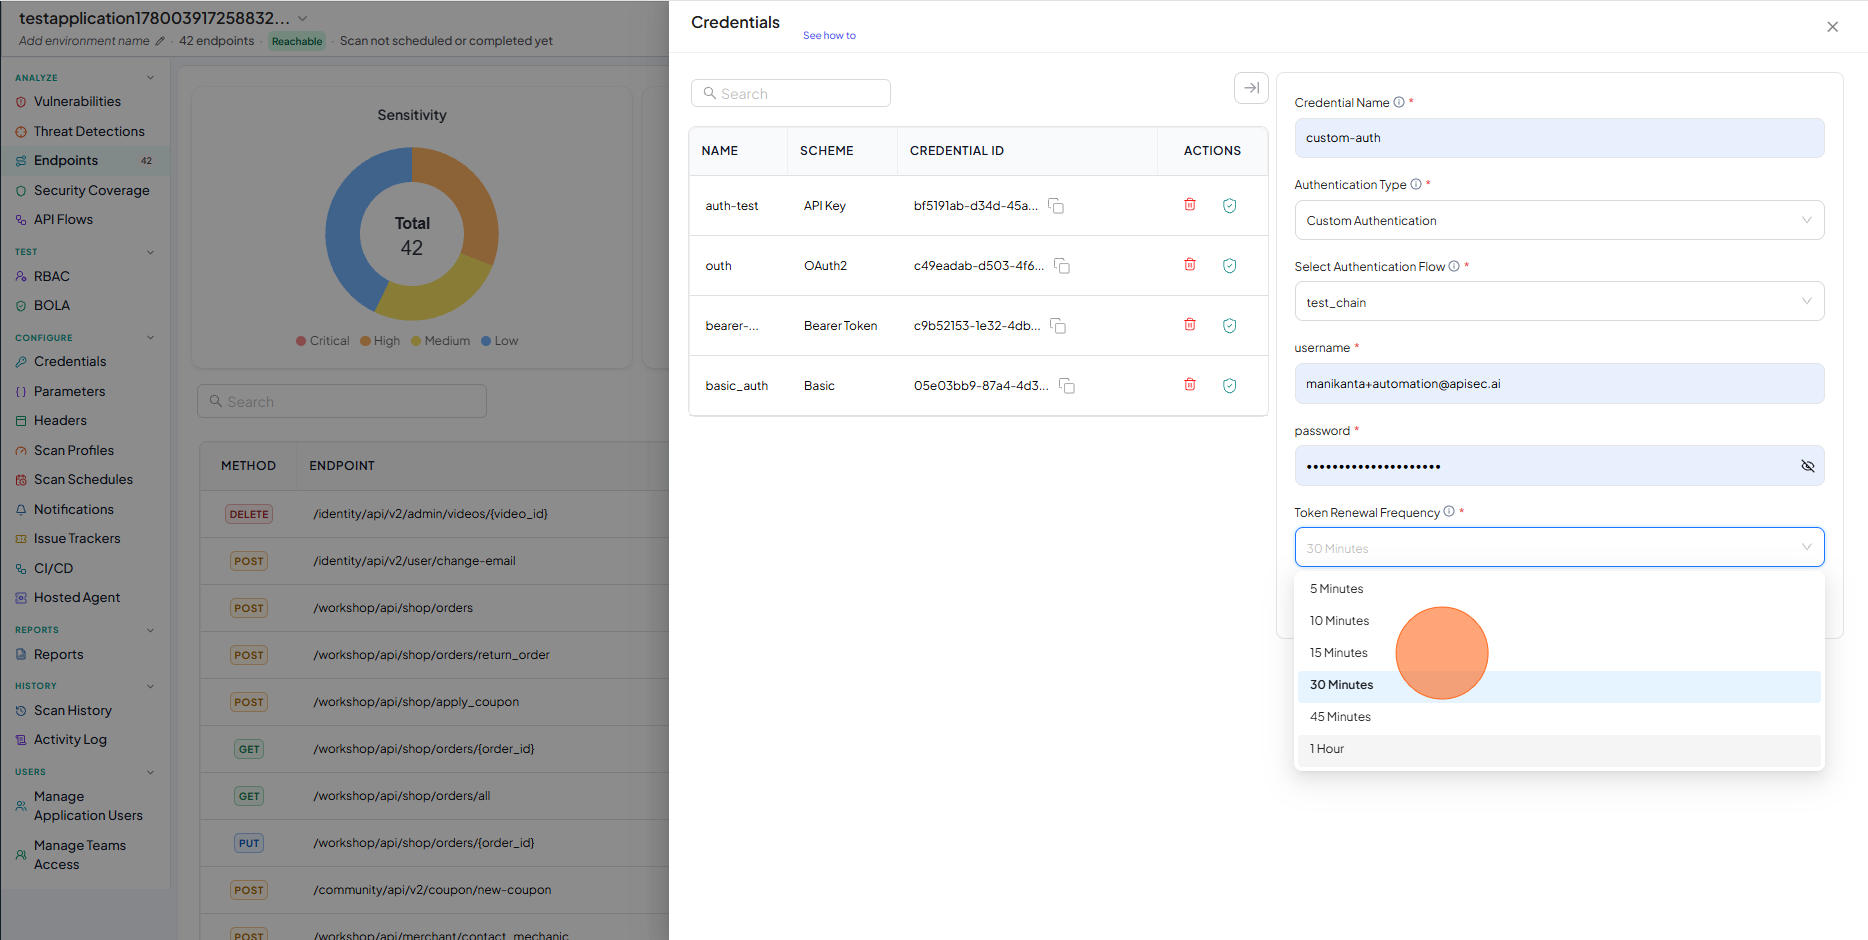
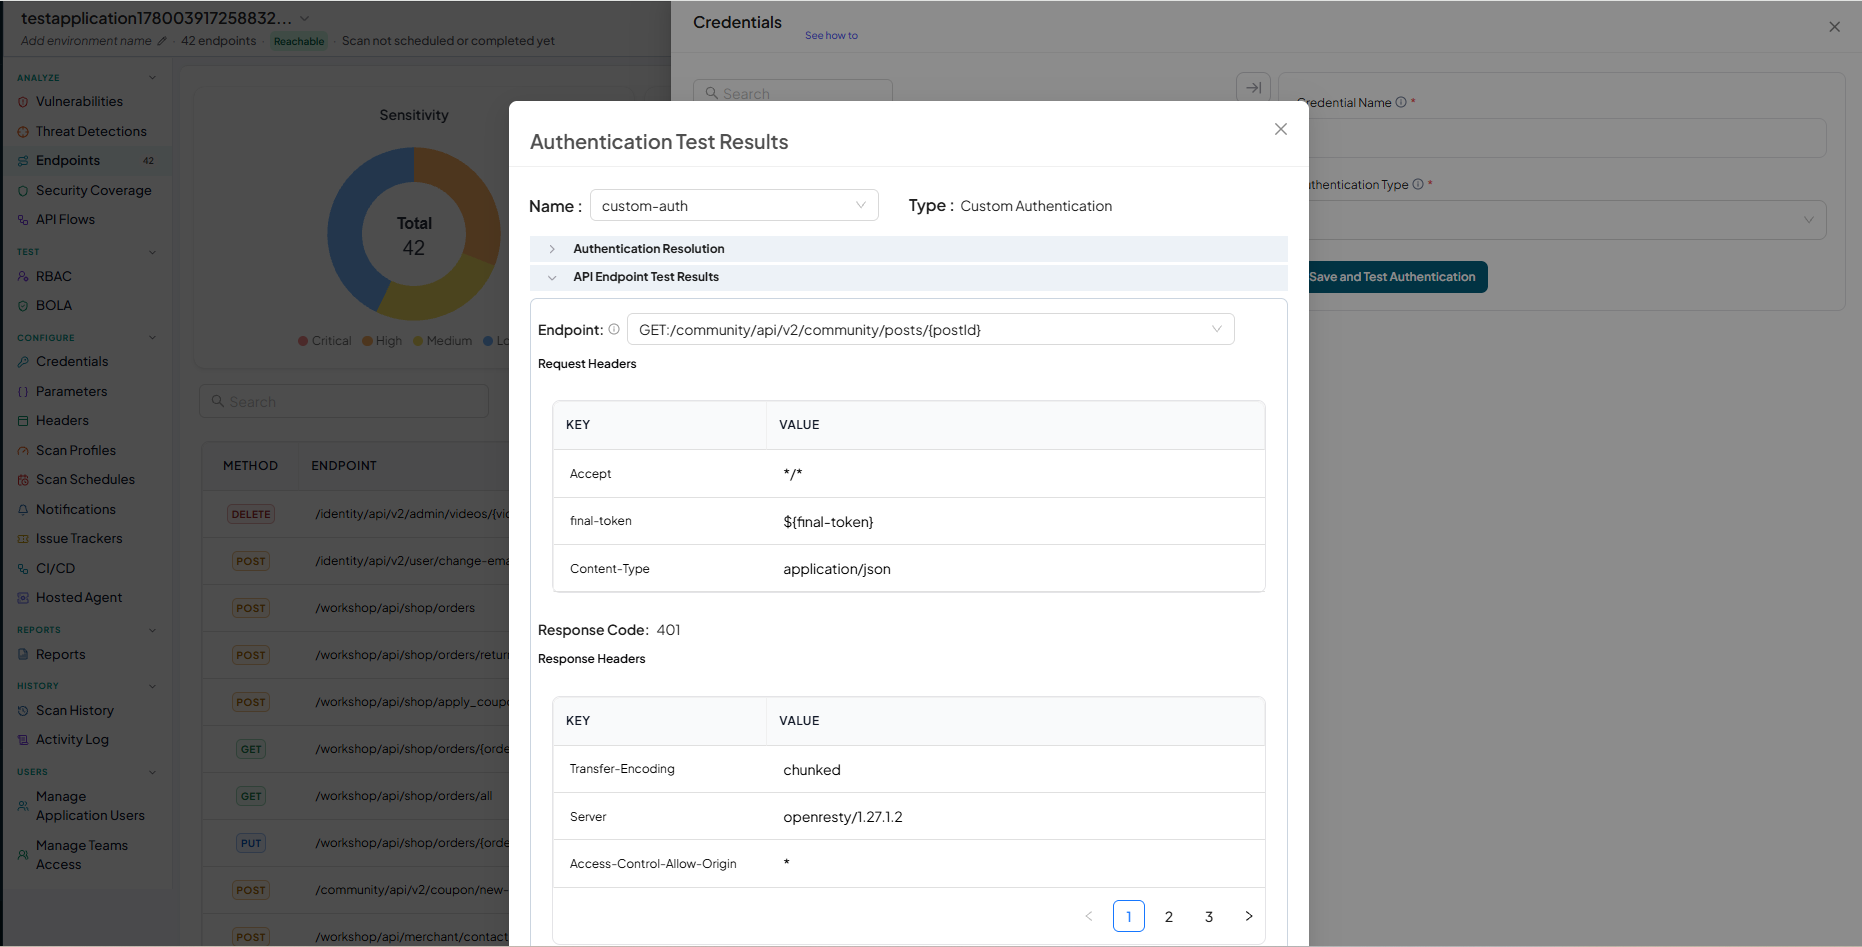
Custom Authentications
Custom Authentication is designed to support complex, multi-step login flows, often needed for APIs that require chaining multiple requests, passing cookies, and extracting values from headers or response bodies.
-
Endter Credential Name
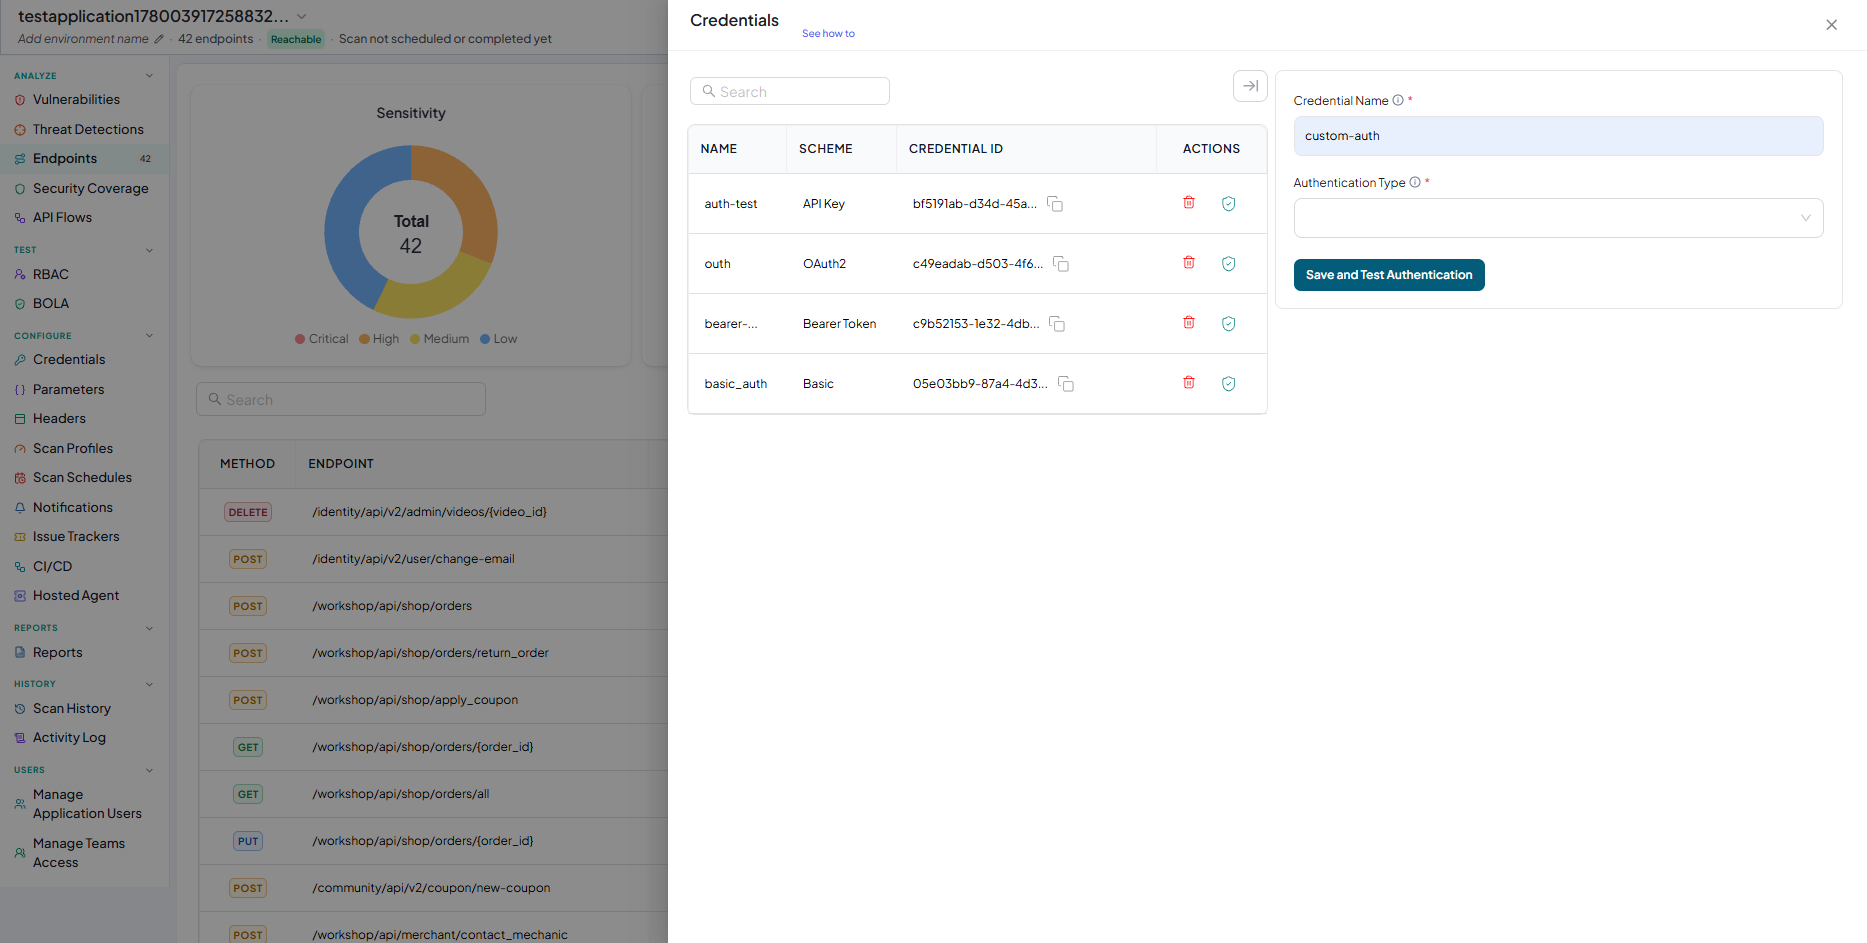
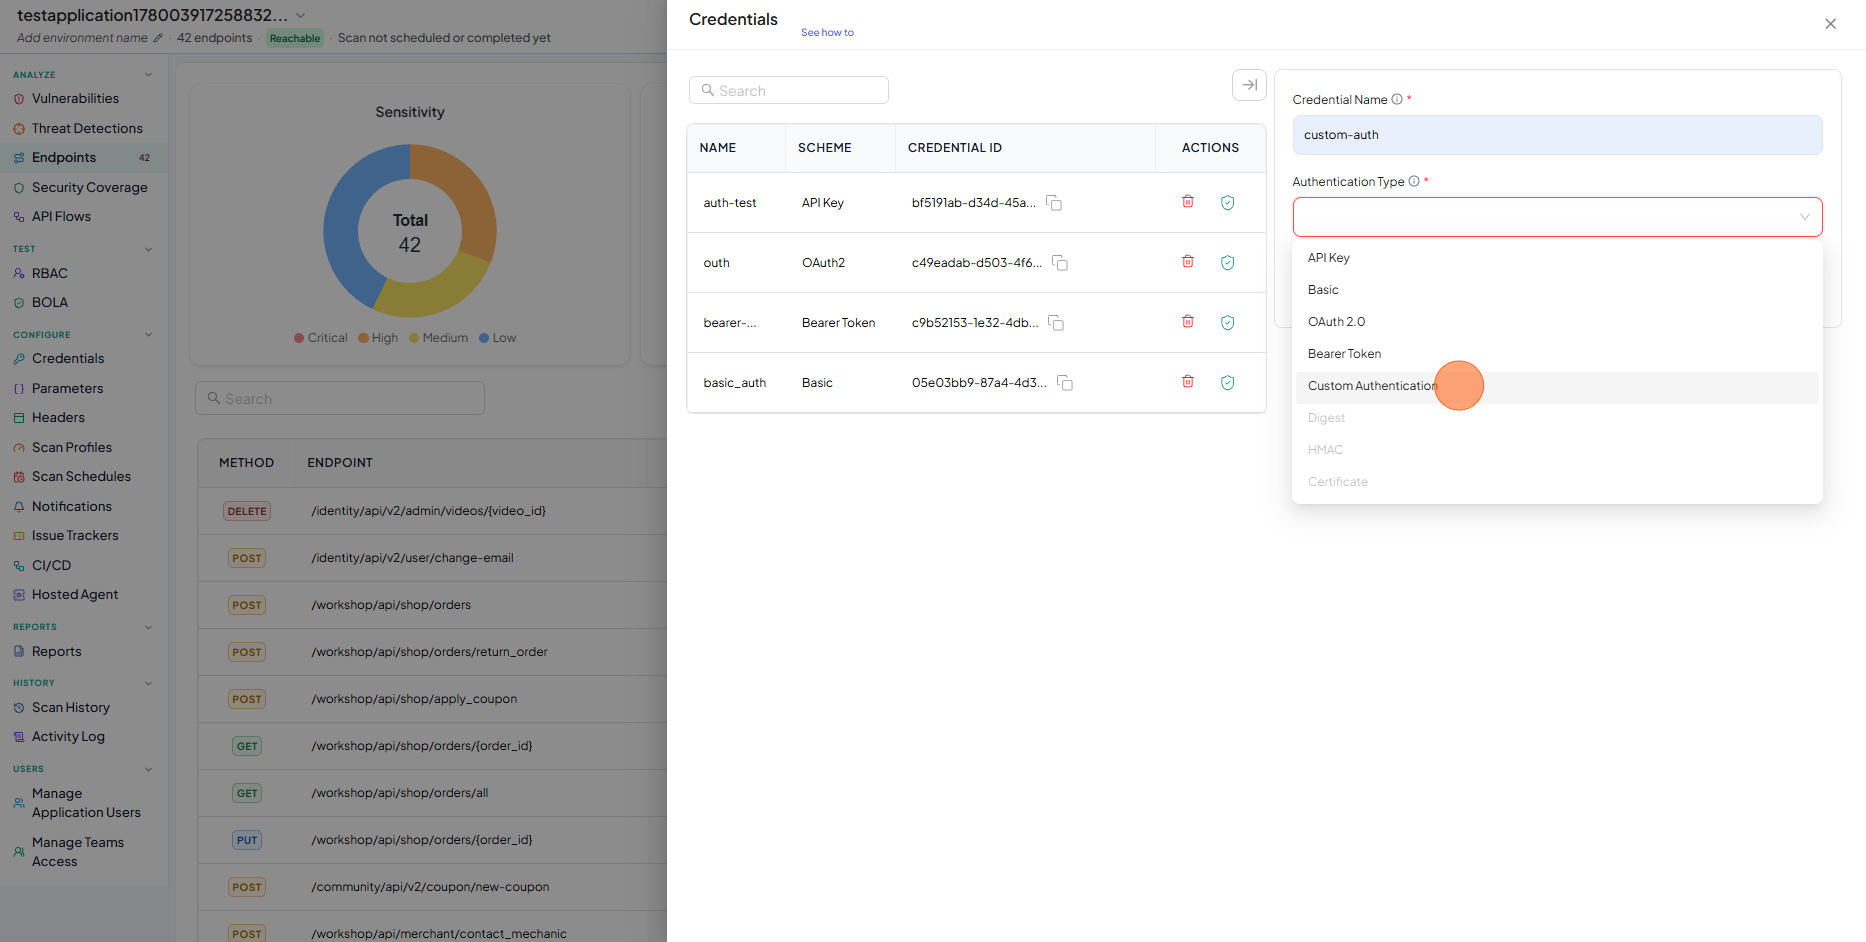
-
From dropdown select "Custom Authentication"
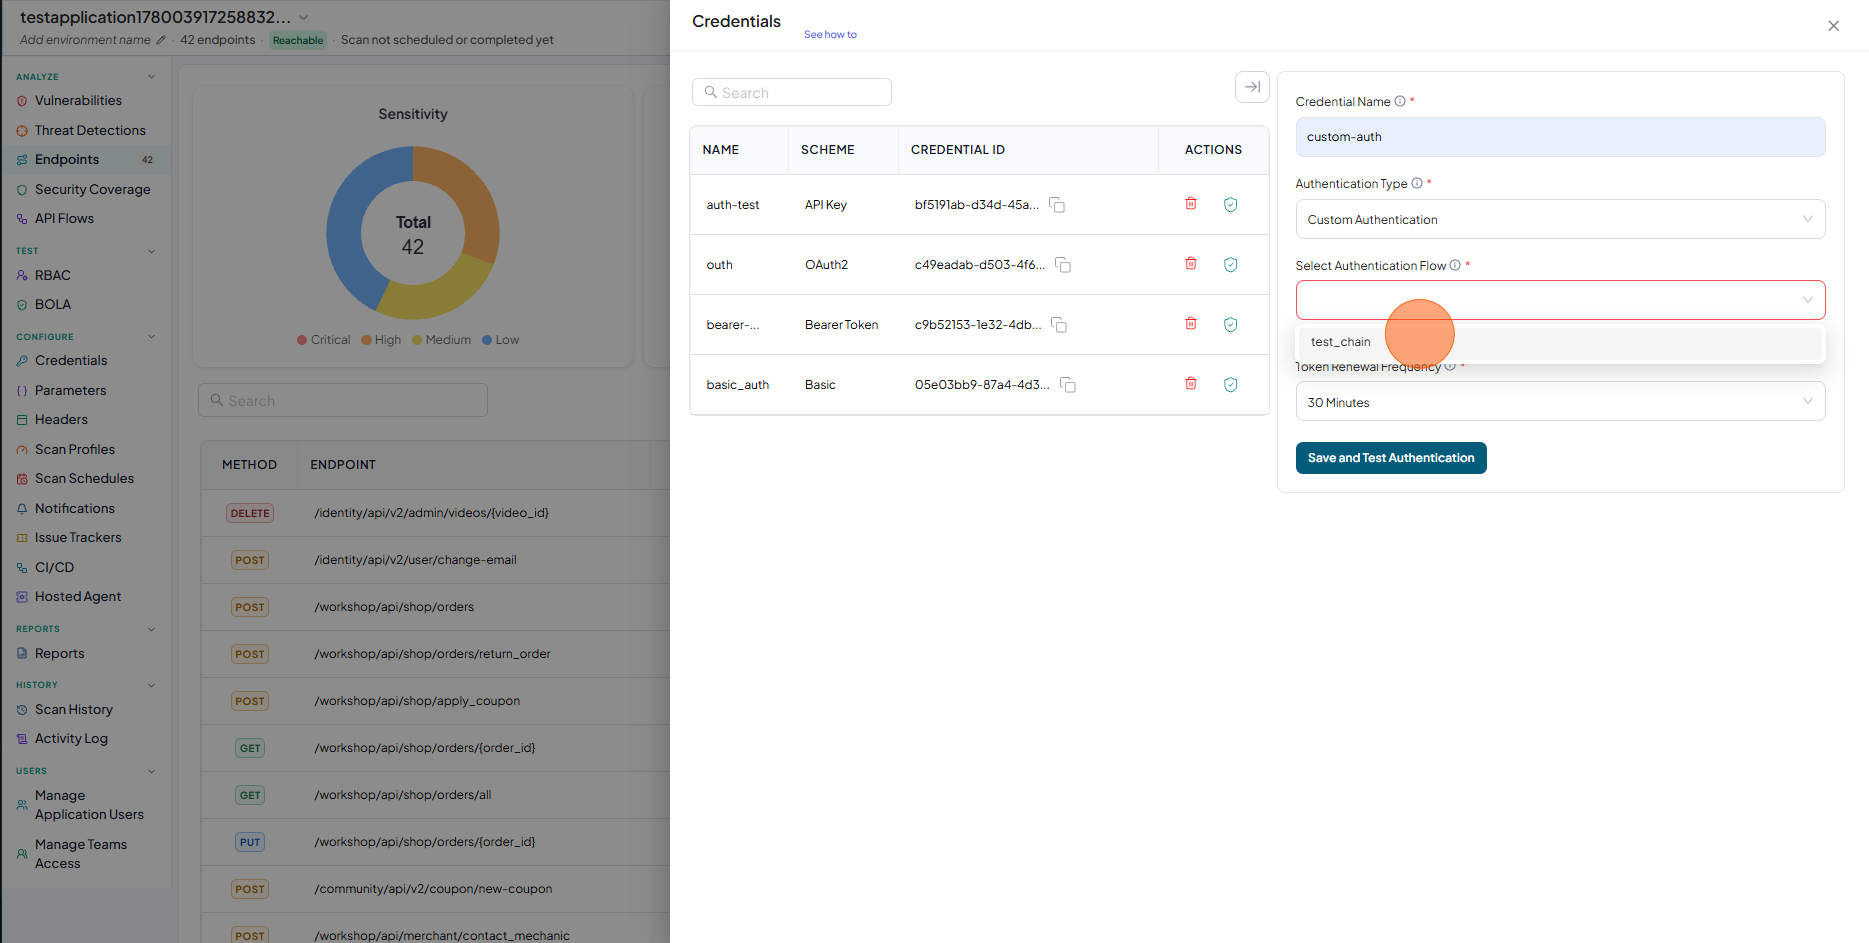
-
Select Authentication Flow configured to obtain a token for APIs that require multi-step authentication.
noteCustom Authentication allows you to run chained requests to obtain a token through a multi-step authentication process. If no authentication flow has been set up, please contact APIsec support team.
-
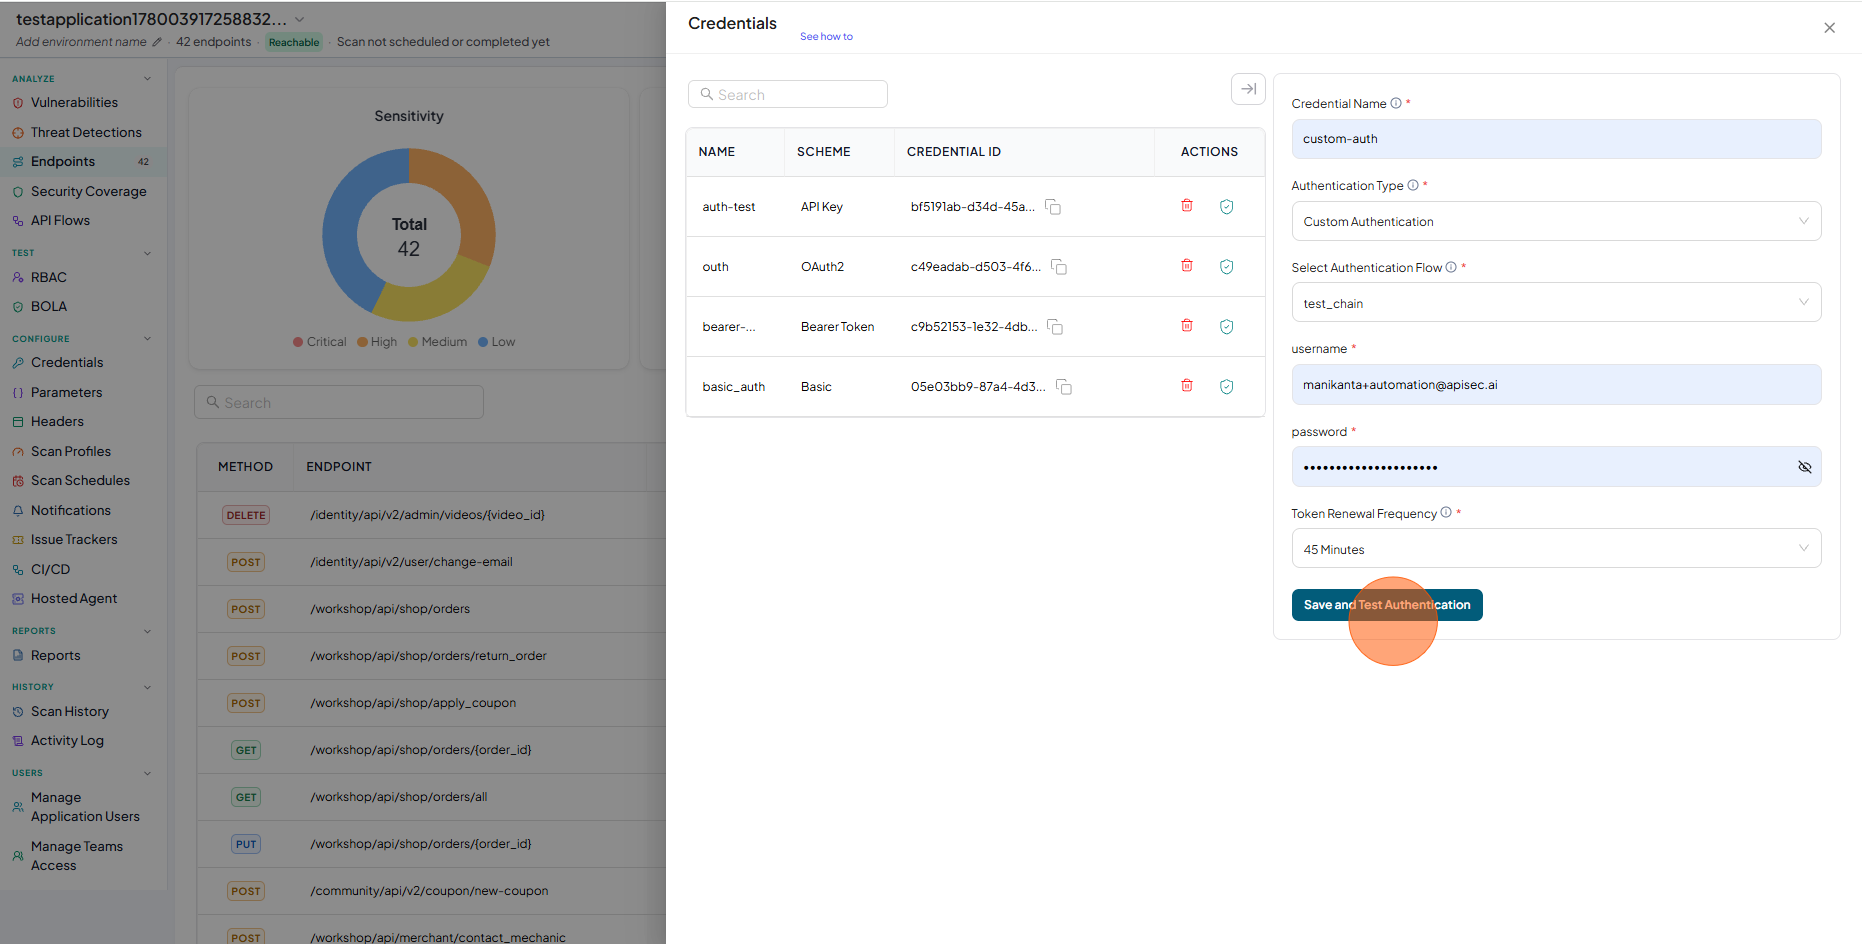
Enter the credentials required to run the script.
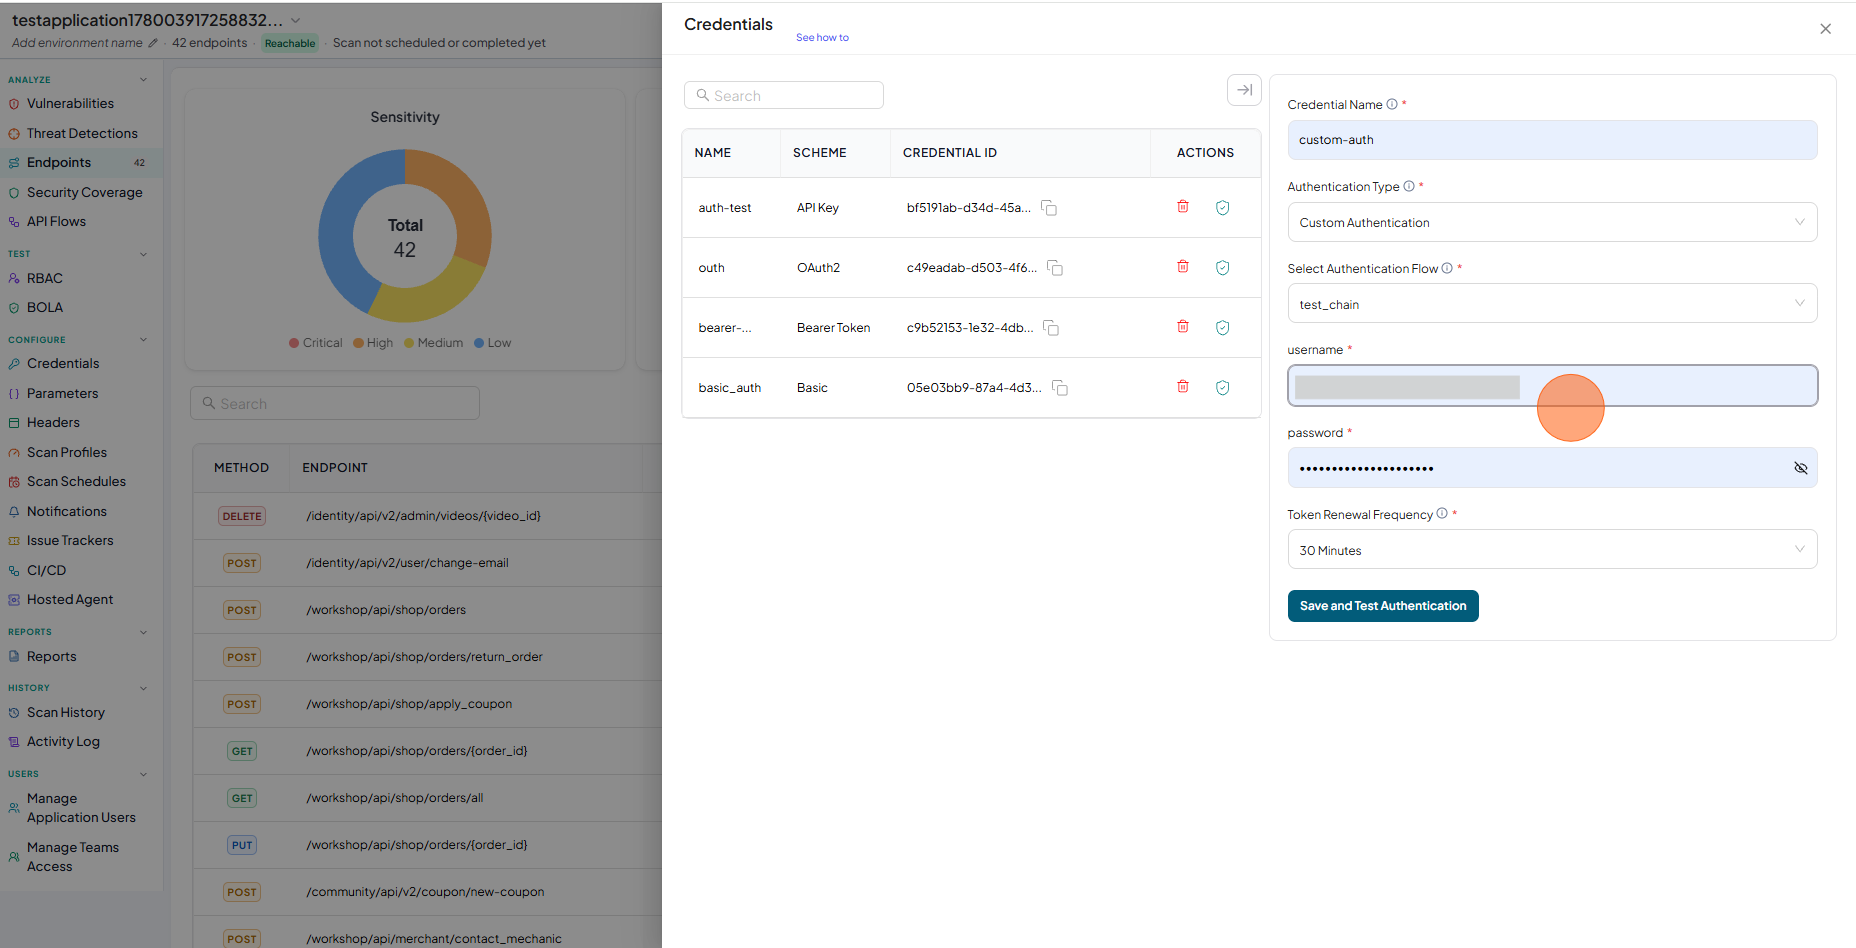
-
Token Renewal Frequency Select the duration for which the token stays valid before it must be regenerated.
-
Click on Save and Test Authentication
-
Authentication saved and Tested Successfully
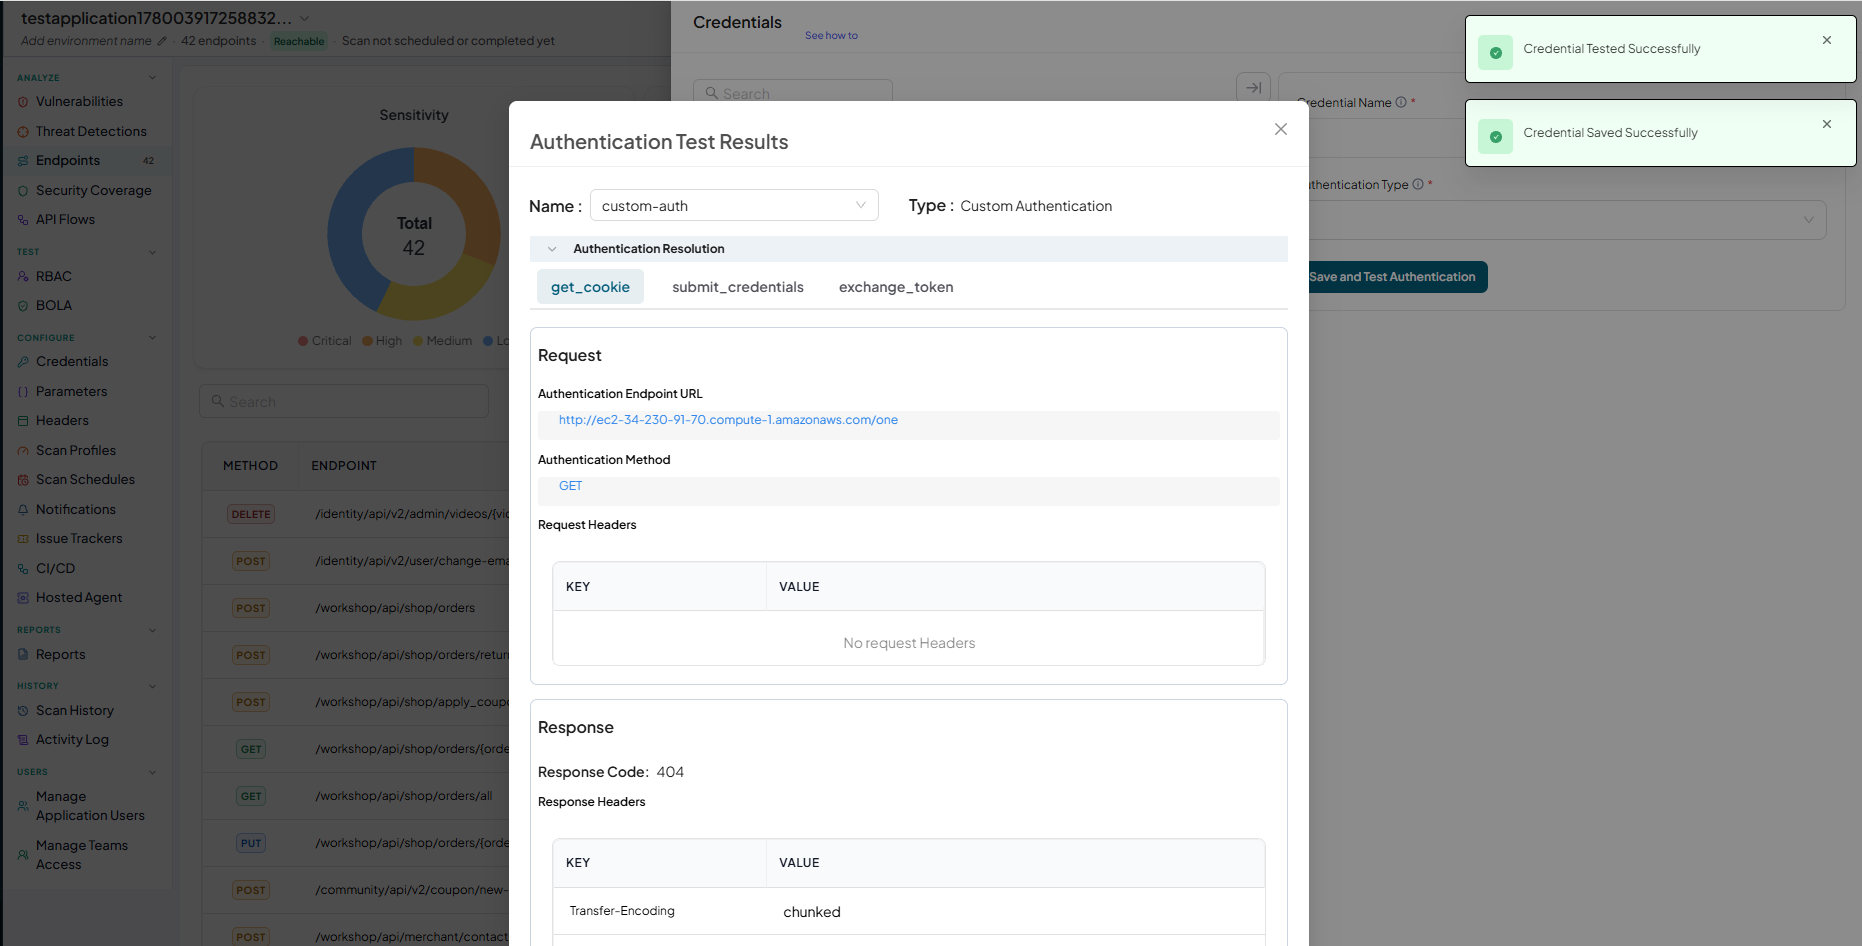
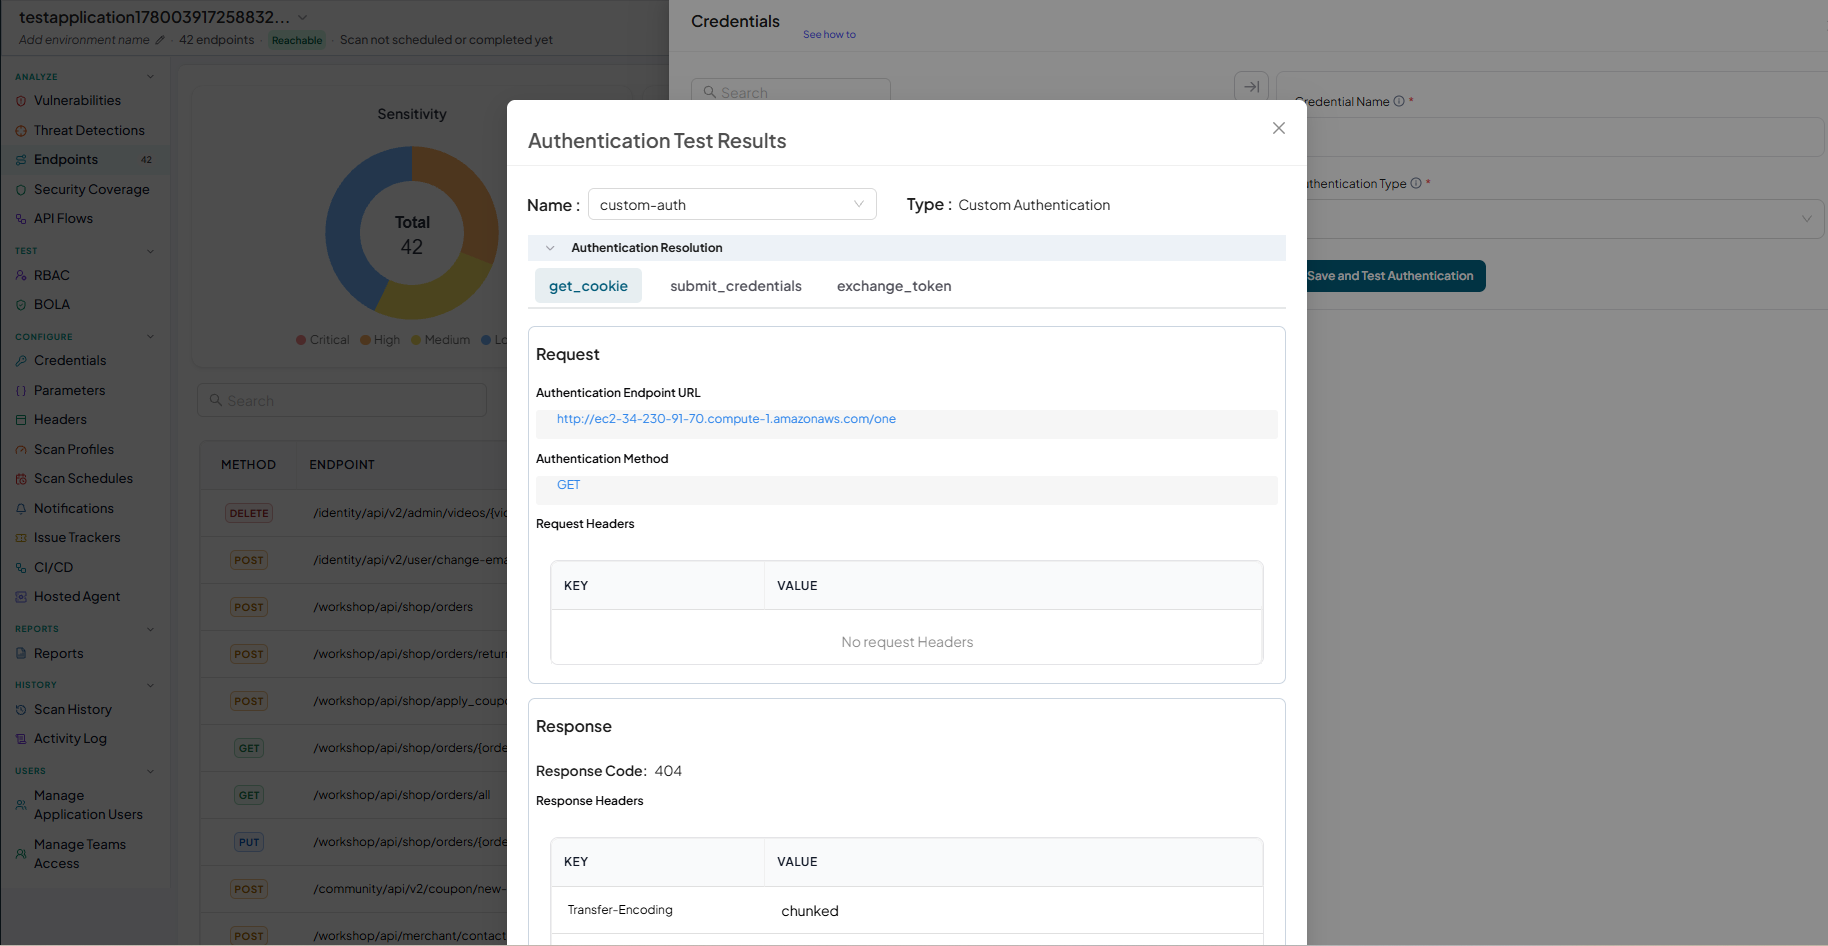
-
Authentication Test Results - Authentication Resolution
-
Authentication Test Results - API Endpoint Test Results
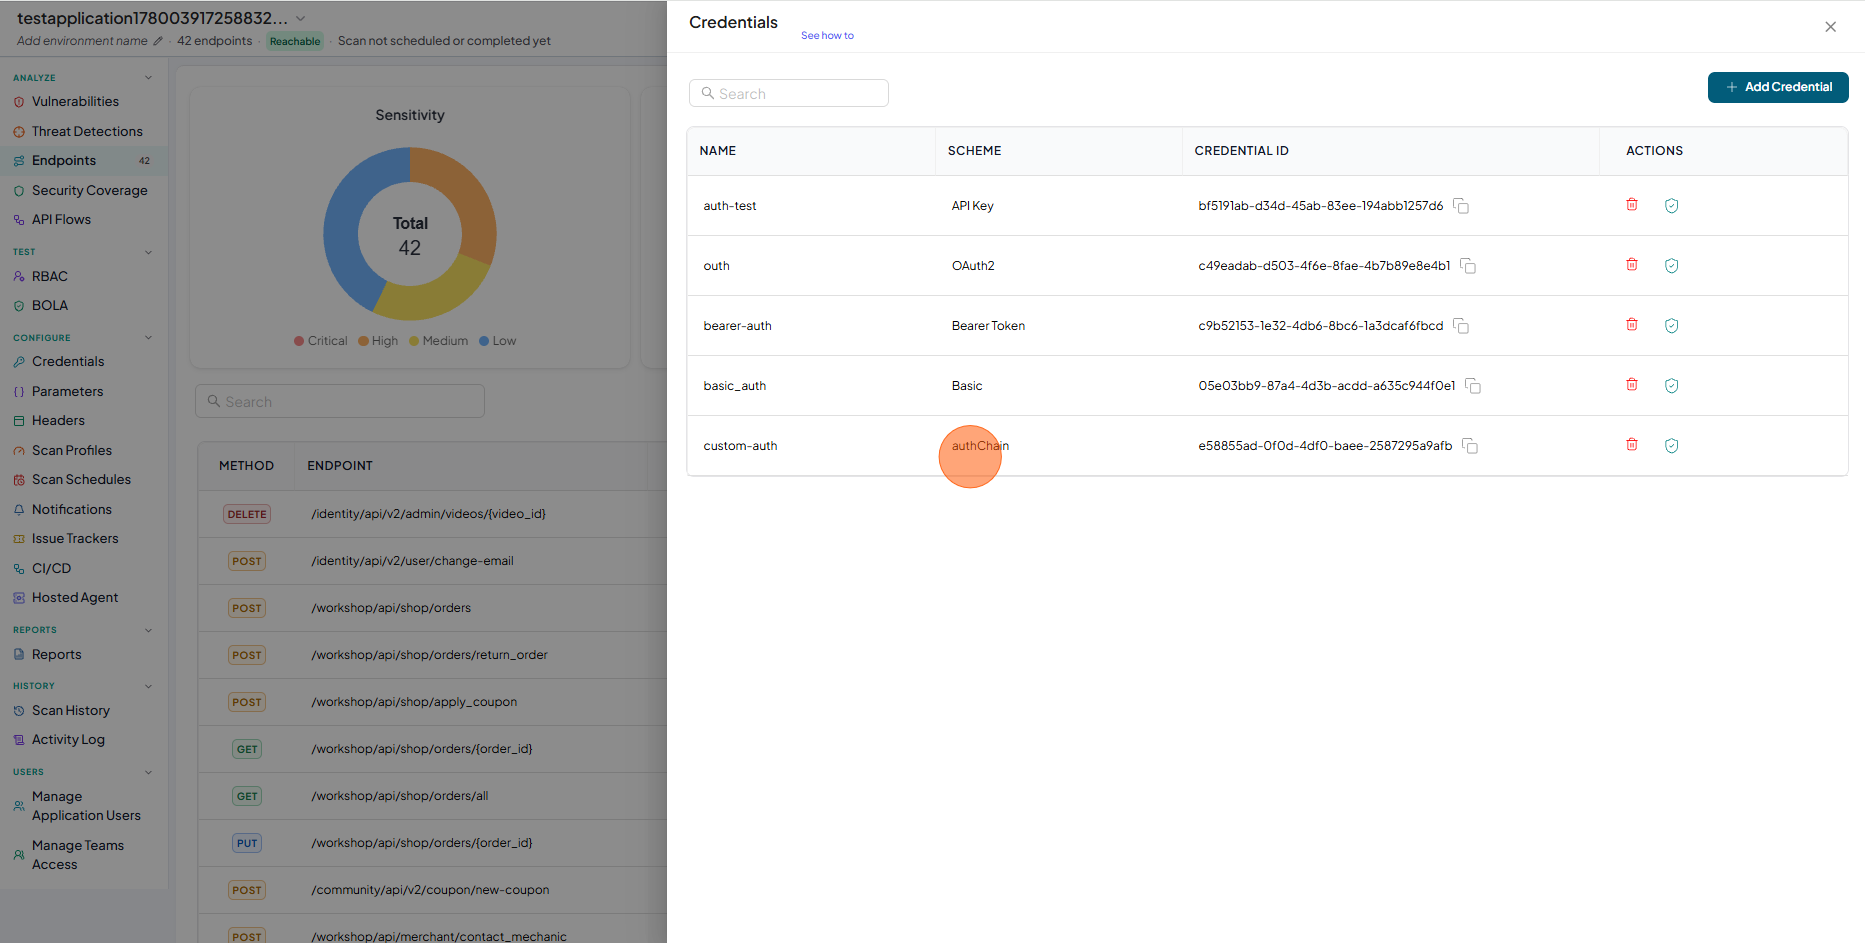
-
Check the saved credentials are available in the table
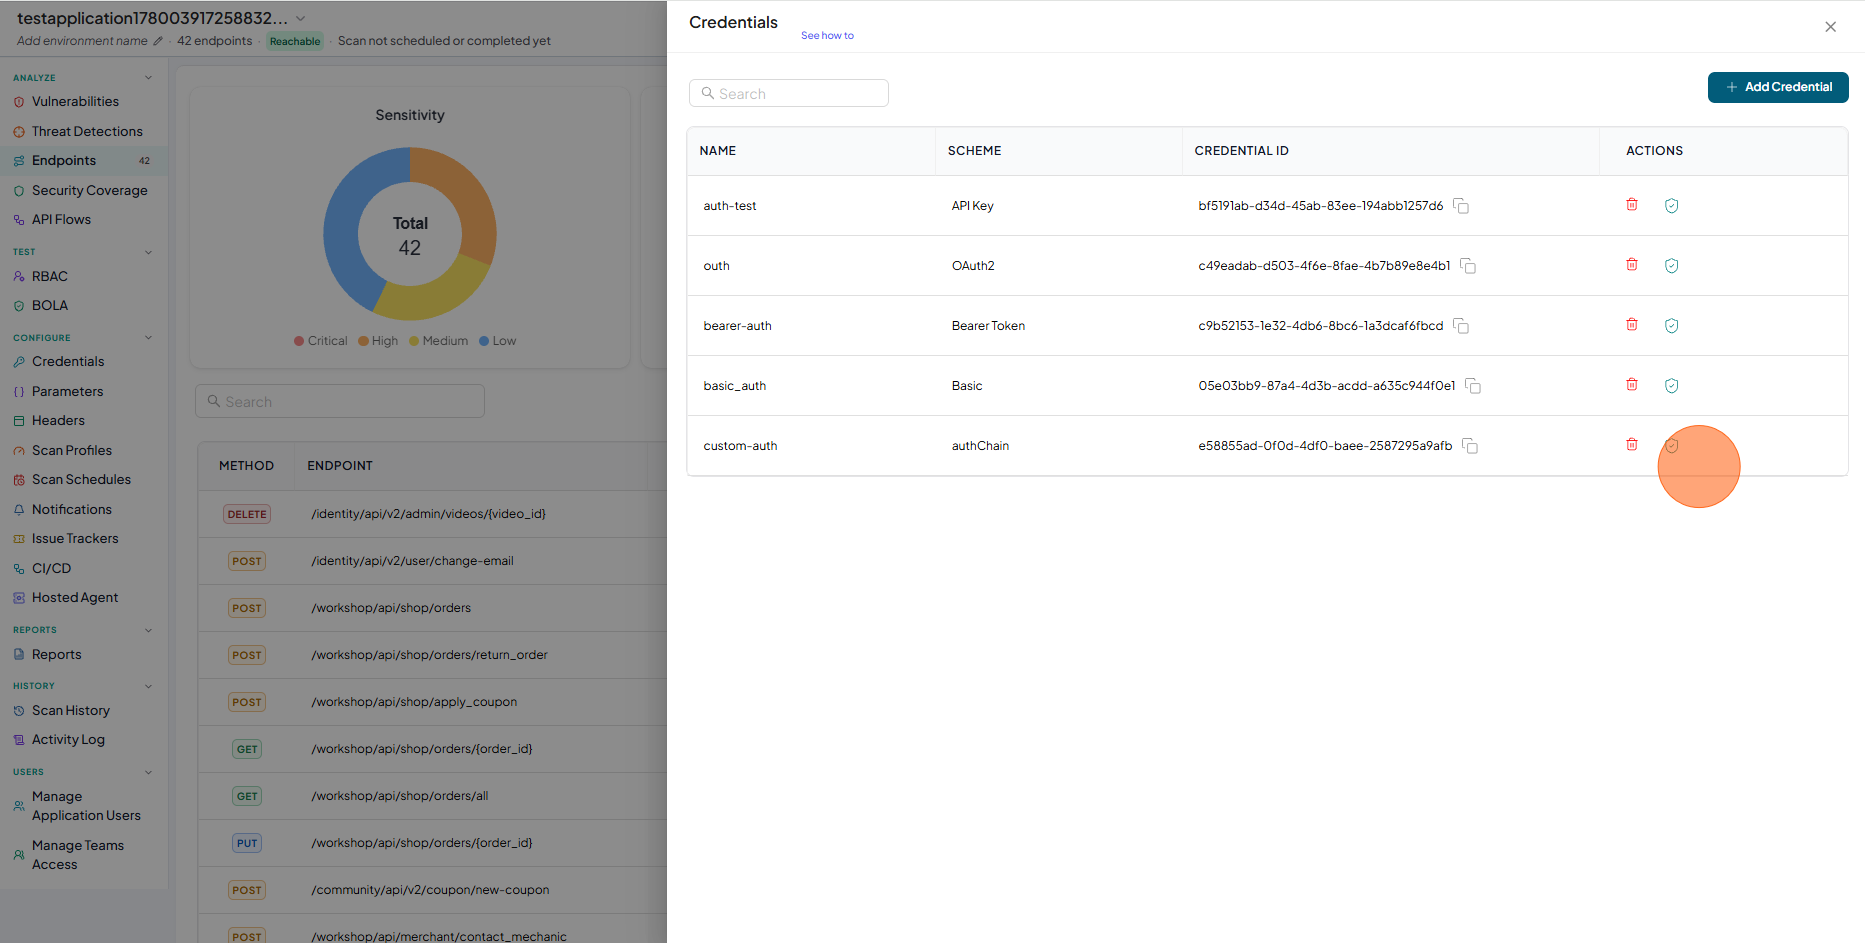
Test Authentication
- Click on Test Authentication
- Authentication Test Results - Authentication Resolution
- Authentication Test Results - API Endpoint Test Results
- Click on Test Authentication
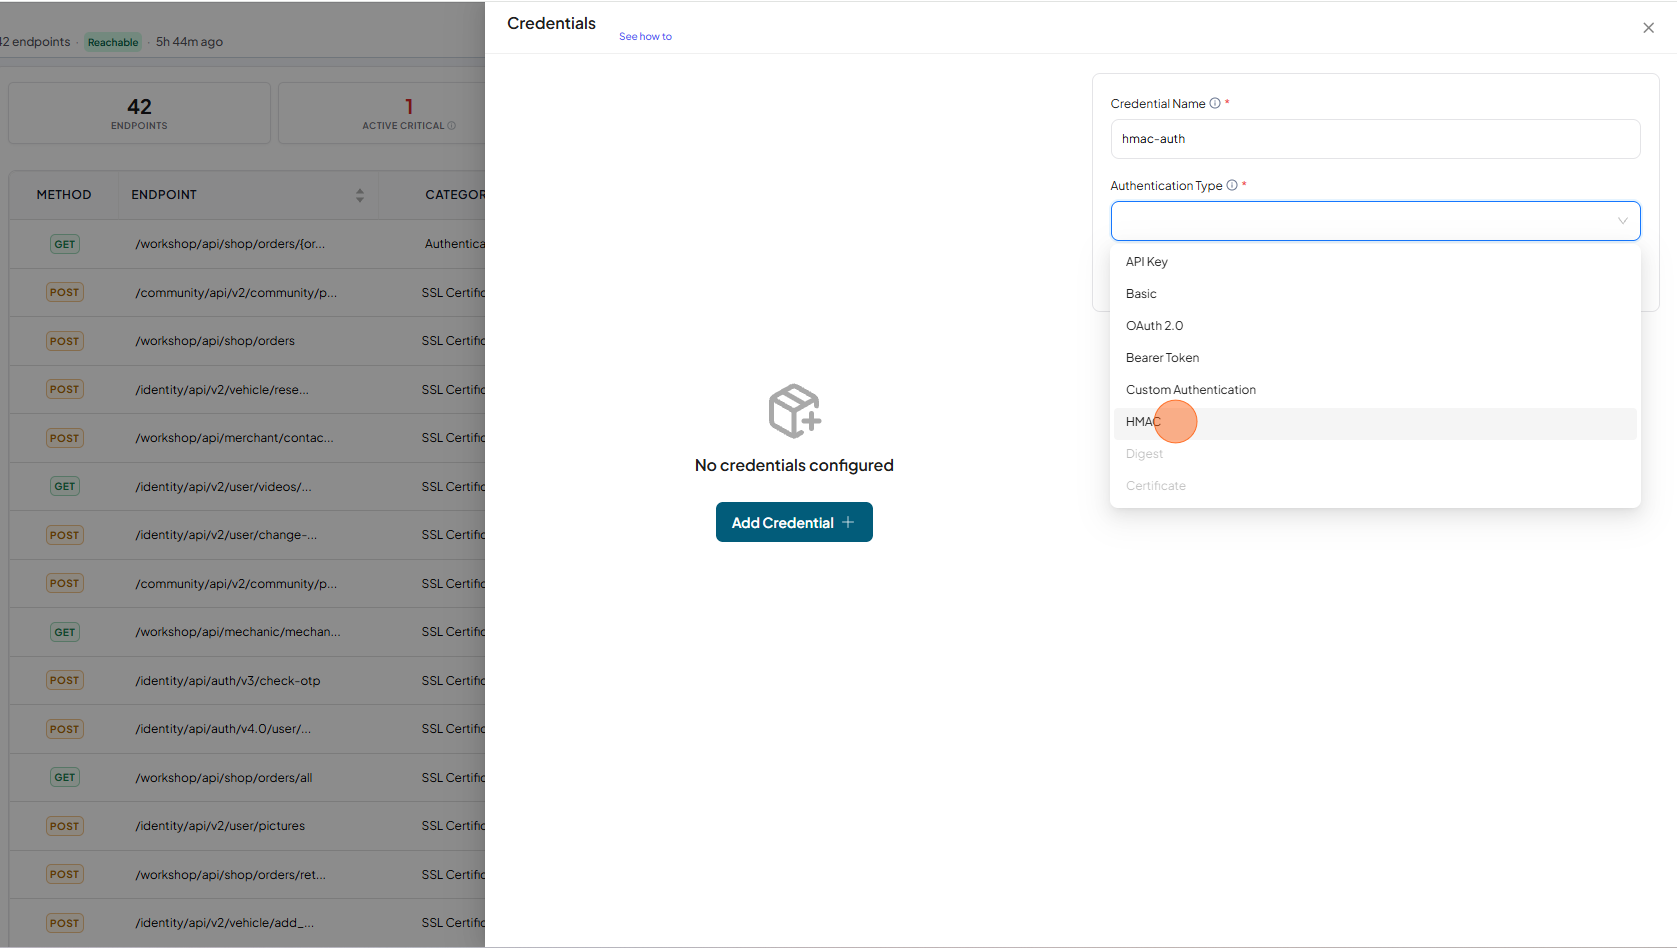
HMAC Authentication
HMAC (Hash-based Message Authentication Code) authentication secures API requests by generating a cryptographic signature using a shared secret. It verifies the authenticity and integrity of each request, ensuring that only trusted clients can access the API and that request data has not been modified during transmission.
- Type auth name
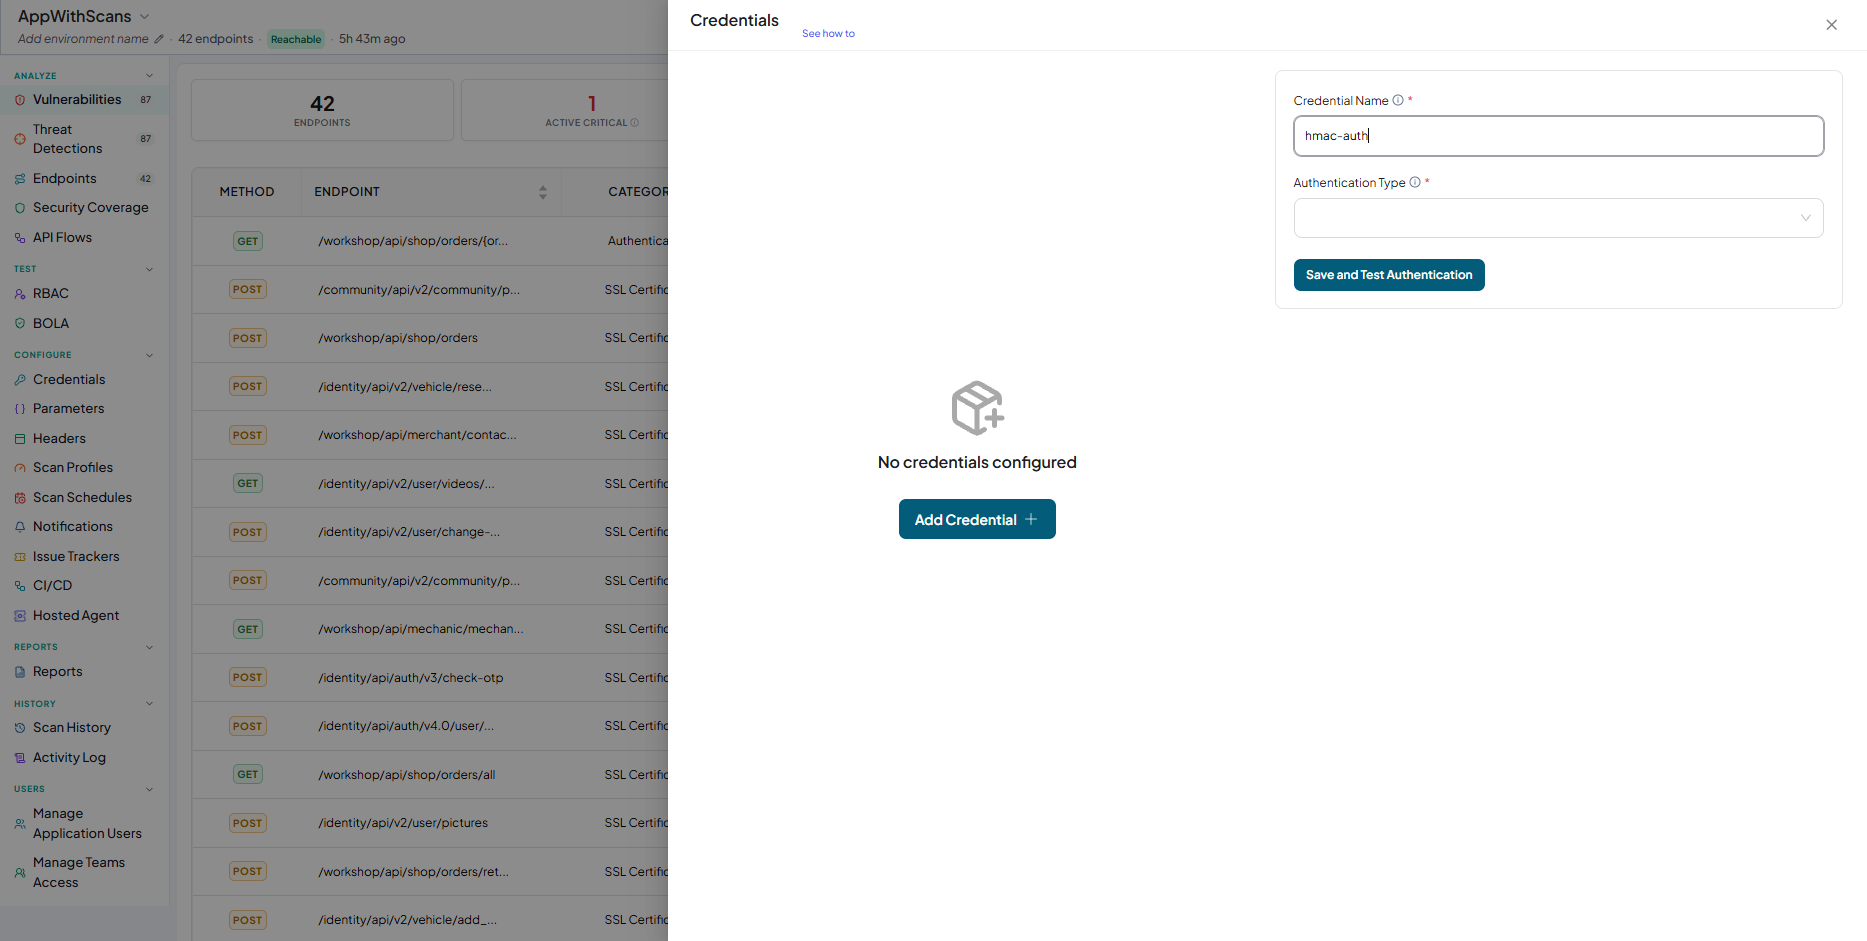
- From dropdown select "HMAC"
- Fill the form
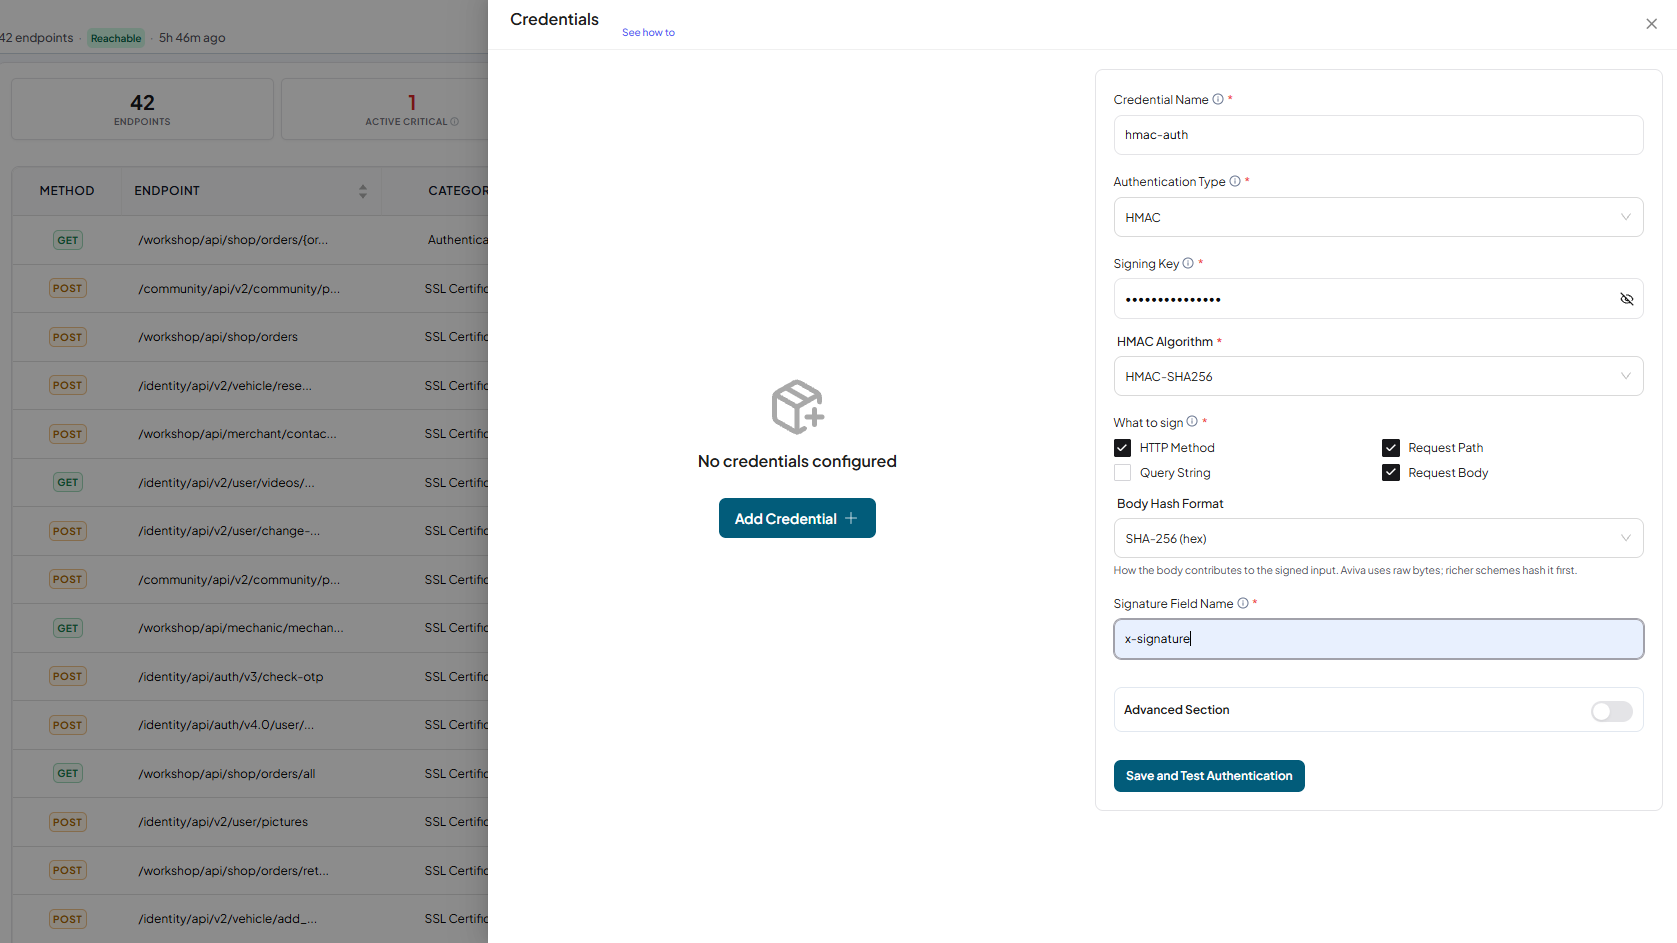
- Click on Save and Test Authentication
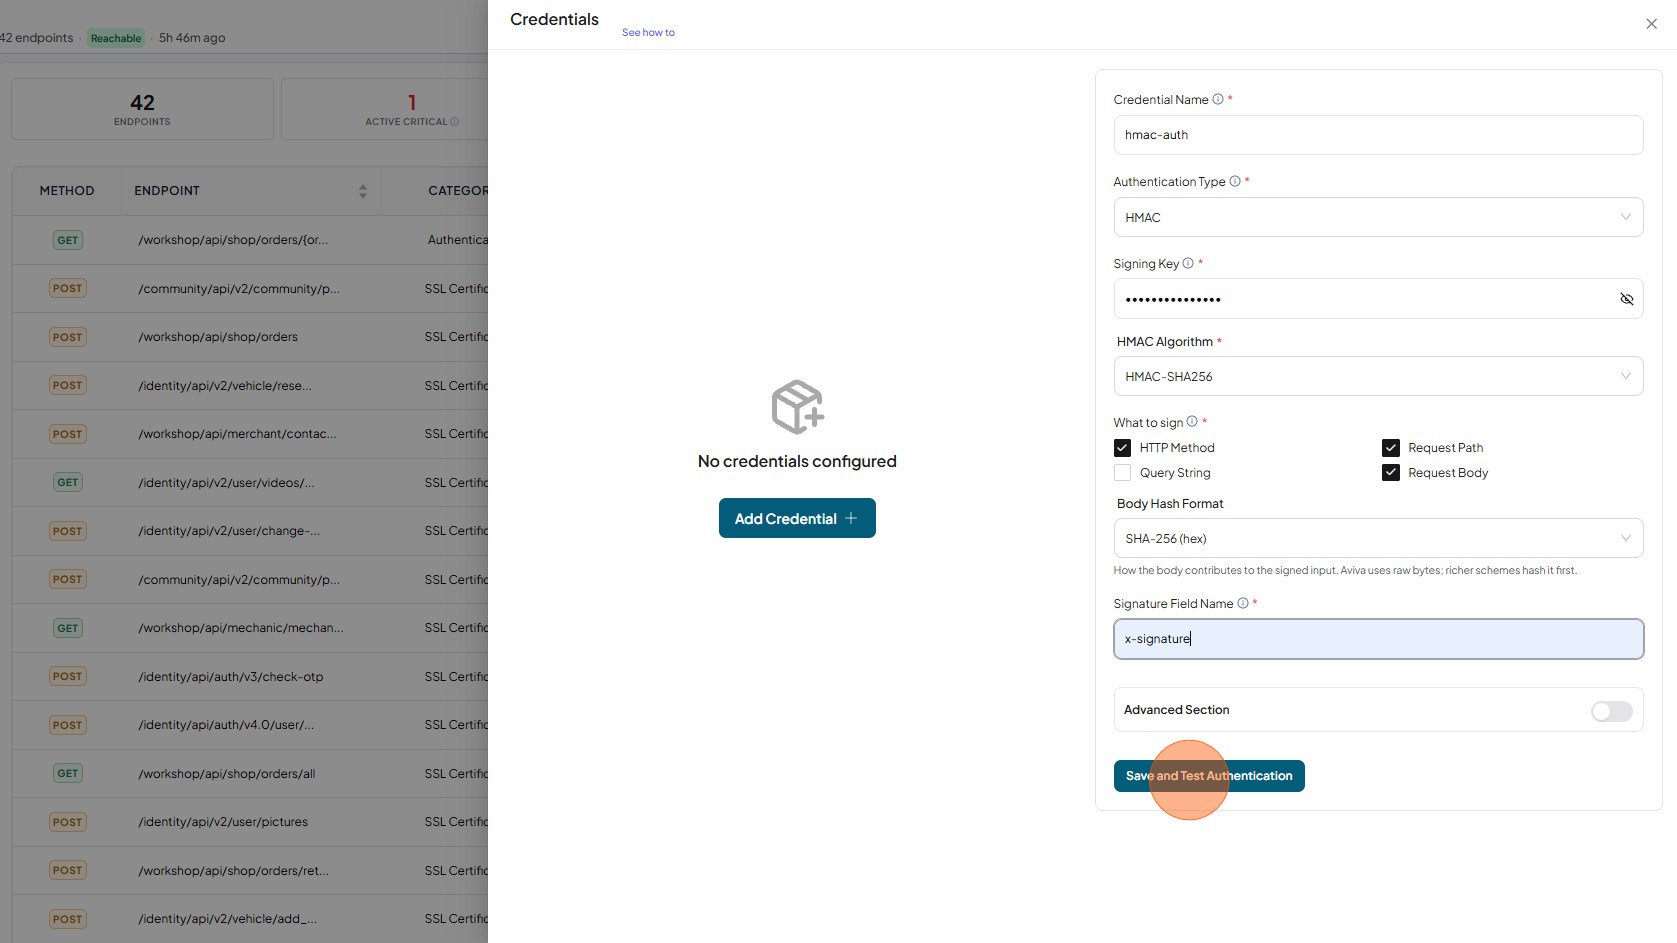
- Authentication saved and Tested Successfully
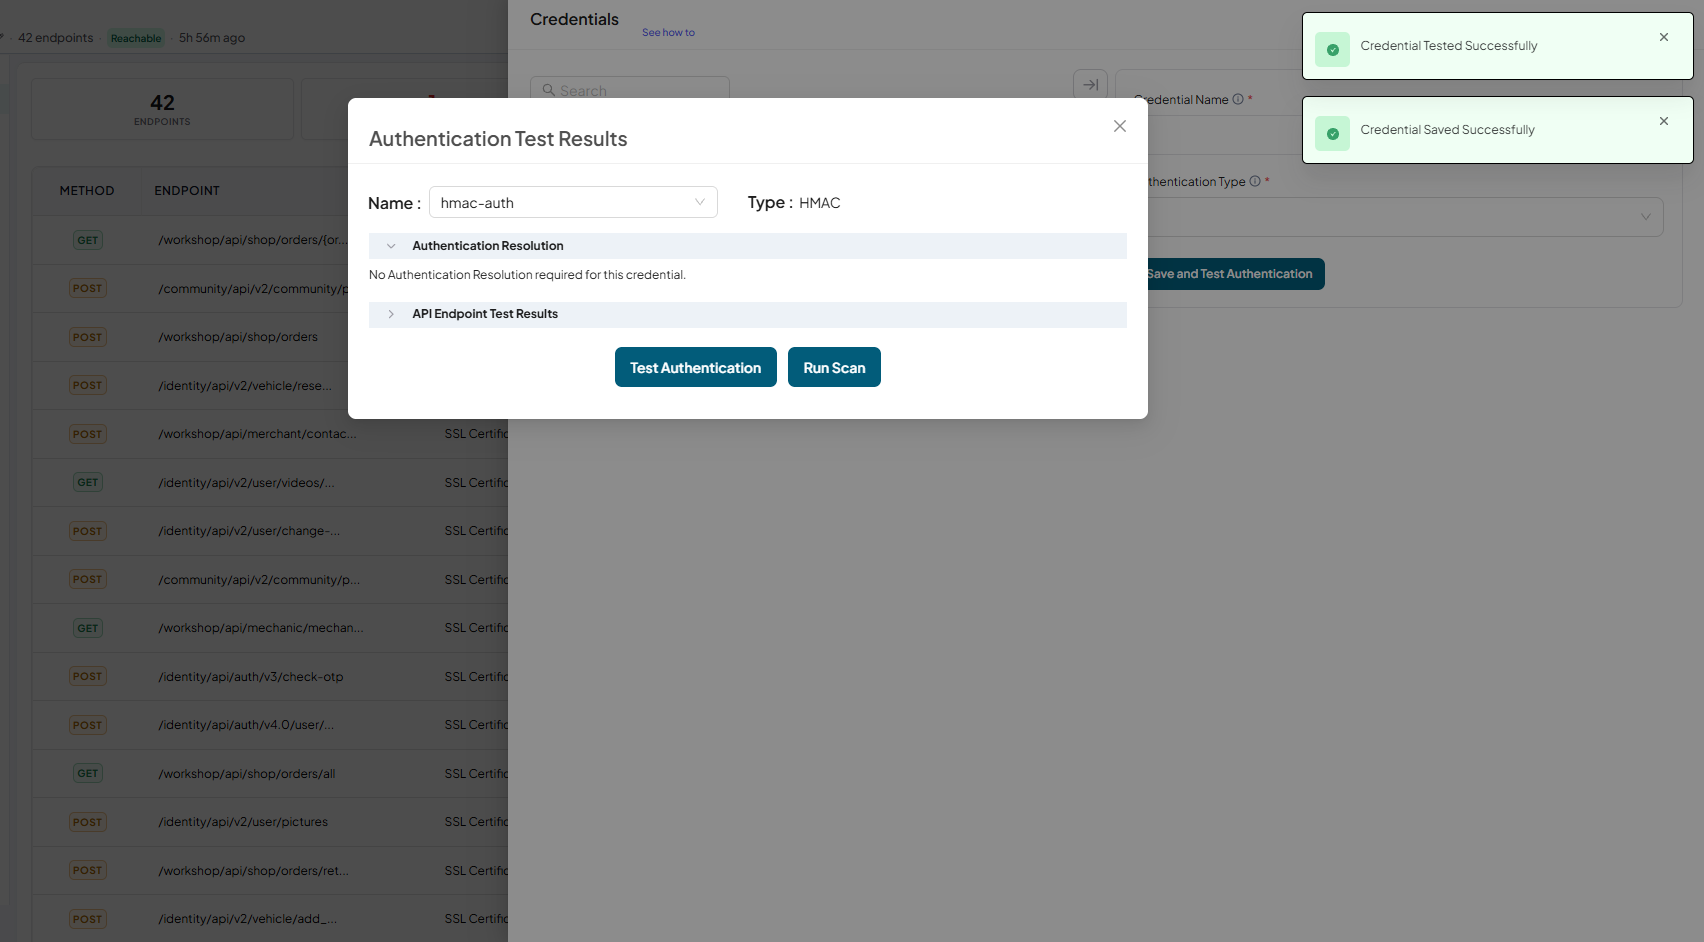
- Authentication Test Results - Authentication Resolution
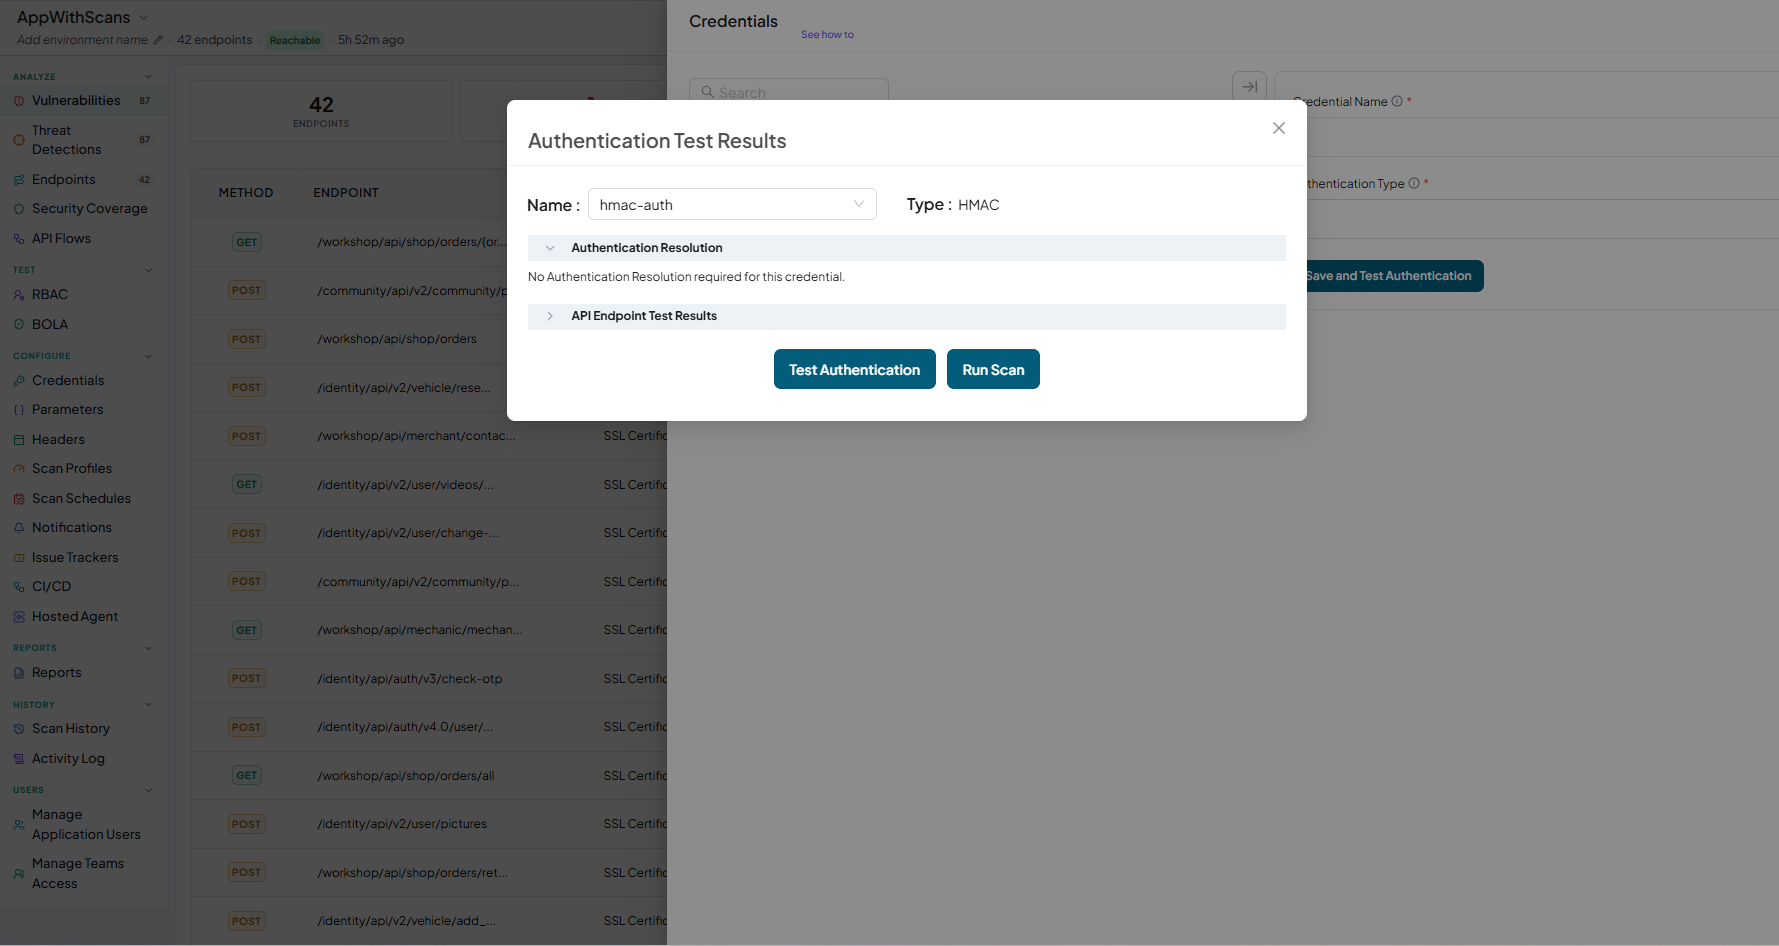
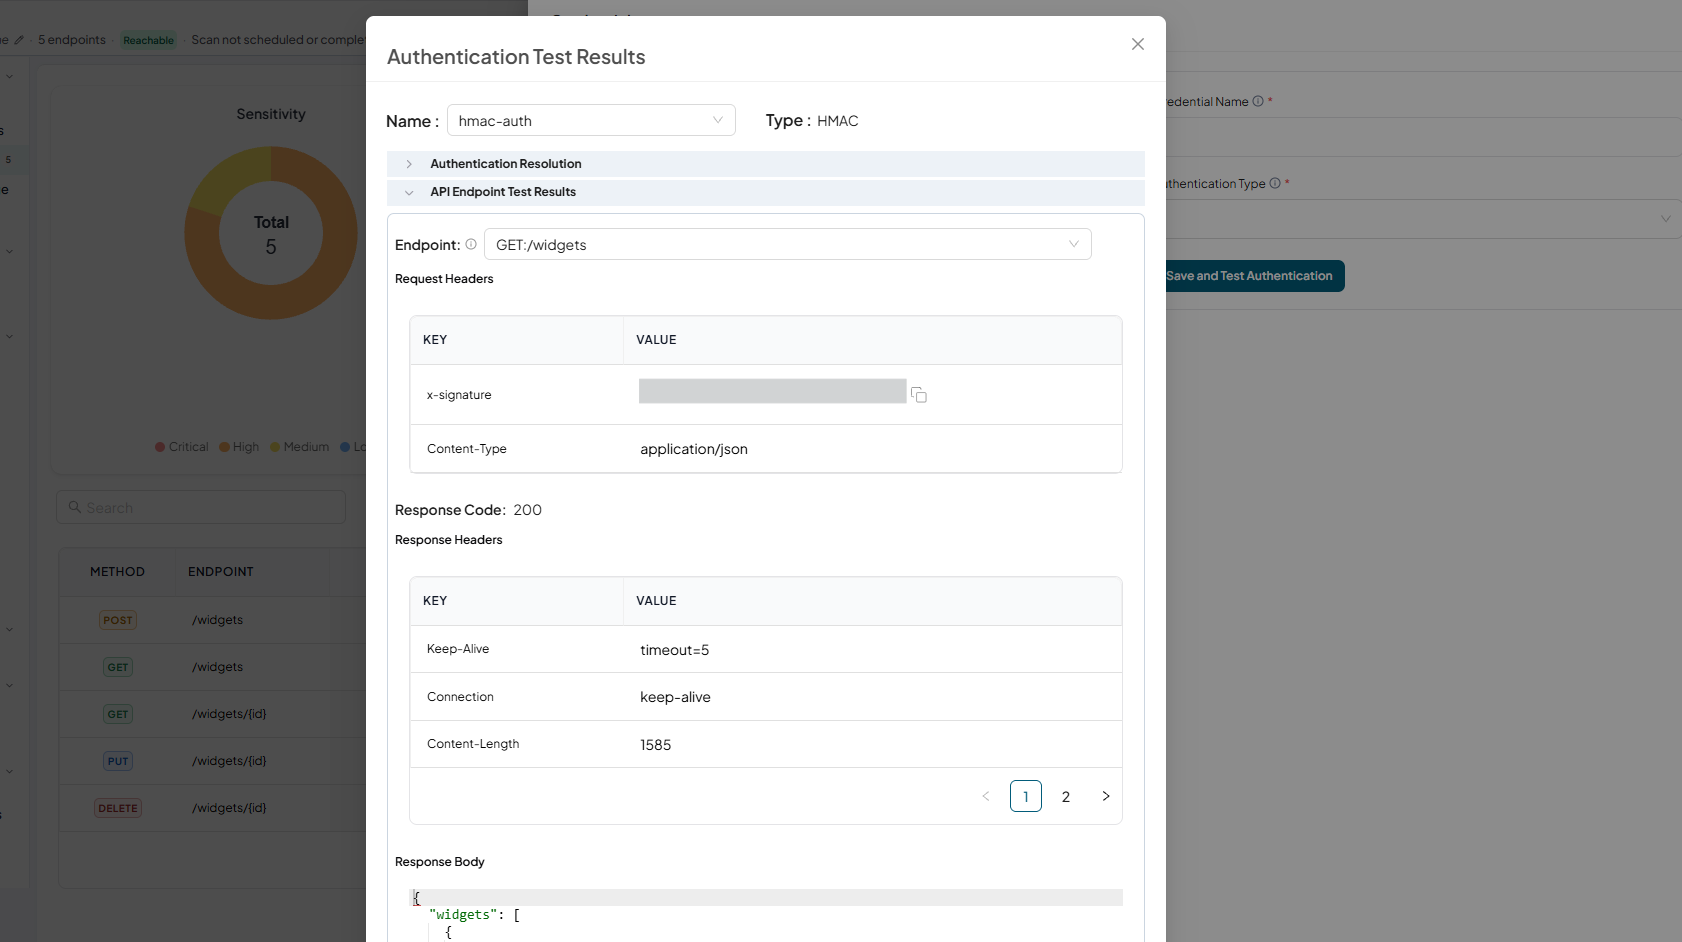
- Authentication Test Results - API Endpoint Test Results
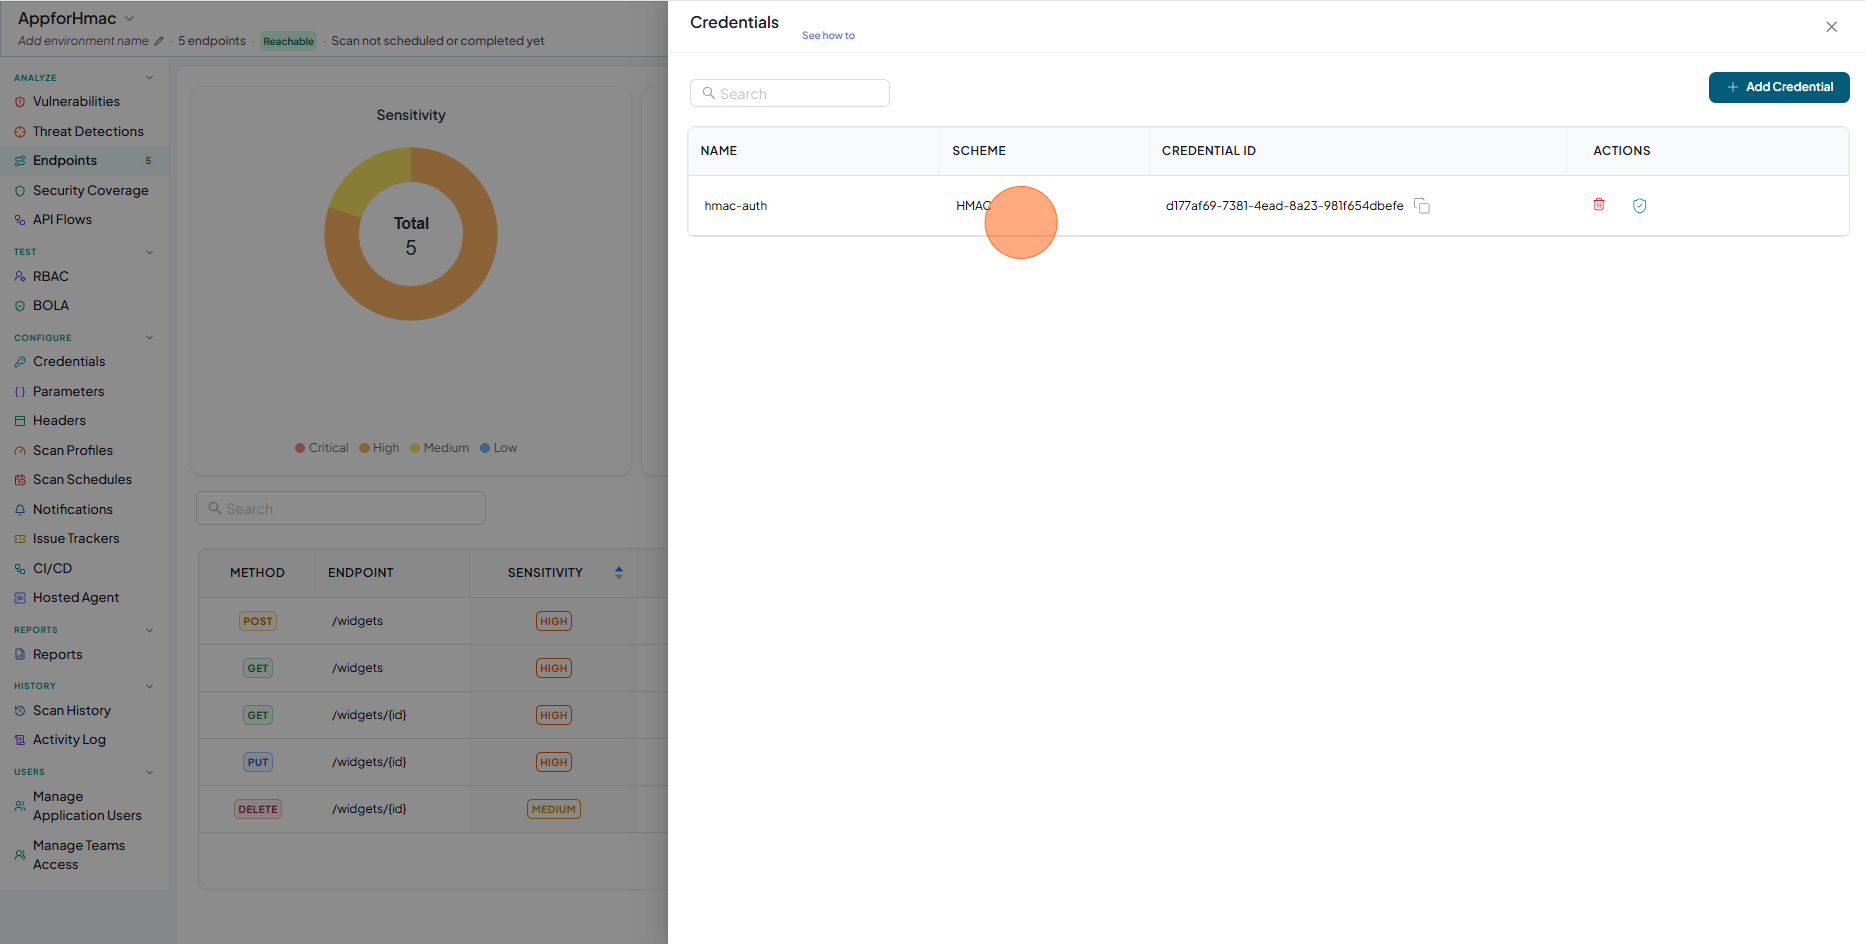
- Check the saved credentials are available in the table
Users with View permissions cannot configure or add authentication in shared application
Test Authentication on different endpoint
- Click on Test Authentication
- Authentication Test Results - Authentication Resolution
- Authentication Test Results - API Endpoint Test Results

- Select any other Endpoint from the dropdown
- Click on Test Authentication
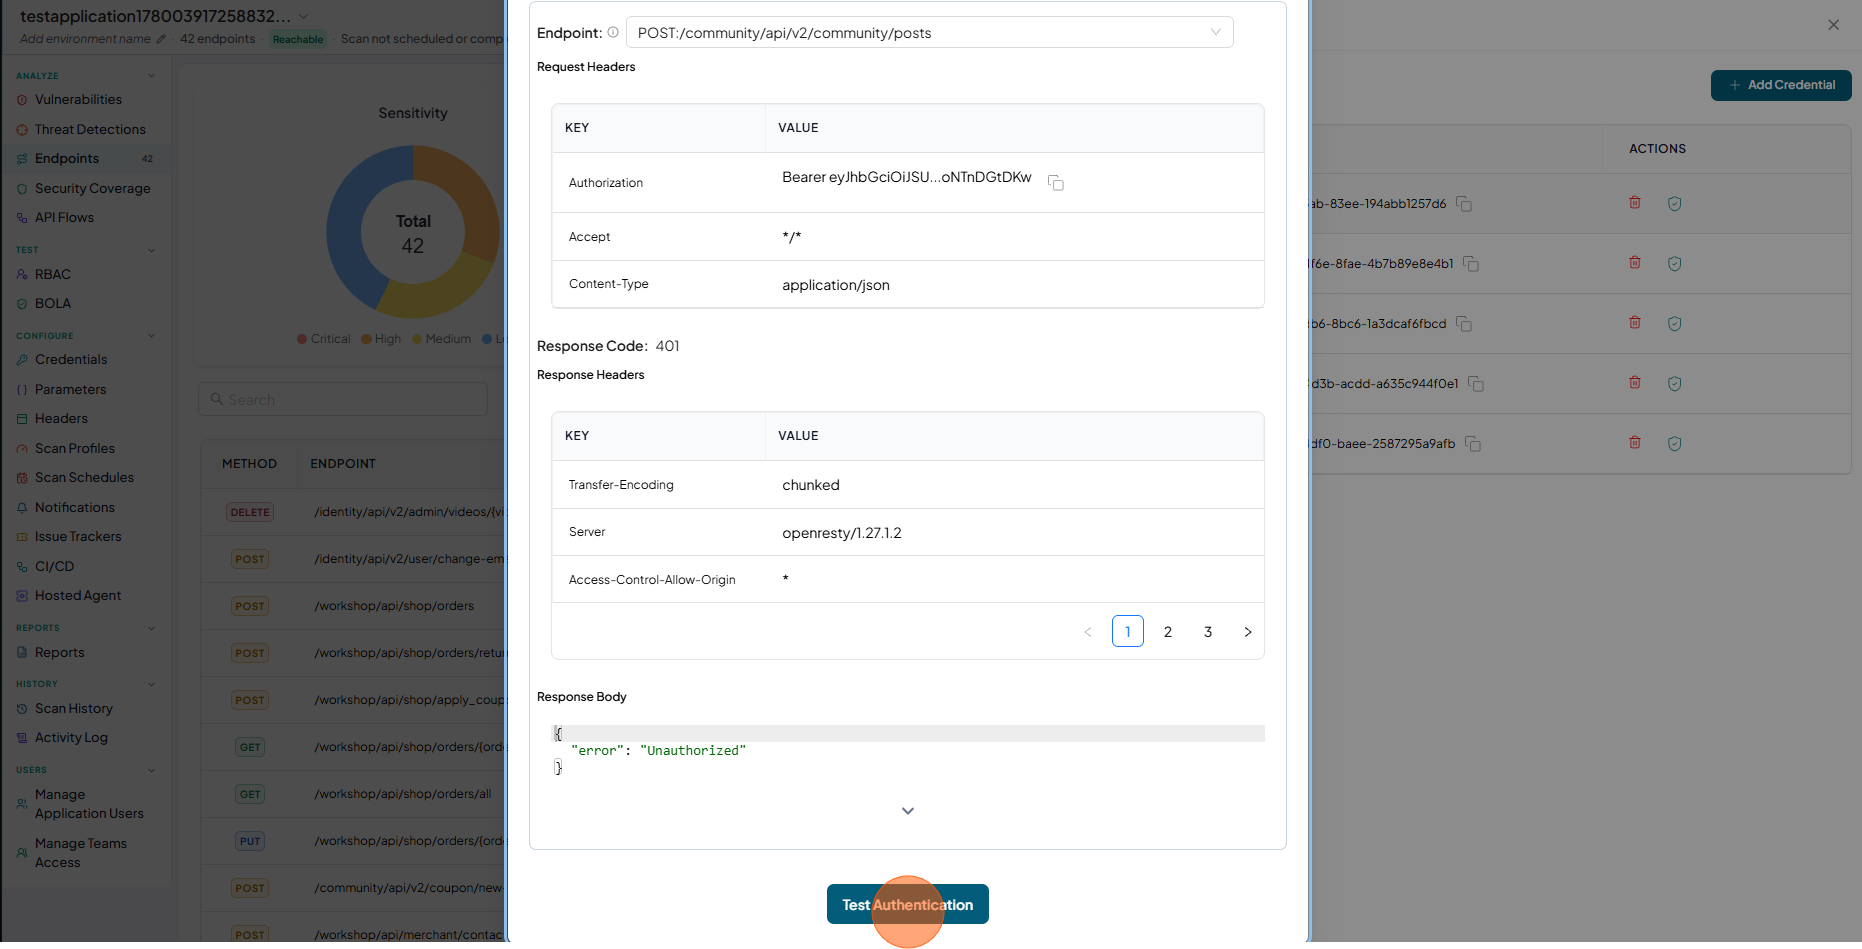
- Authentication Test Results - API Endpoint Test Results
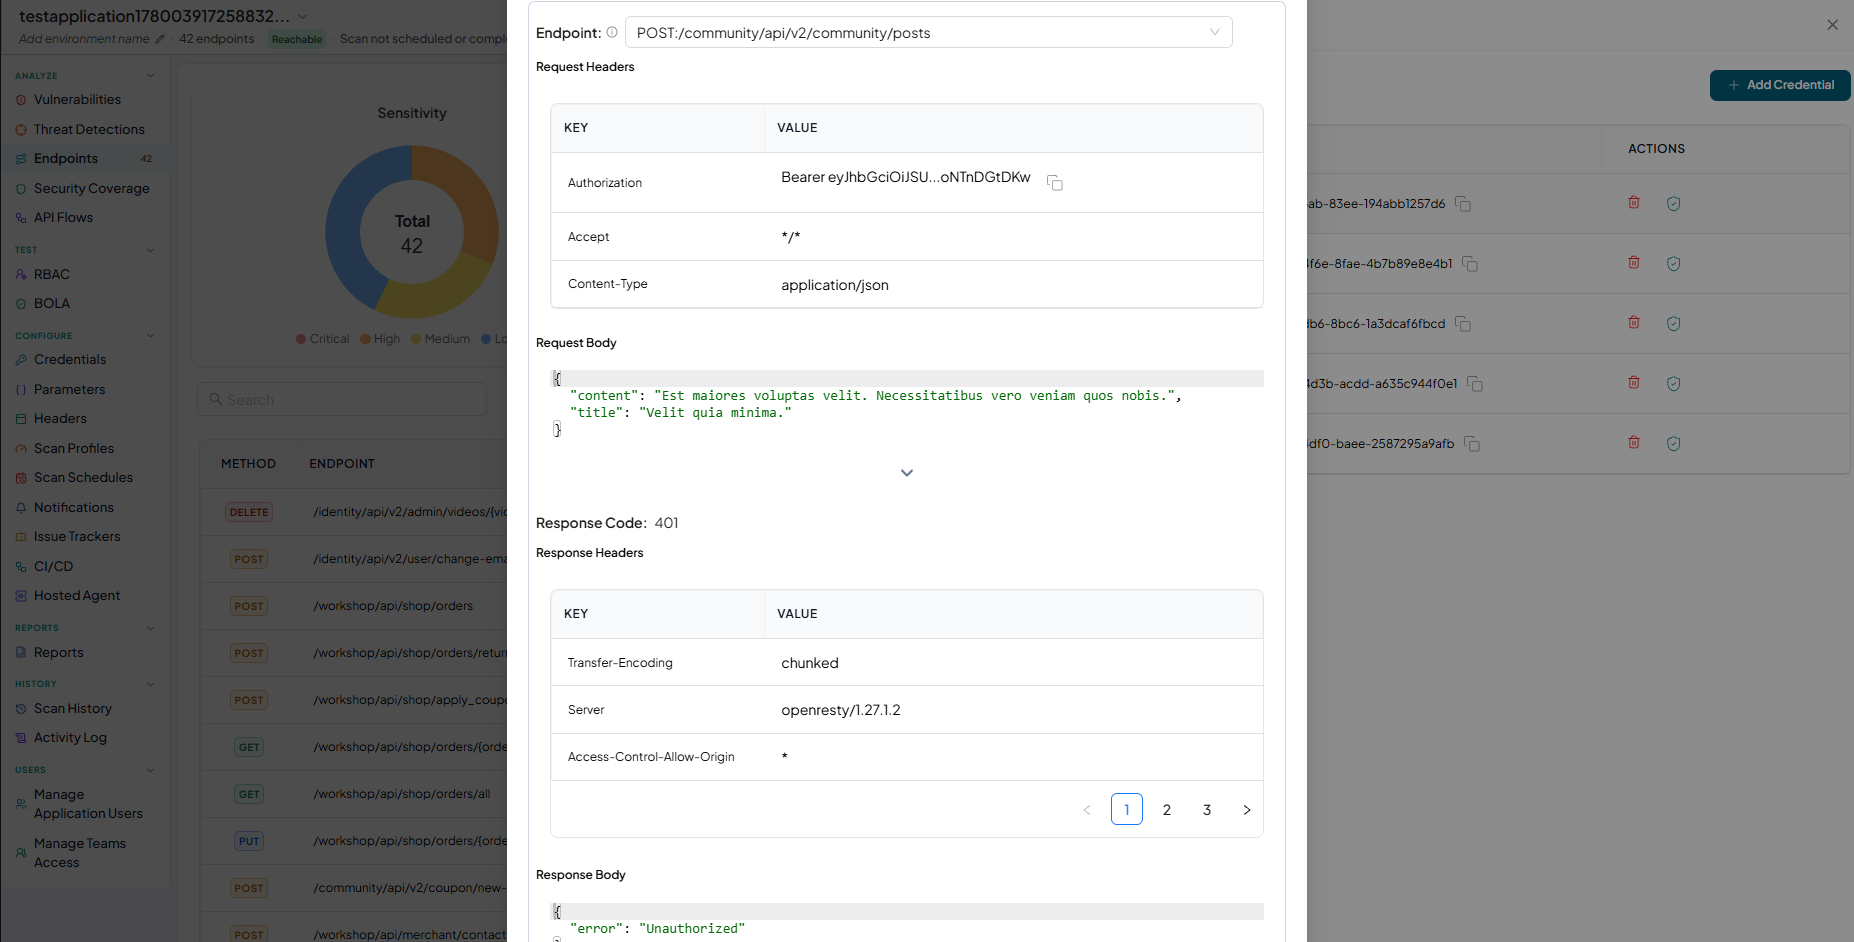
If results show 403, try to change the endpoint and re-test
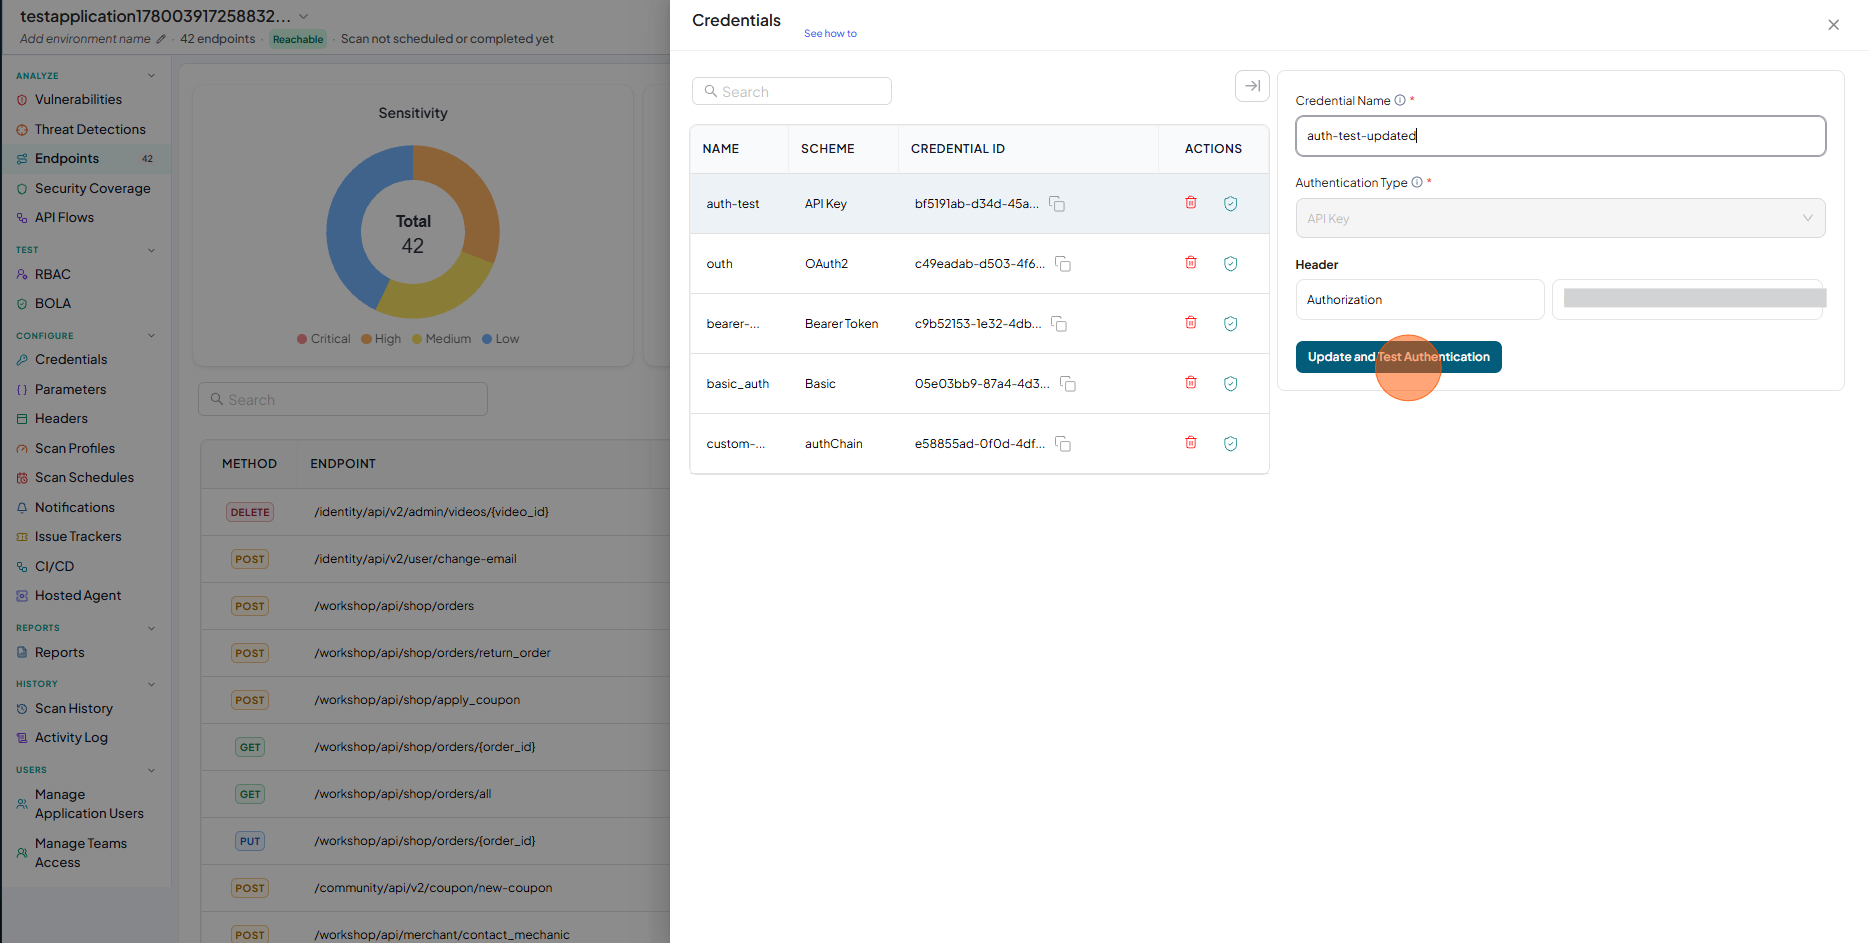
How to Edit Authentication
-
Click on Credentials
-
Click on required authentication from the list
-
Update the required fileds and click on Update and Test Authentication
Users with View permissions cannot edit authentication in shared application
Delete Authentication
-
Click on Credentials
-
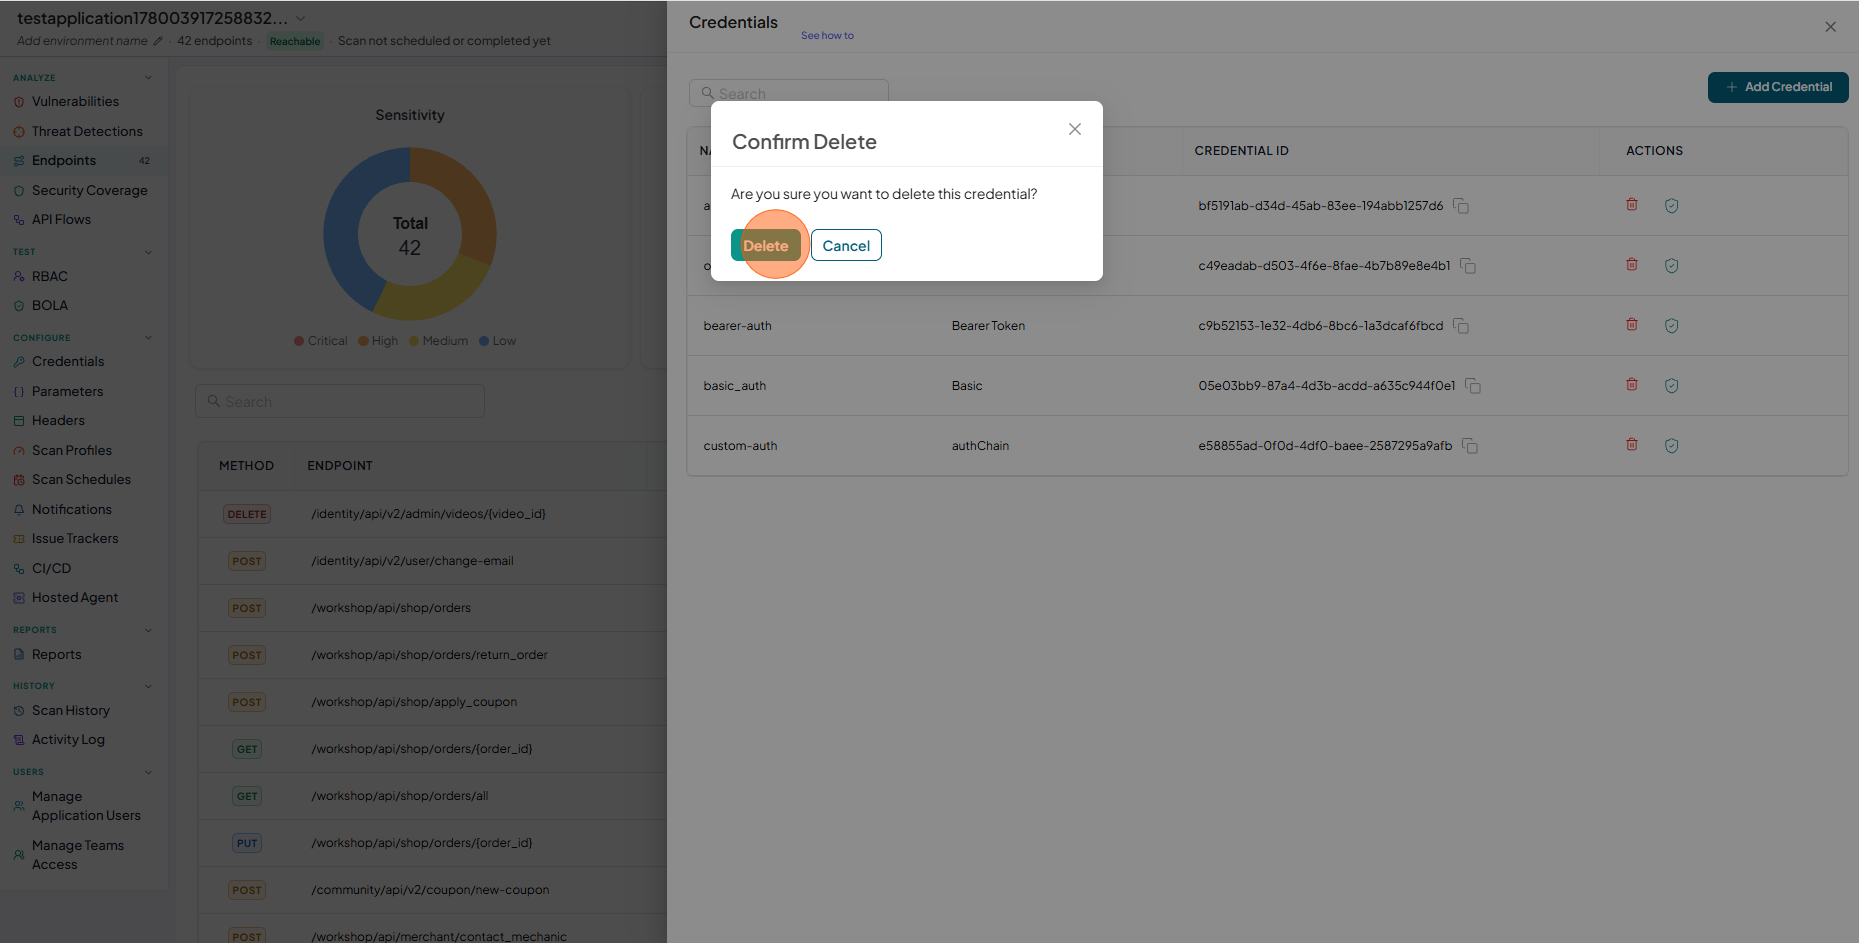
Click on Delete icon next to the Authentication.
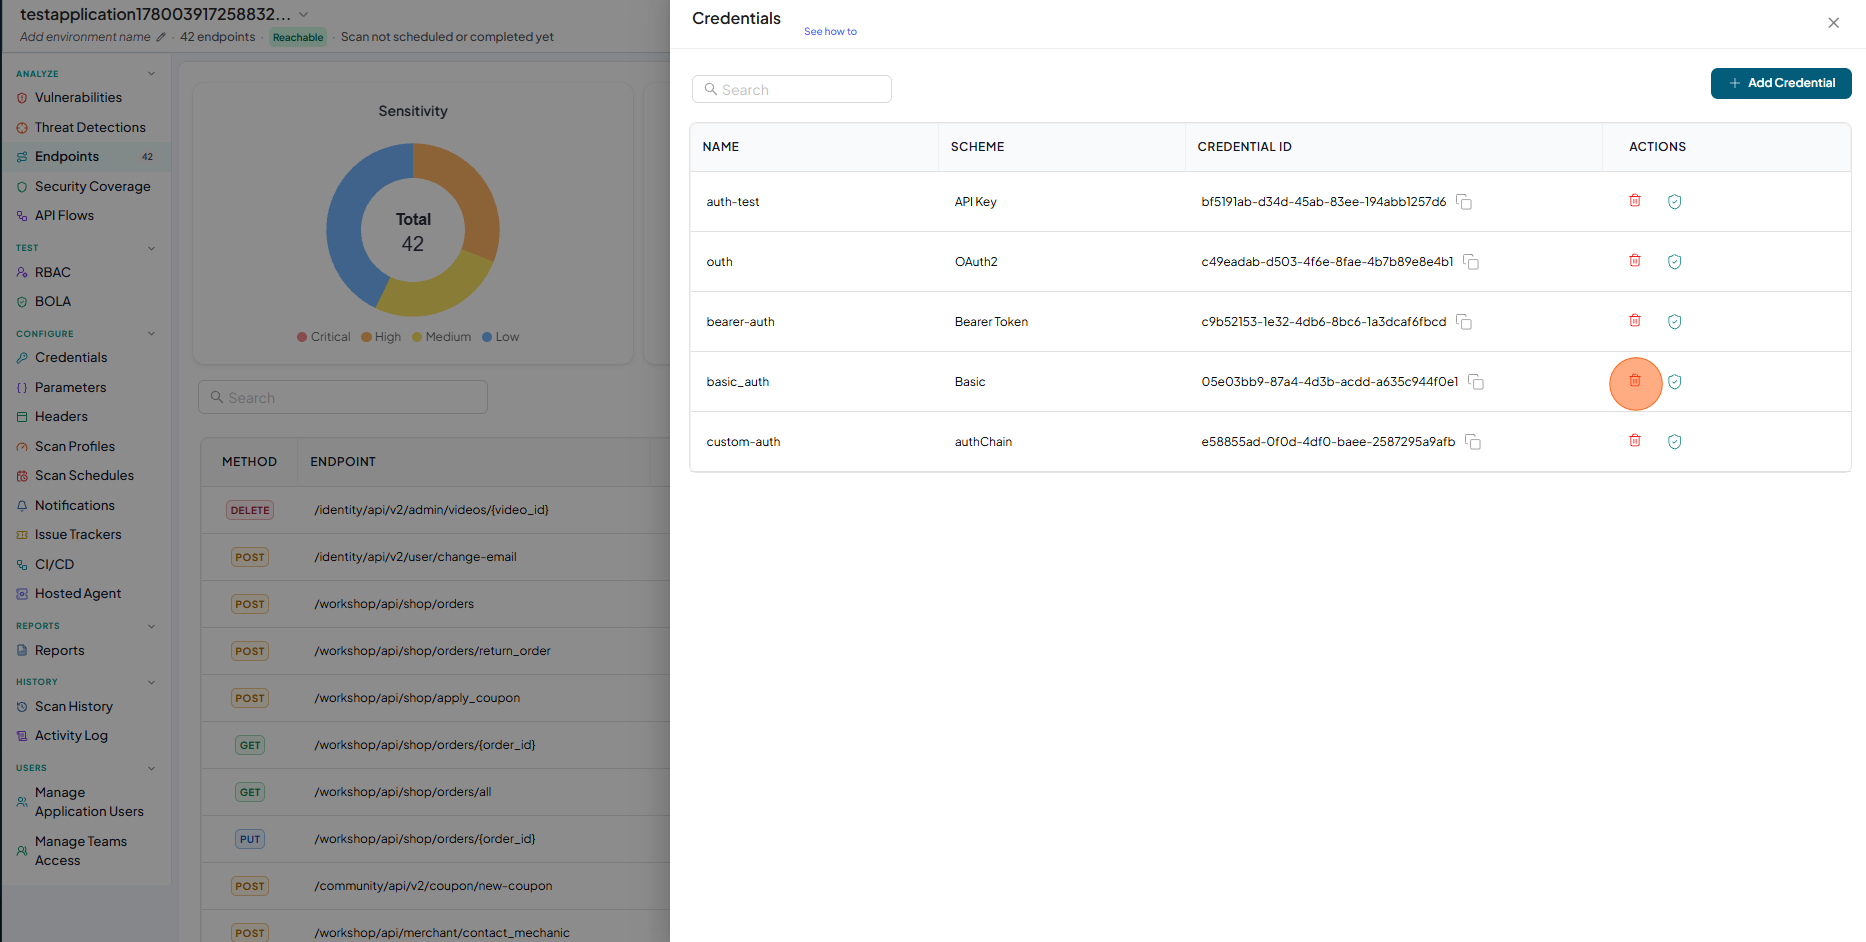
-
Confirm Delete.
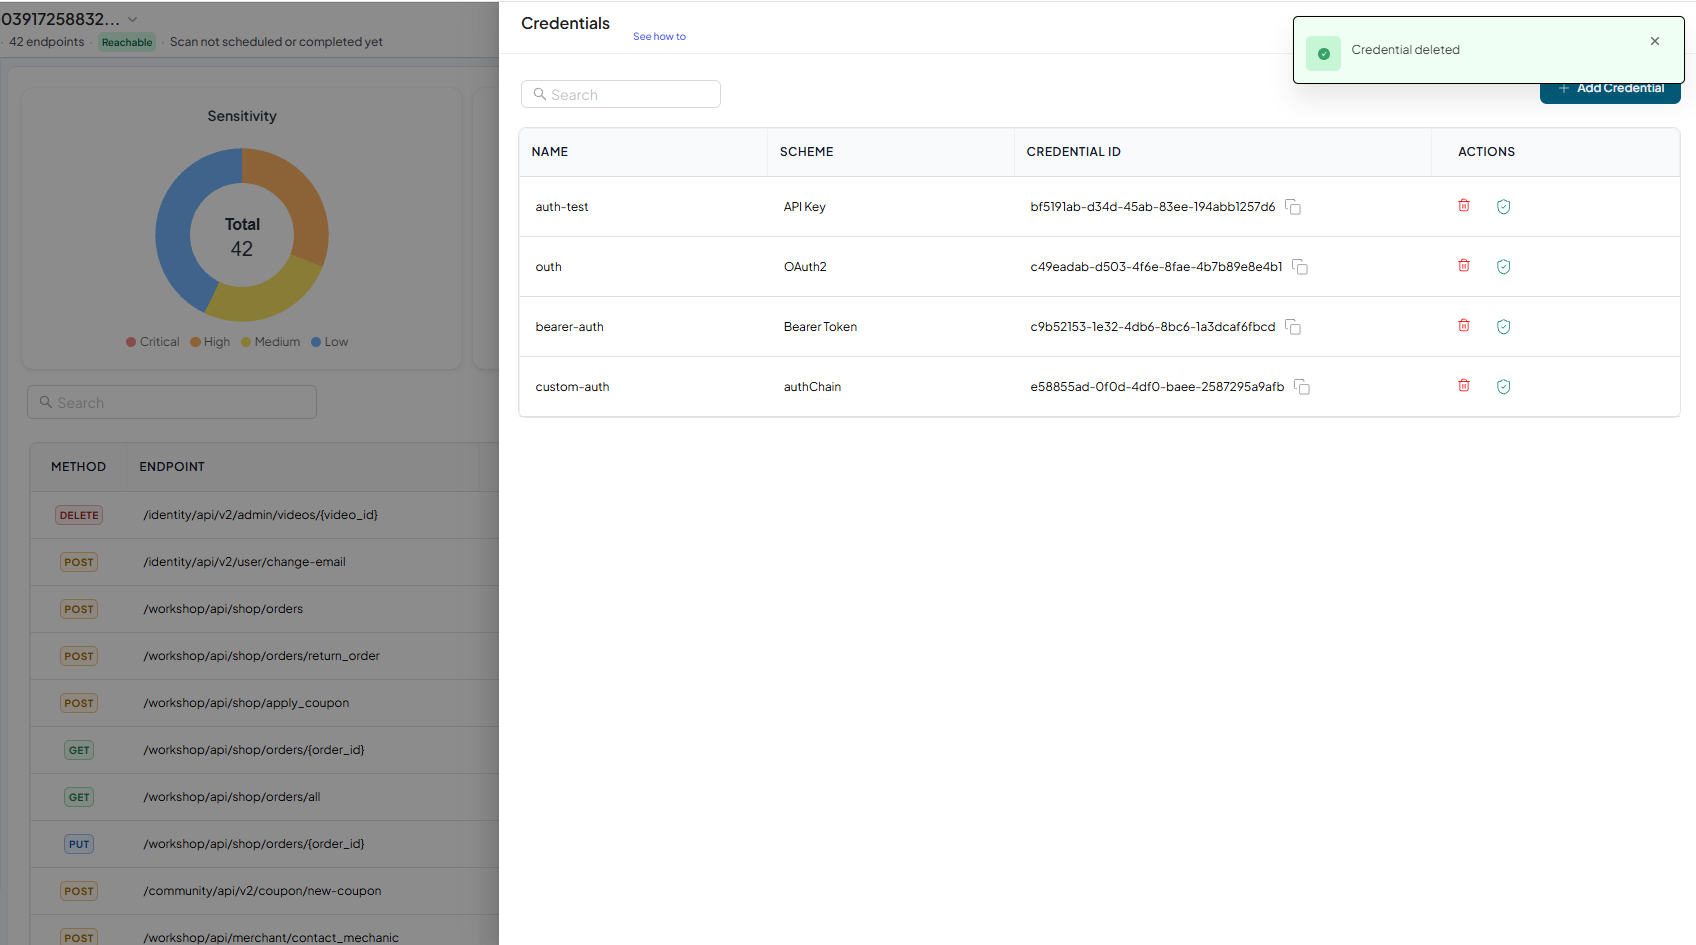
-
Authentication deleted.
 note
noteUsers with View permissions cannot delete authentication in shared application